As it was asked by ReverendSpooky and a few other members earlier I thought it could be helpful to create a thread about lighting equipment for our figures...
It's not properly a tutorial as there are thousands of ways to work and have fun, just sharing my personal experience here, all opinions advices and additions are welcome!
First the equipment of course, high level photographers will only use and talk about the recent "lumecube" because it's the latest fancy accessory for photography. It is indeed a very good light source, but it's white only if you don't get the filters pack, and one spot is around 80$ (yeah yeah...) That said, they have some very good accessories such as light cannon, diffusing half balls...
Personally I tried to go the cheapest possible on my equipment because I'm far from being a pro and it should stay a side budget of the hobby for me (saving the buck for figures huh!)
I bought a set of 4 RGB LED spots that are stickables from "VIDA XL", they can be dimmed in intensity and you can select whatever color within the RGB range. (you can easily find these online between 30 to 50$)
Here they are:

Very easy to set and use, they are also available in set of 8, with a bigger driver. That's the only limitation, as there is only one driver per set, all 4 or 8 spots will be set to the same intensity and color. You can of course buy two sets to skip this limitation, but the best way to go is to buy a DMX controller, which can be found between 20 to 100$ depending on the number of sources you want to support. I took a very small one personally, just enough to set up to 8 different colors and intensities to my sources (I since bought another set of 4 to have more sources, and everything is still linked to my dmx controller)
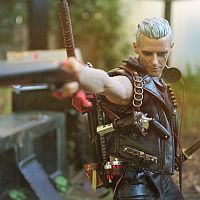
Once equipped it's all about personal tastes and preferences, and what you want to achieve in photography. I just learned through the years that a front light on a subject flattens all details and is not very interesting, reason why I often go with sides lighting or even back lighting.
The back lighting gives a very dramatical or emotional vibe to a shot, still you will need to set an additional side or front light to get some details and not just a chinese shadow (except if it is the purpose of course!)
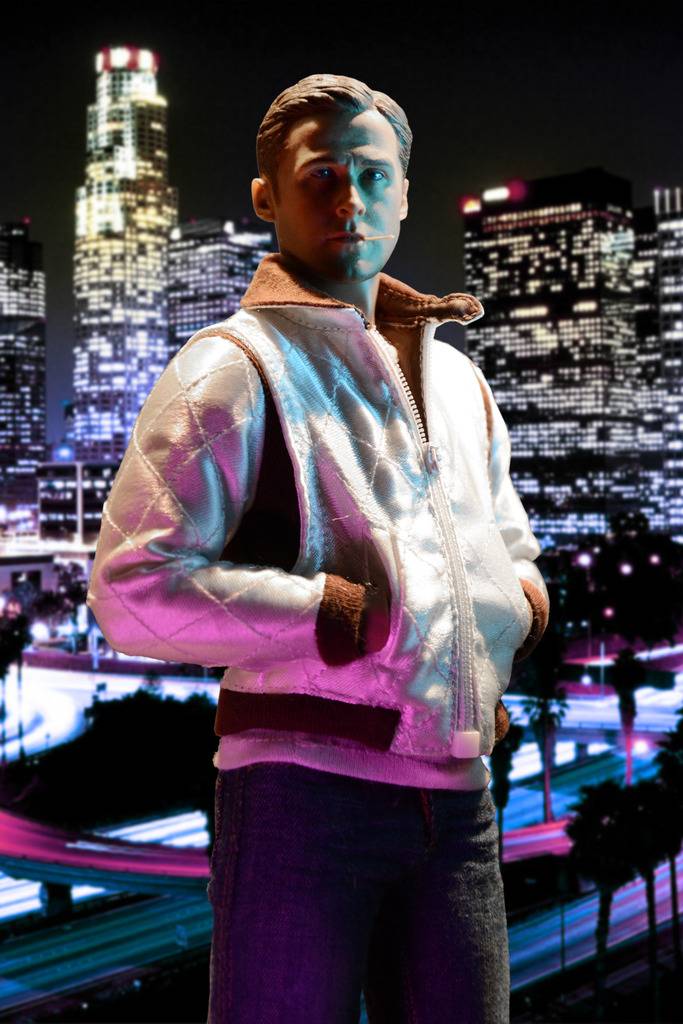
As an example here is one of my recent shots:

On this shot there are 3 main sources and 1 additional:
- I used two spots stuck to the wall behind the diorama, that's what makes the ceiling light, set in warm white color and high intensity to give some character to the picture
- on each side there is another spot, both are set together in slightly orange/fire color and medium intensity. The point is to reveal the details of the face and outfit without killing the "back light" idea. These two spots are the most important in my setting and are kinda reccuring in all my settings, side light reveal a face much better than front light.
- There is one last spot lighting from front, depending on the pictures it's on or off, but always set to neutral white and very low intensity, the point of this one is only to grab a reflection in the eyes or glasses of the subject (it is a detail but that really brings life to a figure by having this little shine on the gloss of the eyes)
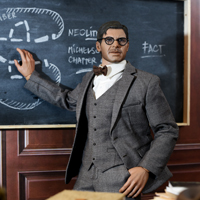
Here is a quick sketch of my installation for the "drive" shooting:

on the sketch and topview 1 and 2 are the side spots, 3 is the rear one(s) and 4 is the additional front one.
This set is composed of three panels, but even doing a "corner" diorama with only two panels I always try to keep multiple light sources and avoid direct front lighting. Since the spots are stickable and can be repositioned a simple plastic bottle is a perfect stand for them, no need to go hunt for tripods or sophisticated equipment.
Hope this helps!
It's not properly a tutorial as there are thousands of ways to work and have fun, just sharing my personal experience here, all opinions advices and additions are welcome!
First the equipment of course, high level photographers will only use and talk about the recent "lumecube" because it's the latest fancy accessory for photography. It is indeed a very good light source, but it's white only if you don't get the filters pack, and one spot is around 80$ (yeah yeah...) That said, they have some very good accessories such as light cannon, diffusing half balls...
Personally I tried to go the cheapest possible on my equipment because I'm far from being a pro and it should stay a side budget of the hobby for me (saving the buck for figures huh!)
I bought a set of 4 RGB LED spots that are stickables from "VIDA XL", they can be dimmed in intensity and you can select whatever color within the RGB range. (you can easily find these online between 30 to 50$)
Here they are:
Very easy to set and use, they are also available in set of 8, with a bigger driver. That's the only limitation, as there is only one driver per set, all 4 or 8 spots will be set to the same intensity and color. You can of course buy two sets to skip this limitation, but the best way to go is to buy a DMX controller, which can be found between 20 to 100$ depending on the number of sources you want to support. I took a very small one personally, just enough to set up to 8 different colors and intensities to my sources (I since bought another set of 4 to have more sources, and everything is still linked to my dmx controller)
Once equipped it's all about personal tastes and preferences, and what you want to achieve in photography. I just learned through the years that a front light on a subject flattens all details and is not very interesting, reason why I often go with sides lighting or even back lighting.
The back lighting gives a very dramatical or emotional vibe to a shot, still you will need to set an additional side or front light to get some details and not just a chinese shadow (except if it is the purpose of course!)
As an example here is one of my recent shots:
On this shot there are 3 main sources and 1 additional:
- I used two spots stuck to the wall behind the diorama, that's what makes the ceiling light, set in warm white color and high intensity to give some character to the picture
- on each side there is another spot, both are set together in slightly orange/fire color and medium intensity. The point is to reveal the details of the face and outfit without killing the "back light" idea. These two spots are the most important in my setting and are kinda reccuring in all my settings, side light reveal a face much better than front light.
- There is one last spot lighting from front, depending on the pictures it's on or off, but always set to neutral white and very low intensity, the point of this one is only to grab a reflection in the eyes or glasses of the subject (it is a detail but that really brings life to a figure by having this little shine on the gloss of the eyes)
Here is a quick sketch of my installation for the "drive" shooting:
on the sketch and topview 1 and 2 are the side spots, 3 is the rear one(s) and 4 is the additional front one.
This set is composed of three panels, but even doing a "corner" diorama with only two panels I always try to keep multiple light sources and avoid direct front lighting. Since the spots are stickable and can be repositioned a simple plastic bottle is a perfect stand for them, no need to go hunt for tripods or sophisticated equipment.
Hope this helps!