I decided to start an entirely new thread dedicated to creating sculptures and molds for seamless figures, with information on how to do them. Anyone else attempting to do the same thing is welcome to contribute.
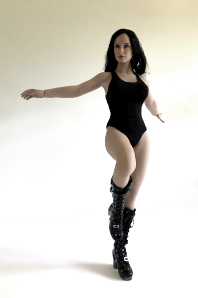
I finally got around to making a mold of my s29. I used Smooth-On Compat 45 for this particular mold. Most tutorials have you clay up one side of the model, pour the material on top of that, and once it dries take the clay out, flip it, and do the other side. I thought I could skip this step to save some money but it resulted in messing up the mold. I just poured enough Compat 45 to fill up half the mold, let it cure, then poured the second half right on top of it, but that resulted in bubbles forming on bottom half when they floated up to the surface. So, don't do that, lol. I'm getting some clay now for my second attempt at making a mold.
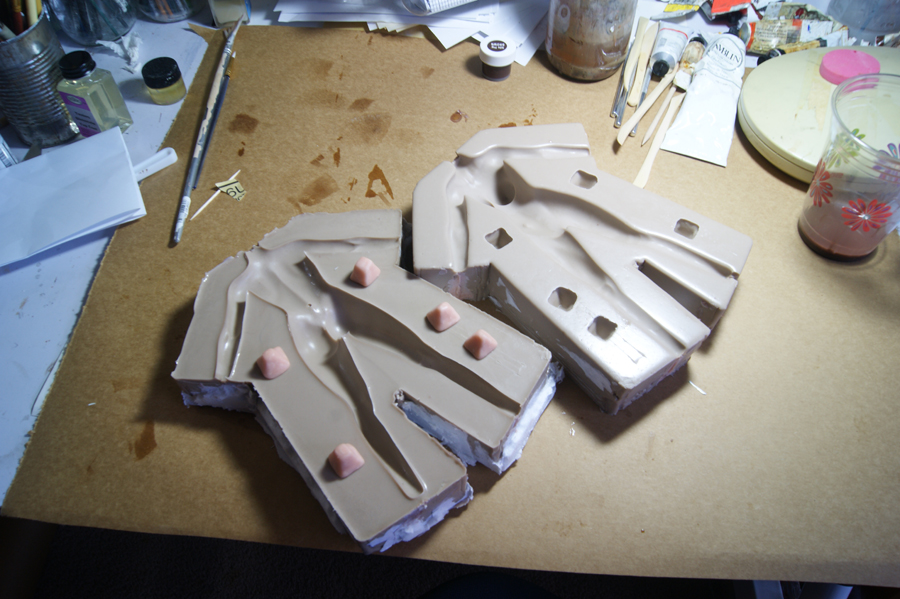
You can see the big bubble on one side of the mold, plus a bunch of smaller ones throughout the rest of the body. For my next attempt I think I'm going to try the Smooth-On Moldstar 30. Compat 45 is a urethane, so I had to wear a respirator and do the mixing/pouring outside because my studio apartment has (censored) ventilation. Since the weather is going start getting cold I won't be able to do that for much longer either, since cold temperatures can apparently inhibit curing. The cured final is quite nice, just a bit of a pain to make.
I went ahead and tried pouring silicone into the mold to do some testing and go through the process, but I also messed that up the first go around. I plugged the holes where the feet/hands are with some clay, but this alone wasn't strong enough to hold back the liquid silicone and the mold ended up leaking all over the place, so I stopped pouring partway through. Next time I'll have to secure everything more tightly with duct tape.
Anyways, I used Smooth-On ecoflex 20 for this figure with some Silc Pig brown to color the skin. The color ended up being a wonderful shade of brown. The picture below has baby powder added to the figure, so it looks a little bit chalky at the moment. Silicone is super shiny otherwise. I need to see if I can get my hands on a more translucent matting agent, or maybe try brown chalk pastels dabbed onto a thin layer of silicone to seal them in place and reduce the shininess.
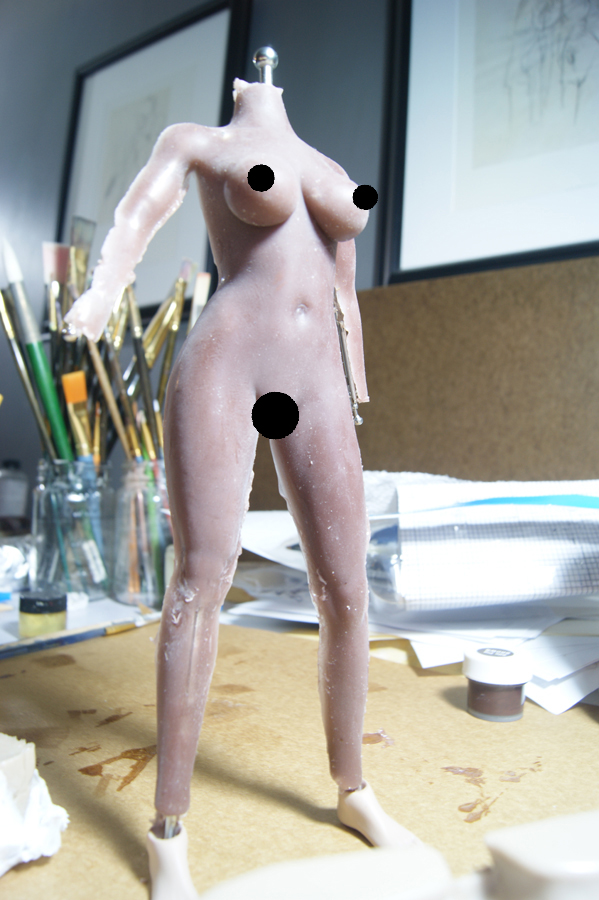
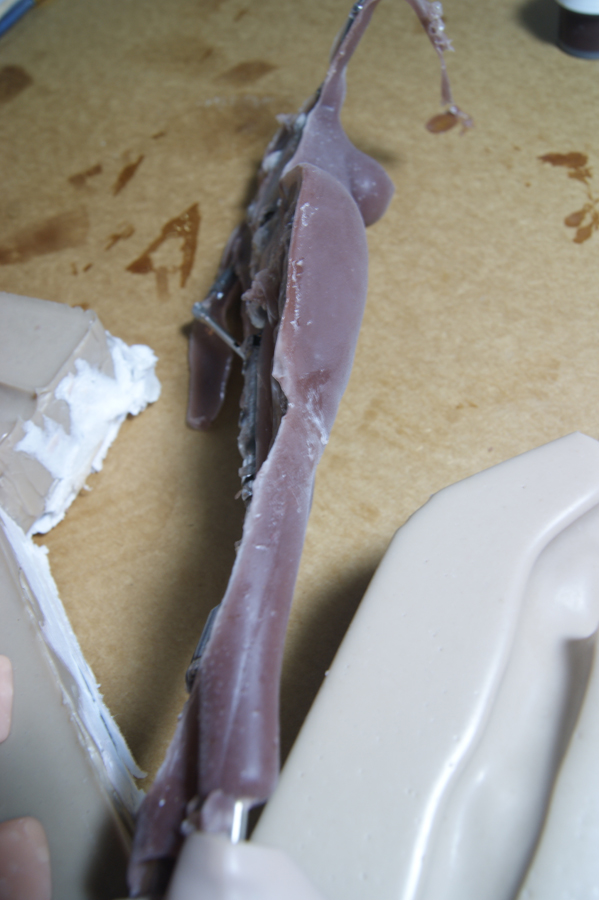
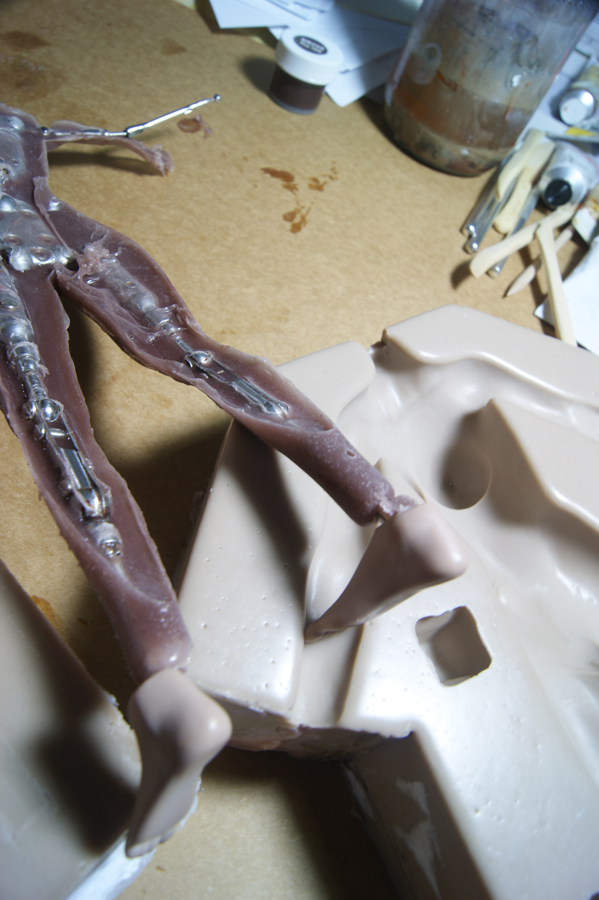
I need to make my next mold a bit better so that the skeleton can properly stay in place. You can see parts of the body where it comes too close to the surface, because it was shifting around in the mold as I was pouring.
One really great thing I figured out was how to get rid of the seams that inevitably show up as a result of using a mold. If you take the silicone and dilute it with solvent, and brush it on in layers you can cover up or fill in the parts where there's a visible seam line. In this picture I painted the area around her hip.
The seam line is almost invisible, especially once you put some matte on and get rid of the shine. It looked something like this before.
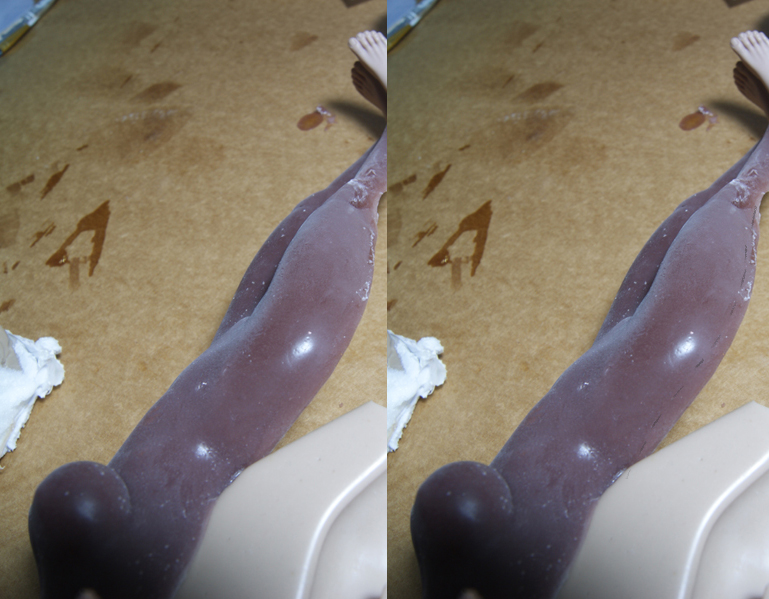
The biggest downside I ran into here was the very tiny bubbles that popped up in spots across the body. I thought Ecoflex 20 would be liquid enough to not require degassing, but clearly I'm mistaken.
You can see all of the little bubbles pretty clearly by her ankle. I'm not sure there's any way around that except for using a vacuum chamber, which was an expense I was hoping to avoid. Although now that I'm nearly at the end of the tunnel in terms of making a permanent, brown skinned Phicen, I'll probably bite the bullet and get one.
That's all the time and material I have for this project. I have a deadline at the end of this month so I don't think I can work on this anymore until November. If I can get this to work to my satisfaction, then I'm going to try sculpting my own body and creating a totally new Phicen body with a re-used skeleton.
I finally got around to making a mold of my s29. I used Smooth-On Compat 45 for this particular mold. Most tutorials have you clay up one side of the model, pour the material on top of that, and once it dries take the clay out, flip it, and do the other side. I thought I could skip this step to save some money but it resulted in messing up the mold. I just poured enough Compat 45 to fill up half the mold, let it cure, then poured the second half right on top of it, but that resulted in bubbles forming on bottom half when they floated up to the surface. So, don't do that, lol. I'm getting some clay now for my second attempt at making a mold.

You can see the big bubble on one side of the mold, plus a bunch of smaller ones throughout the rest of the body. For my next attempt I think I'm going to try the Smooth-On Moldstar 30. Compat 45 is a urethane, so I had to wear a respirator and do the mixing/pouring outside because my studio apartment has (censored) ventilation. Since the weather is going start getting cold I won't be able to do that for much longer either, since cold temperatures can apparently inhibit curing. The cured final is quite nice, just a bit of a pain to make.
I went ahead and tried pouring silicone into the mold to do some testing and go through the process, but I also messed that up the first go around. I plugged the holes where the feet/hands are with some clay, but this alone wasn't strong enough to hold back the liquid silicone and the mold ended up leaking all over the place, so I stopped pouring partway through. Next time I'll have to secure everything more tightly with duct tape.
Anyways, I used Smooth-On ecoflex 20 for this figure with some Silc Pig brown to color the skin. The color ended up being a wonderful shade of brown. The picture below has baby powder added to the figure, so it looks a little bit chalky at the moment. Silicone is super shiny otherwise. I need to see if I can get my hands on a more translucent matting agent, or maybe try brown chalk pastels dabbed onto a thin layer of silicone to seal them in place and reduce the shininess.

I need to make my next mold a bit better so that the skeleton can properly stay in place. You can see parts of the body where it comes too close to the surface, because it was shifting around in the mold as I was pouring.
One really great thing I figured out was how to get rid of the seams that inevitably show up as a result of using a mold. If you take the silicone and dilute it with solvent, and brush it on in layers you can cover up or fill in the parts where there's a visible seam line. In this picture I painted the area around her hip.

The seam line is almost invisible, especially once you put some matte on and get rid of the shine. It looked something like this before.

The biggest downside I ran into here was the very tiny bubbles that popped up in spots across the body. I thought Ecoflex 20 would be liquid enough to not require degassing, but clearly I'm mistaken.

You can see all of the little bubbles pretty clearly by her ankle. I'm not sure there's any way around that except for using a vacuum chamber, which was an expense I was hoping to avoid. Although now that I'm nearly at the end of the tunnel in terms of making a permanent, brown skinned Phicen, I'll probably bite the bullet and get one.
That's all the time and material I have for this project. I have a deadline at the end of this month so I don't think I can work on this anymore until November. If I can get this to work to my satisfaction, then I'm going to try sculpting my own body and creating a totally new Phicen body with a re-used skeleton.