When I took these pictures, I wasn't really planning to make a tutorial, but I think others might find it useful. So here's my "almost tutorial" for making a corset.
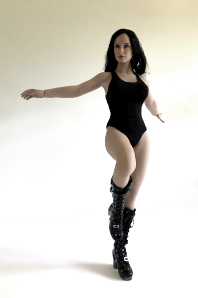
Model is Josephine, my TBLeague S39 (Plus Size) in Suntan.
First, I had to make a pattern, which I did not get pictures of. I will try to make another post at some point on how I made my pattern. I did this from scratch because her body proportions are so disproportionate.

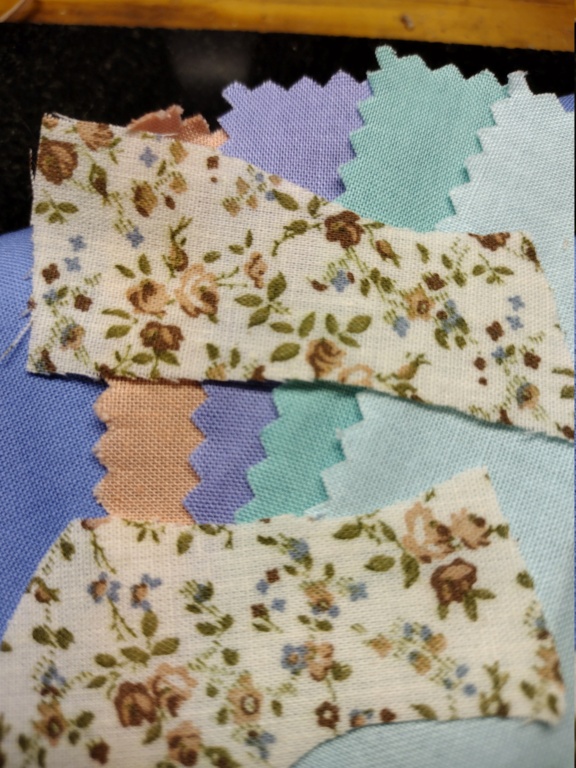
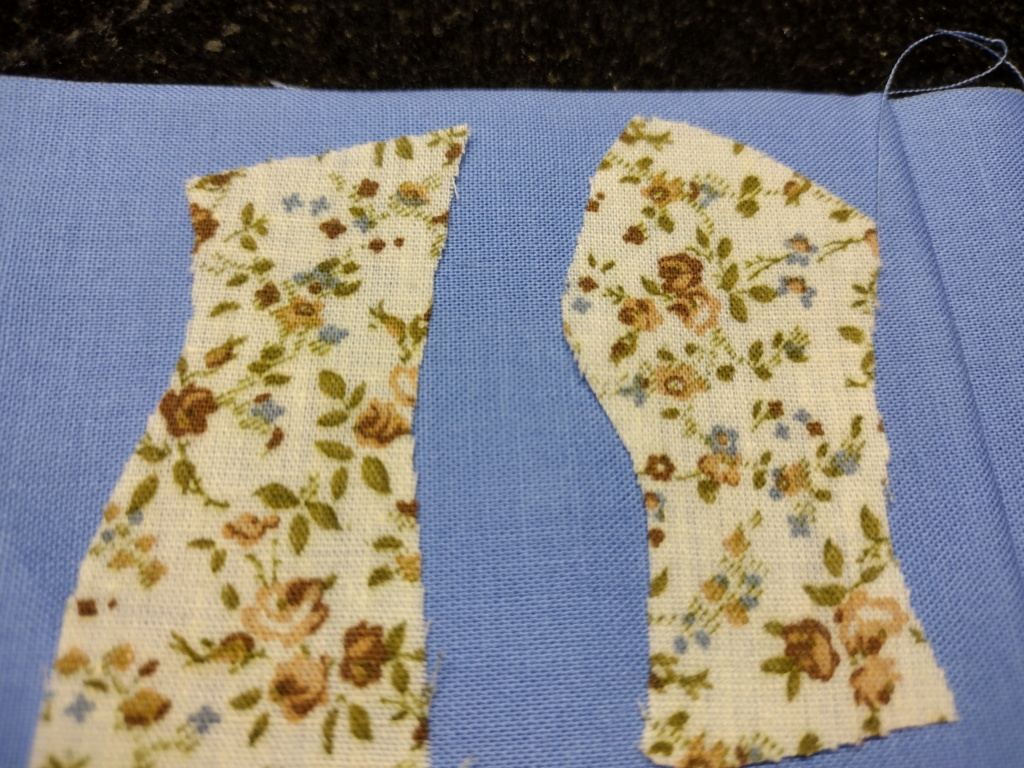
After making the pattern, I cut 1 of each piece, flipped the pattern and cut another 1 of each piece. This will be the left and right sides. Leave room for seam allowances. I wanted this floral print because I love the tiny flowers and I think it would make a nice Victorian era outfit.
I decided I wanted a different color for the inside to make it reversible. I compared a few fabrics and chose this blue. I cut out the pieces the same way for the blue pieces. I didn't get pictures, but all the following steps are exactly the same for the floral and the blue.


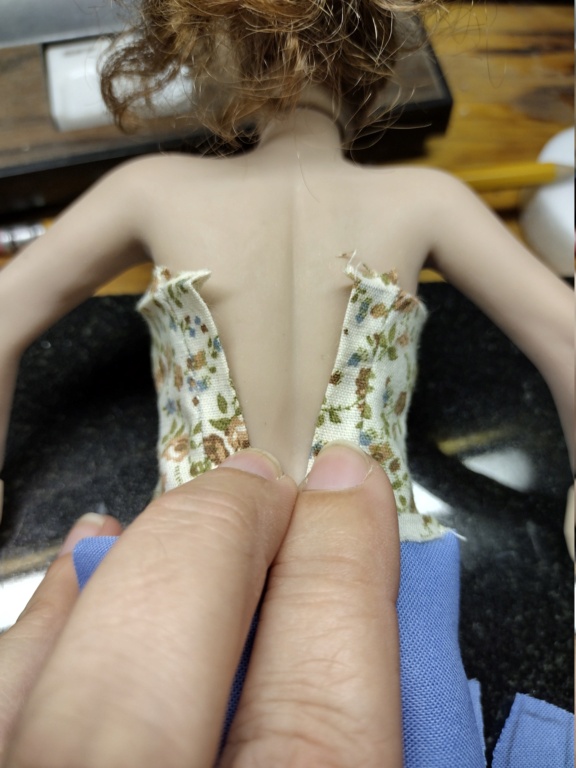
Starting with the cup darts, I hand stitched each piece. Work from the center to one side, then the other side, leave the back open. You could leave the front open to lace up, use hook and eyes, install a tiny zipper, but for this particular item, I wanted it closed.
Check the fit, make adjustments if needed and iron down the seams. The left and right back panels were folded in half and a narrow strip of iron on hem tape was used to slightly stiffen. Complete the outer and inner layers the same way. (Inner layer not shown.

Sew inner and outer layers together, check fitting, make adjustments if needed and press. I used a rolled up washcloth to carefully press the bust and other rounded areas.


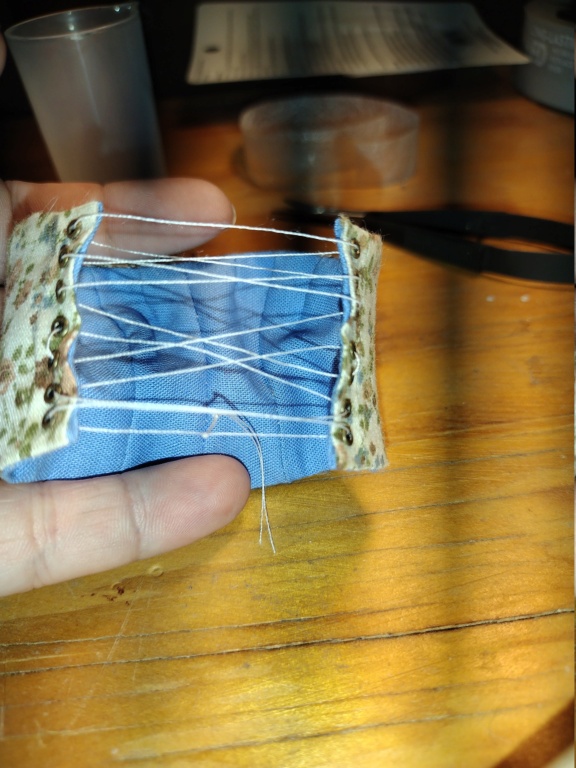
For the closure, I ordered 1mm eyelets. They sent extras to practice with, so here's my practice piece.

I installed the tiny grommets, tested out the lacing and fit. Satisfied, I replaced the thread with a thicker cord.

Finished product with a simple camisole underneath.
Model is Josephine, my TBLeague S39 (Plus Size) in Suntan.
First, I had to make a pattern, which I did not get pictures of. I will try to make another post at some point on how I made my pattern. I did this from scratch because her body proportions are so disproportionate.

After making the pattern, I cut 1 of each piece, flipped the pattern and cut another 1 of each piece. This will be the left and right sides. Leave room for seam allowances. I wanted this floral print because I love the tiny flowers and I think it would make a nice Victorian era outfit.


I decided I wanted a different color for the inside to make it reversible. I compared a few fabrics and chose this blue. I cut out the pieces the same way for the blue pieces. I didn't get pictures, but all the following steps are exactly the same for the floral and the blue.


Starting with the cup darts, I hand stitched each piece. Work from the center to one side, then the other side, leave the back open. You could leave the front open to lace up, use hook and eyes, install a tiny zipper, but for this particular item, I wanted it closed.

Check the fit, make adjustments if needed and iron down the seams. The left and right back panels were folded in half and a narrow strip of iron on hem tape was used to slightly stiffen. Complete the outer and inner layers the same way. (Inner layer not shown.

Sew inner and outer layers together, check fitting, make adjustments if needed and press. I used a rolled up washcloth to carefully press the bust and other rounded areas.


For the closure, I ordered 1mm eyelets. They sent extras to practice with, so here's my practice piece.


I installed the tiny grommets, tested out the lacing and fit. Satisfied, I replaced the thread with a thicker cord.

Finished product with a simple camisole underneath.