Although it may seem strange, While kitbashing, I decided to take a break, and for some reason, I tried out a little experiment.
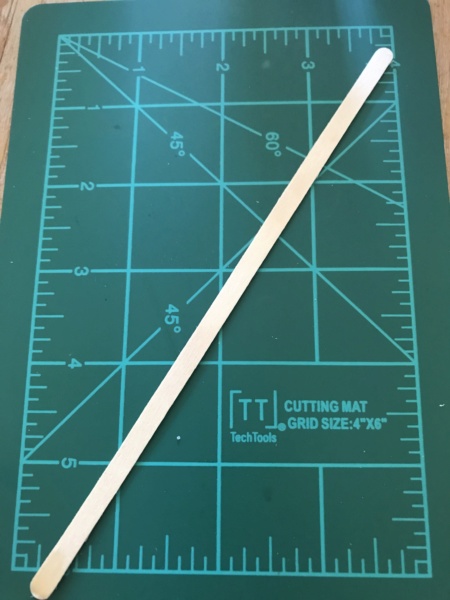
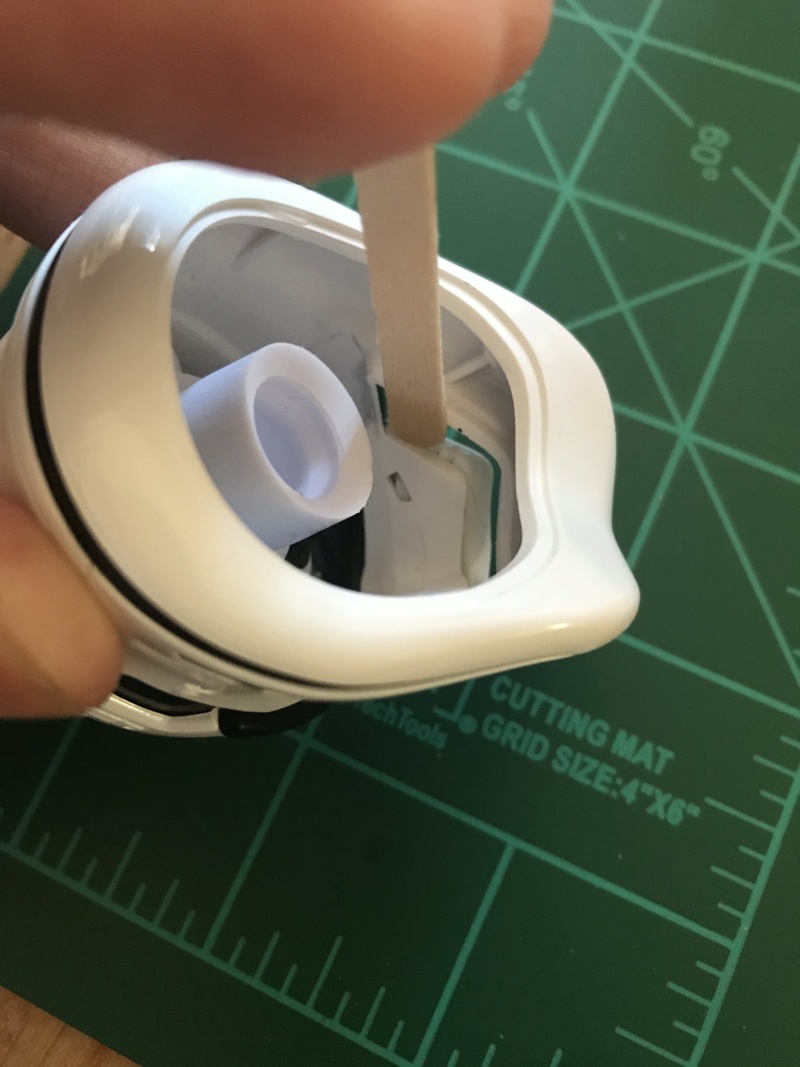
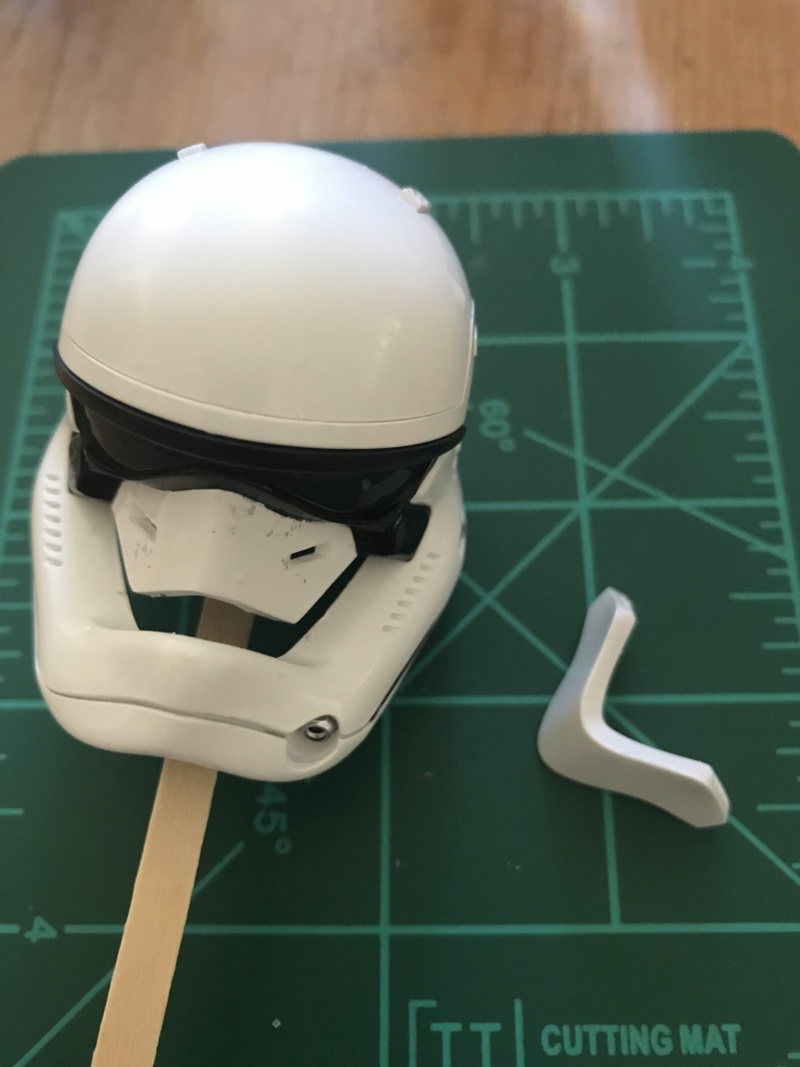
I heated a small pot of boiling water and turned the fire off. I turned off the water and place the Helmet "beak" first in the water, dunking like a donut 3 times and removed and placed it on a cutting mat. The only thing holding the duckbill are two little notches. I pressed ever so gently with a stir stick from Starbucks as in the photo.
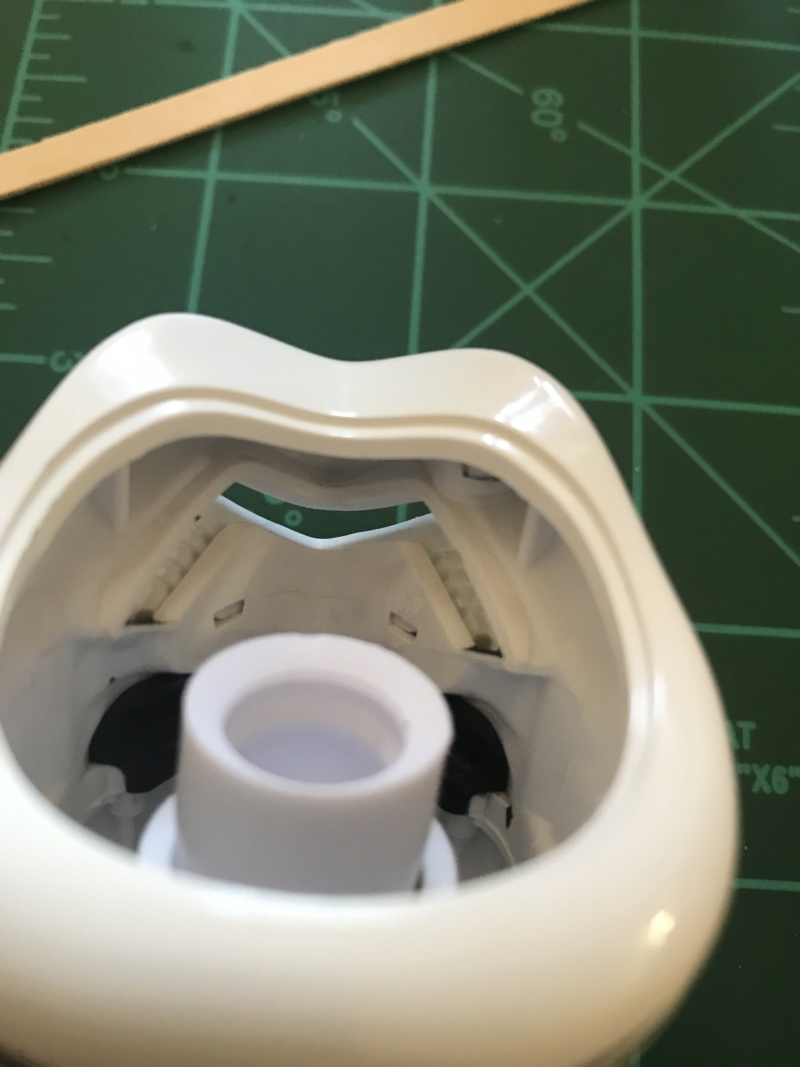
I forgot to mention that the black part has to be pushed from the other side first using this method. The black part is a soft rubber plastic, akin to Spawn figures (I don't know the exact name of that type of plastic )
)
Gently push, no glue is applied on the sides so start there. Press with a little force in the center. It will pop off.
Before continuing, you can remove the three screws holding the neck peg. It is easy. The plastic is soft. This will give you more room when gluing.
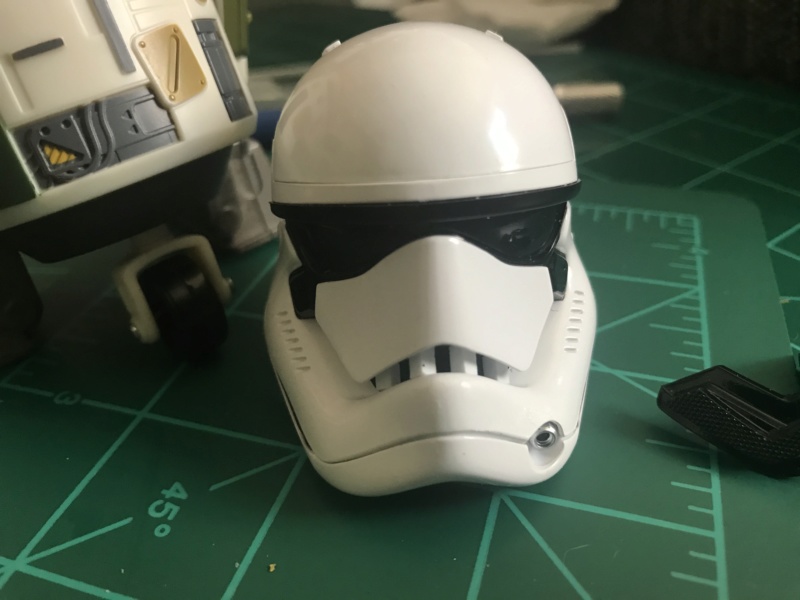
I cut 3/16 of a inch a evergreen scale model 0.80 x 0.80 164 strip to fit in the area between the part where it looks like it is smiling and the "chin part" of the helmet. I used superglue.
Note: use tweezers to hold the tiny pieces to glue and hold in place. I didn't, and this process took me 26 minutes. Use super glue accelerator lightly.
When the "teeth" dry, place the "duck bill" back on. There will be a "grinning" gap on the sides. You could cut the black rubber part and place it back before putting on the duck bill. I'm going to use that space fabric I used last time to hide the "grin"
I can't believe I bought a Cold Brew, drove passed the bakery and didn't get a custard empanada (pocket fruit pie) or a Marranitos (gingerbread shaped like a fat pig) pan dulce
 Welp, gotta fix that crave.
*Wind-up talking Chopper sold at Galaxy's Edge.
I heated a small pot of boiling water and turned the fire off. I turned off the water and place the Helmet "beak" first in the water, dunking like a donut 3 times and removed and placed it on a cutting mat. The only thing holding the duckbill are two little notches. I pressed ever so gently with a stir stick from Starbucks as in the photo.
I forgot to mention that the black part has to be pushed from the other side first using this method. The black part is a soft rubber plastic, akin to Spawn figures (I don't know the exact name of that type of plastic
)Gently push, no glue is applied on the sides so start there. Press with a little force in the center. It will pop off.
Before continuing, you can remove the three screws holding the neck peg. It is easy. The plastic is soft. This will give you more room when gluing.
I cut 3/16 of a inch a evergreen scale model 0.80 x 0.80 164 strip to fit in the area between the part where it looks like it is smiling and the "chin part" of the helmet. I used superglue.
Note: use tweezers to hold the tiny pieces to glue and hold in place. I didn't, and this process took me 26 minutes. Use super glue accelerator lightly.
When the "teeth" dry, place the "duck bill" back on. There will be a "grinning" gap on the sides. You could cut the black rubber part and place it back before putting on the duck bill. I'm going to use that space fabric I used last time to hide the "grin"
I can't believe I bought a Cold Brew, drove passed the bakery and didn't get a custard empanada (pocket fruit pie) or a Marranitos (gingerbread shaped like a fat pig) pan dulce


*Wind-up talking Chopper sold at Galaxy's Edge.