


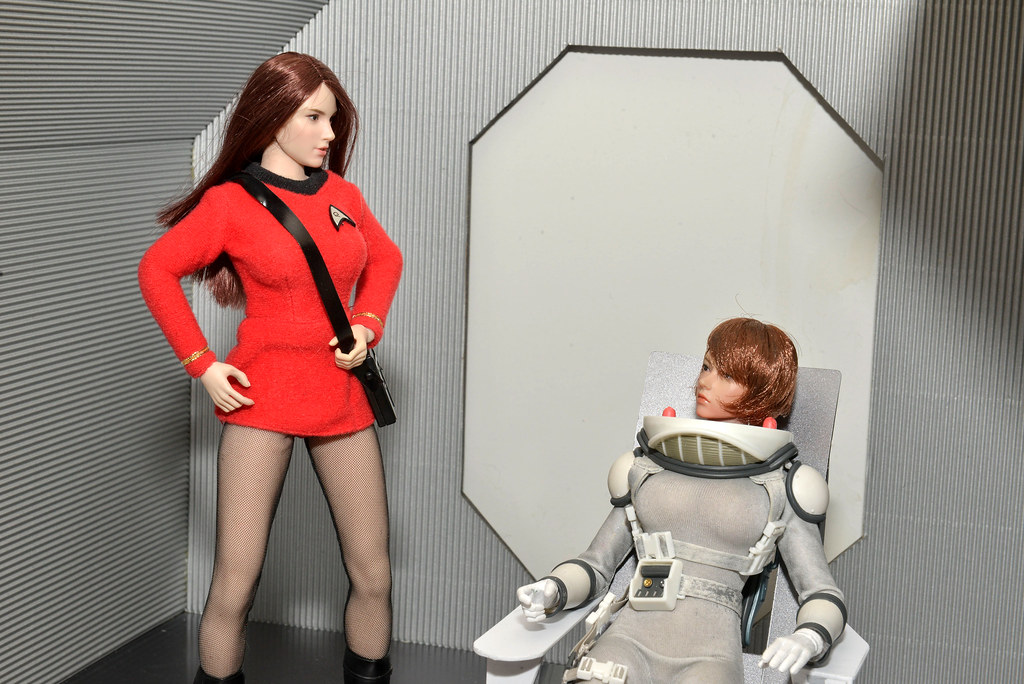
t may be cool to build an acceleration chair for a retro astronette character, but without a starship bridge to put in on, it seems rather pointless. This weekend. I finally started getting some work done on the bridge for the Hydran Federastion Scout "Inside Straight," though as the photos will tell, right now it looks more like the inside of a corrugated metal shed than it does a starship bridge. In fact, an argument could be made that it bears a bit of a resemblance to an oversized Anderson Shelter from WWII.
The basic construction makes heavy use of foam core, which is easy to cut and lightweight, though prone to warping, especially if you try to paint it. The time and budget to build this out of wood were simply not there. The deck is made from four 1/4" foam core sheets glued together, then topped with some 040 or 060 strip plastic. (I frankly forget which it is.) This was then spray painted with Tamiya light gun metal acrylic paint. This part was actually done a couple of weeks ago, but requires mention anyway. Normally, I would have used a thicker 1/2" or thicker board, but there just doesn't seem to be any available these days, Probably because of disruptions to the supply chain as a result of the pandemic.
The bulkheads were made of the same foam core, cut to size, then topped with a silver coloured corrugated cardboard sheet available in art supply stores. It actually comes in many colours. The idea here was to give the ship something of a grungy sci-fi look...it needs some weathering, though without the instrument panels that and consoles going up next, it does look more like a corrugated tin shed or Anderson Shelter at the moment than the bridge of a starship. More on that later

The Bridge: A Work In Progress by
Gary Menten, on Flickr
An interesting thing about this corrugated cardboard is that the corrugations are on one side only and glued to a flat piece of cardboard on the other side. Therefore, if you want to affix things to it with a flush look, cutting out a backing for whatever object out of the same cardboard, then gluing the flat side to the object creates a grooved or corrugated surface on the other side, which then fits very neatly and aligns with the corrugations in the bulkhead, and voila! a flush mount is created.
Bridge: A work In Progress by
Gary Menten, on Flickr
The backs of the bulkheads had cuts made in them, though not all the way through, so that i could bend them to the angles seen in the photos. This is purely for cosmetic effect, to give a cramped look.
The foam core sections were glued together using carpenter's glue and held in place by bamboo skewers which were cut flush with the other surface of the foam core.
Bridge: A Work In Progress by
Gary Menten, on Flickr
As one can see from the photos, this will be a fairly cramped bridge once the other chairs and instruments are installed. It will fit two figures for sure, and possibly a third if I can swing it. More details will be posted as more work gets done.
url=https://flic.kr/p/2n5WHkE]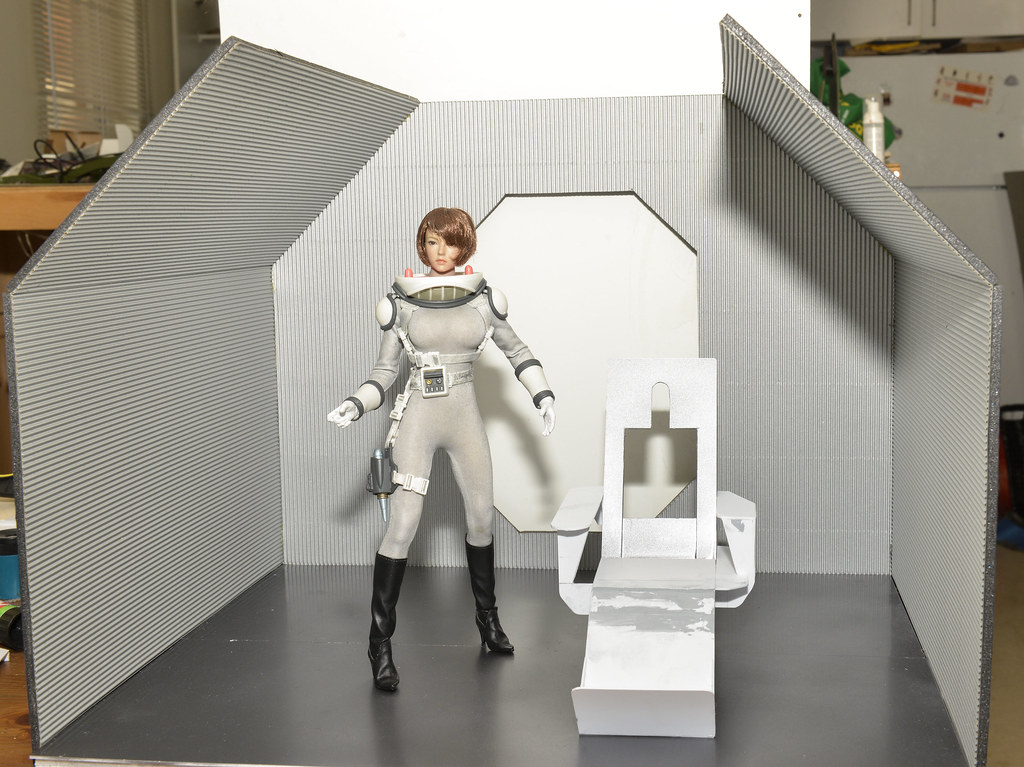 [/url]The
Bridge: A Work In Progress by
Gary Menten, on Flickr
[/url]The Bridge: A Work In Progress by
Gary Menten, on Flickr
The basic construction makes heavy use of foam core, which is easy to cut and lightweight, though prone to warping, especially if you try to paint it. The time and budget to build this out of wood were simply not there. The deck is made from four 1/4" foam core sheets glued together, then topped with some 040 or 060 strip plastic. (I frankly forget which it is.) This was then spray painted with Tamiya light gun metal acrylic paint. This part was actually done a couple of weeks ago, but requires mention anyway. Normally, I would have used a thicker 1/2" or thicker board, but there just doesn't seem to be any available these days, Probably because of disruptions to the supply chain as a result of the pandemic.
The bulkheads were made of the same foam core, cut to size, then topped with a silver coloured corrugated cardboard sheet available in art supply stores. It actually comes in many colours. The idea here was to give the ship something of a grungy sci-fi look...it needs some weathering, though without the instrument panels that and consoles going up next, it does look more like a corrugated tin shed or Anderson Shelter at the moment than the bridge of a starship. More on that later
The Bridge: A Work In Progress by
Gary Menten, on Flickr
An interesting thing about this corrugated cardboard is that the corrugations are on one side only and glued to a flat piece of cardboard on the other side. Therefore, if you want to affix things to it with a flush look, cutting out a backing for whatever object out of the same cardboard, then gluing the flat side to the object creates a grooved or corrugated surface on the other side, which then fits very neatly and aligns with the corrugations in the bulkhead, and voila! a flush mount is created.
Bridge: A work In Progress by
Gary Menten, on Flickr
The backs of the bulkheads had cuts made in them, though not all the way through, so that i could bend them to the angles seen in the photos. This is purely for cosmetic effect, to give a cramped look.
The foam core sections were glued together using carpenter's glue and held in place by bamboo skewers which were cut flush with the other surface of the foam core.
Bridge: A Work In Progress by
Gary Menten, on Flickr
As one can see from the photos, this will be a fairly cramped bridge once the other chairs and instruments are installed. It will fit two figures for sure, and possibly a third if I can swing it. More details will be posted as more work gets done.


