I don't think this is NSFW, but you decide. As usual, I couldn't resist some slightly adult humor.
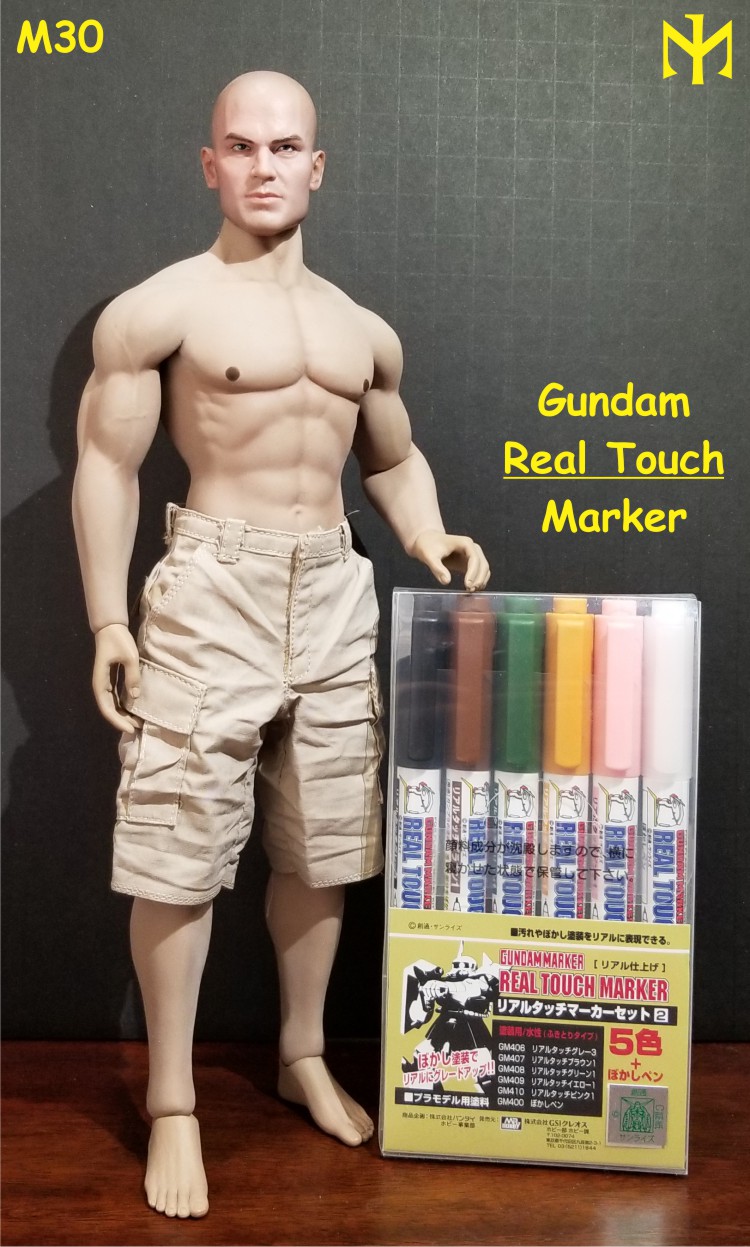
For alternatives methods, using Watercolor Pencils, see Posts 21-22 below; using Gundam Real Touch Markers, see Post 35 below.
Another Mistress Gina tutorial: TBLeague neck stuffing.
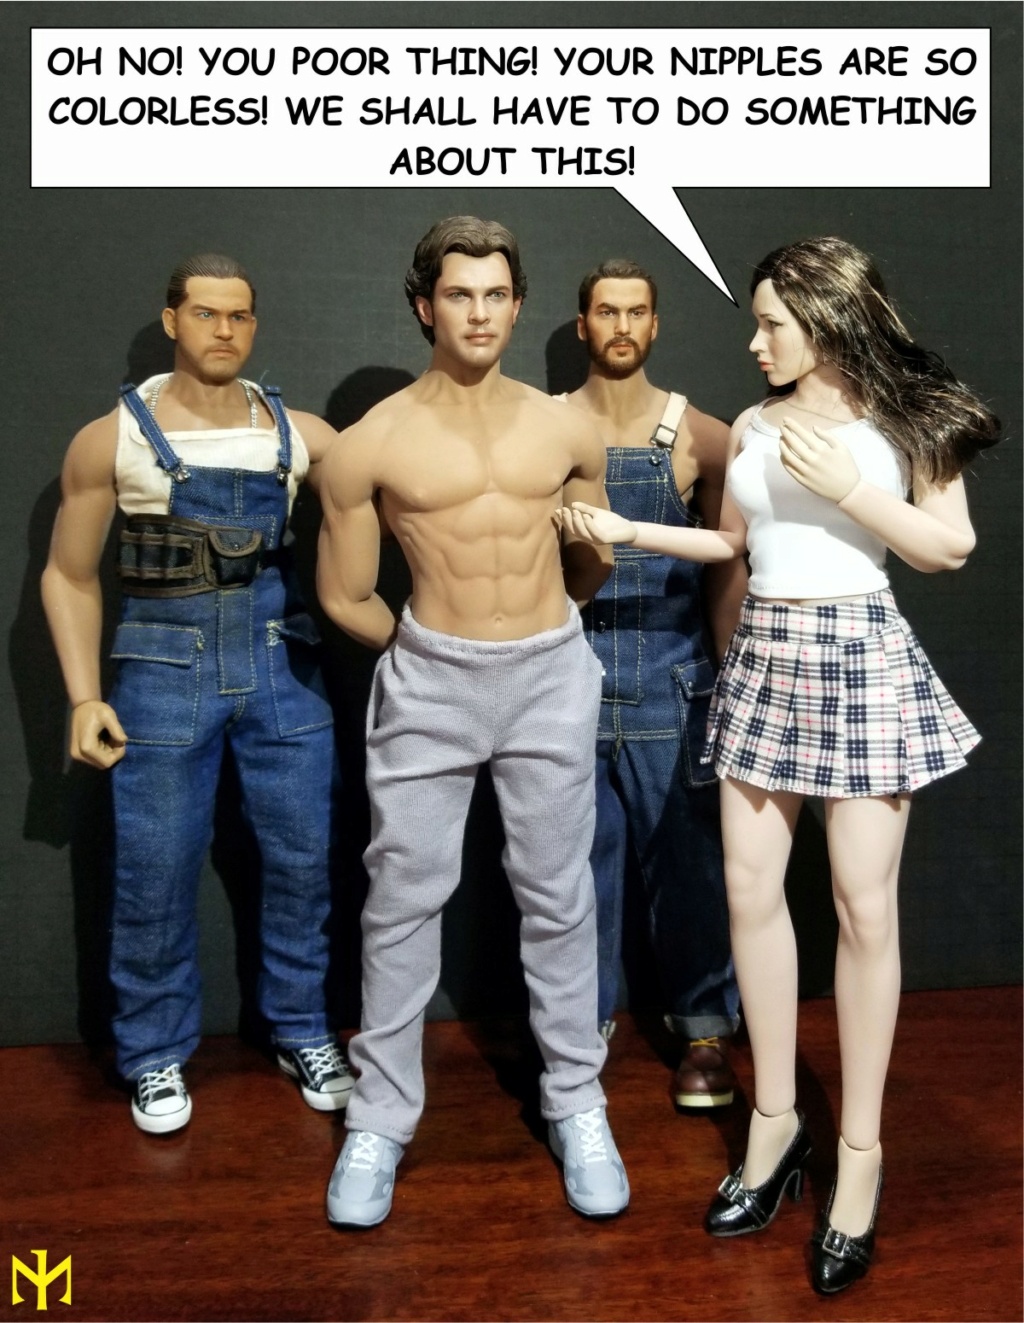
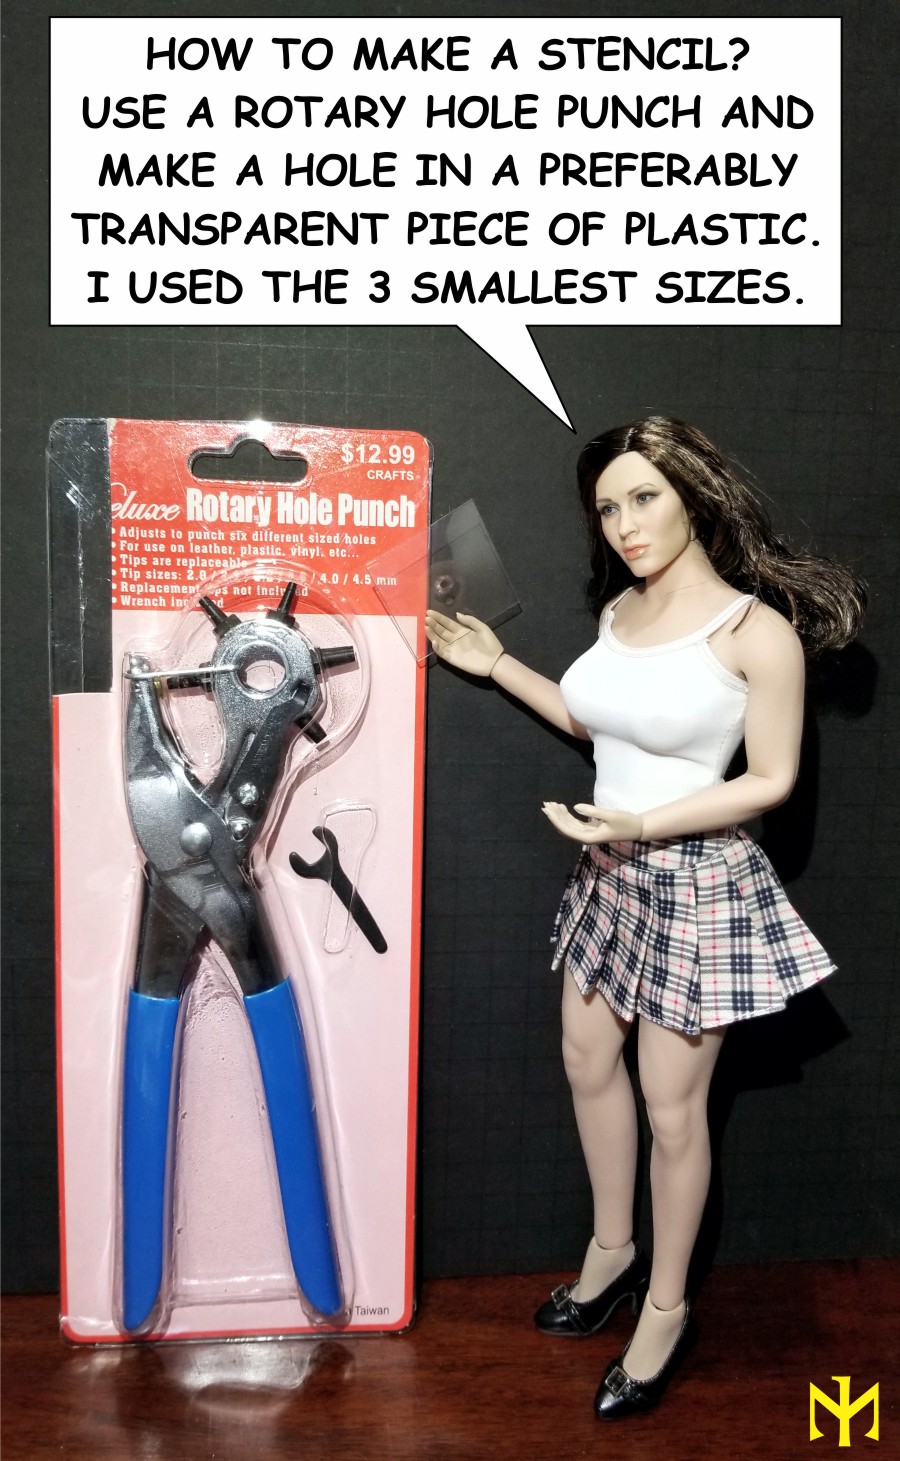
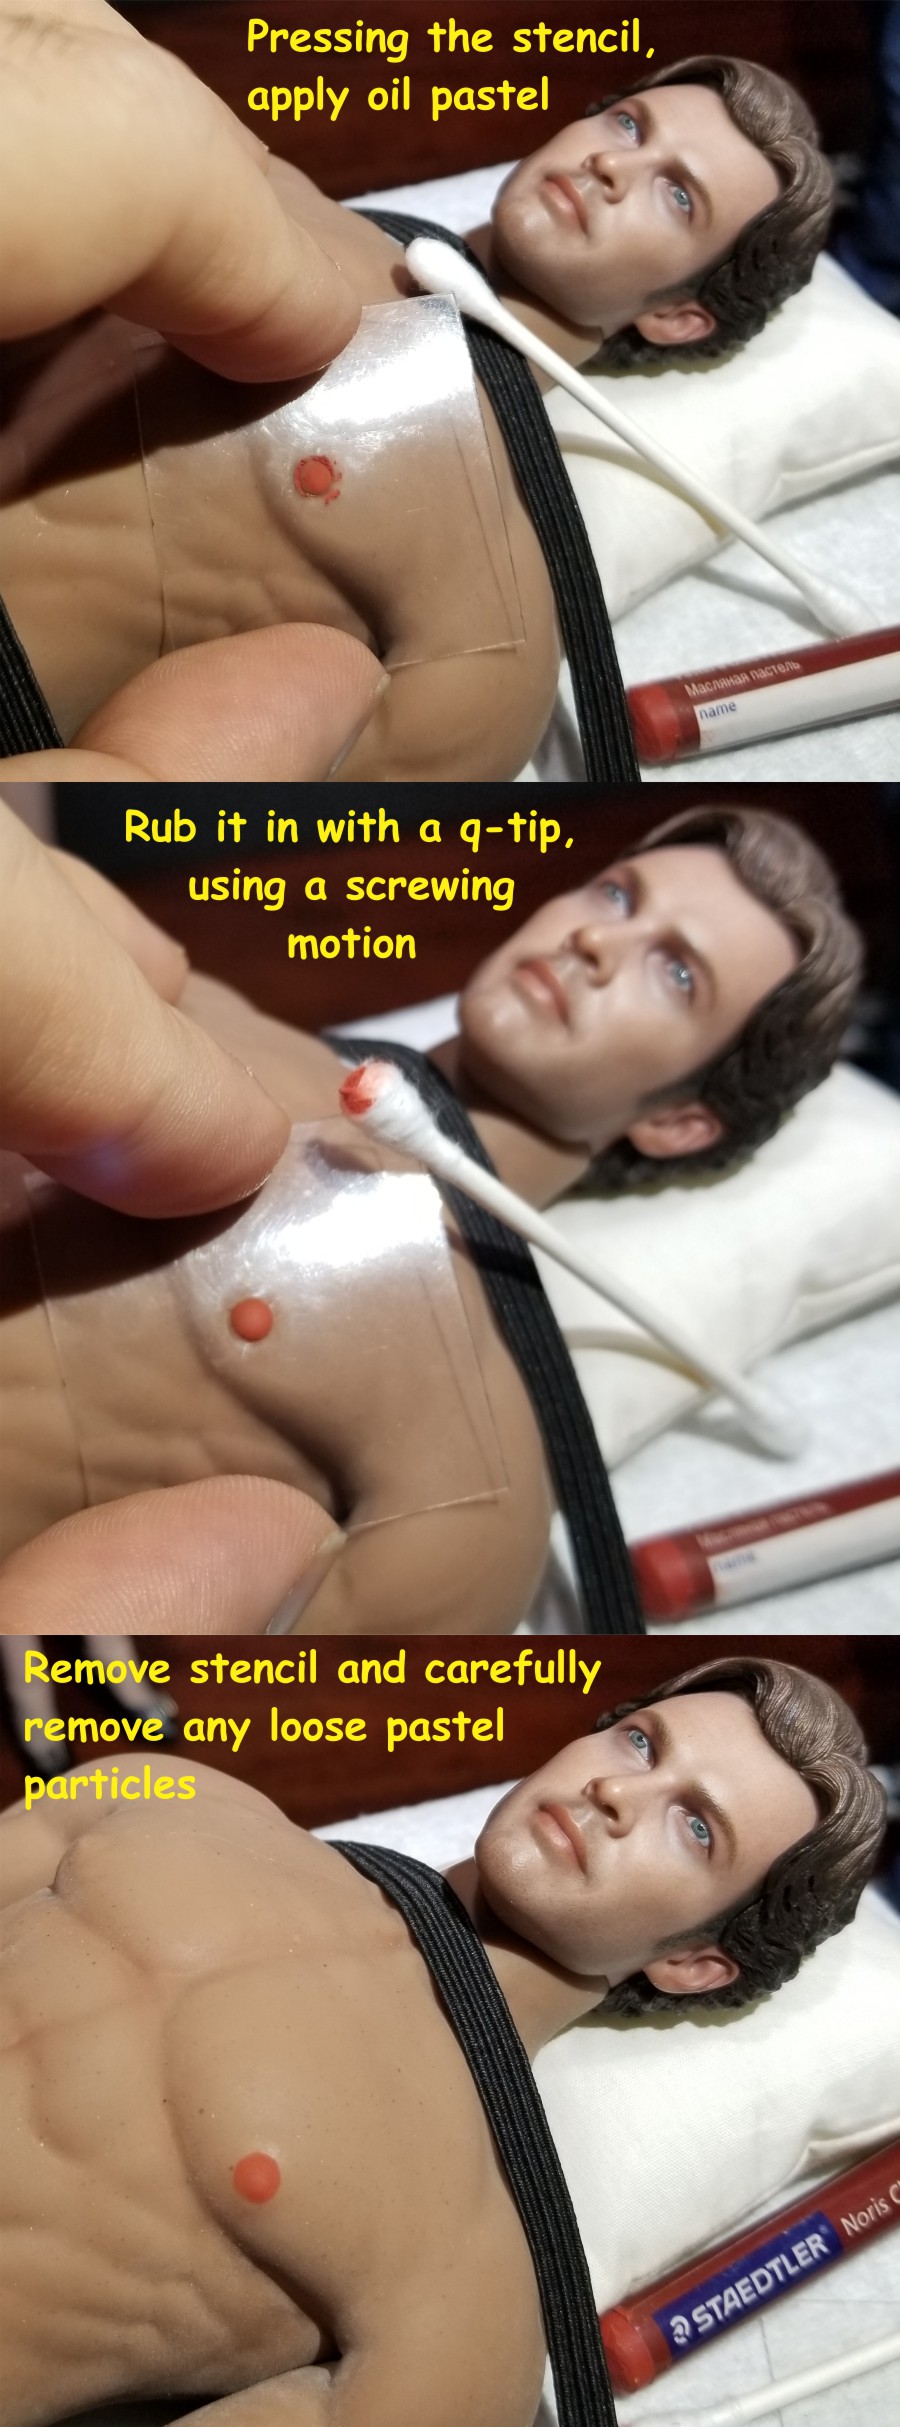
Several days ago someone asked how to paint nipples and certain other parts on TBLeague female bodies. Both the way the question was posed and the photo illustration were questionably appropriate vis-a-vis our site's regulations, so a moderator removed the post. Nevertheless, since the subject has come up more than once, here is a step-by-step tutorial, using a male figure (thanks to double standards, male nipples are not considered offensive). The process is similar to that for painting seamless bodies with oil pastels (see full thread HERE), but with some more specific techniques. This post will eventually be parked in the Tutorials section.
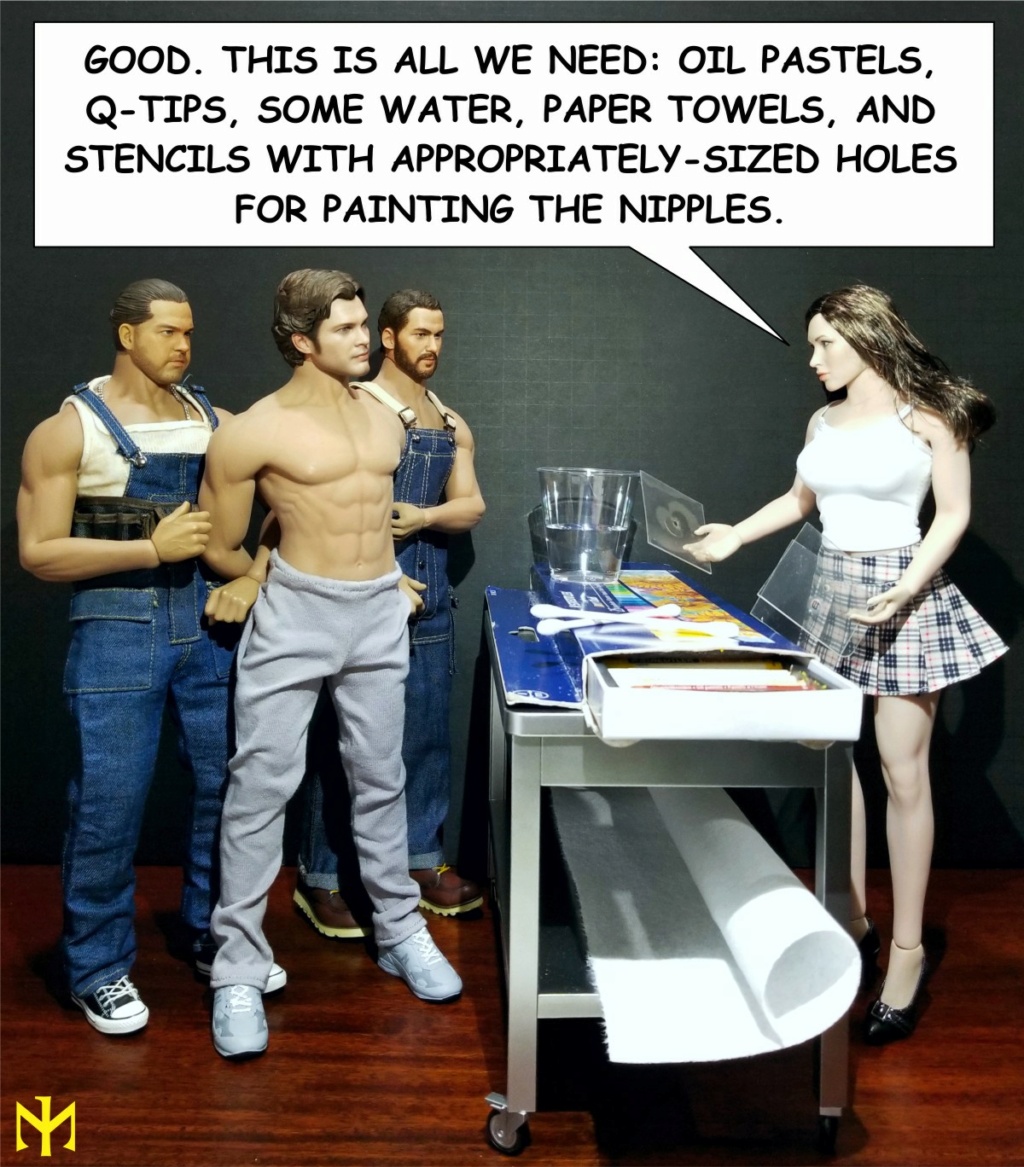
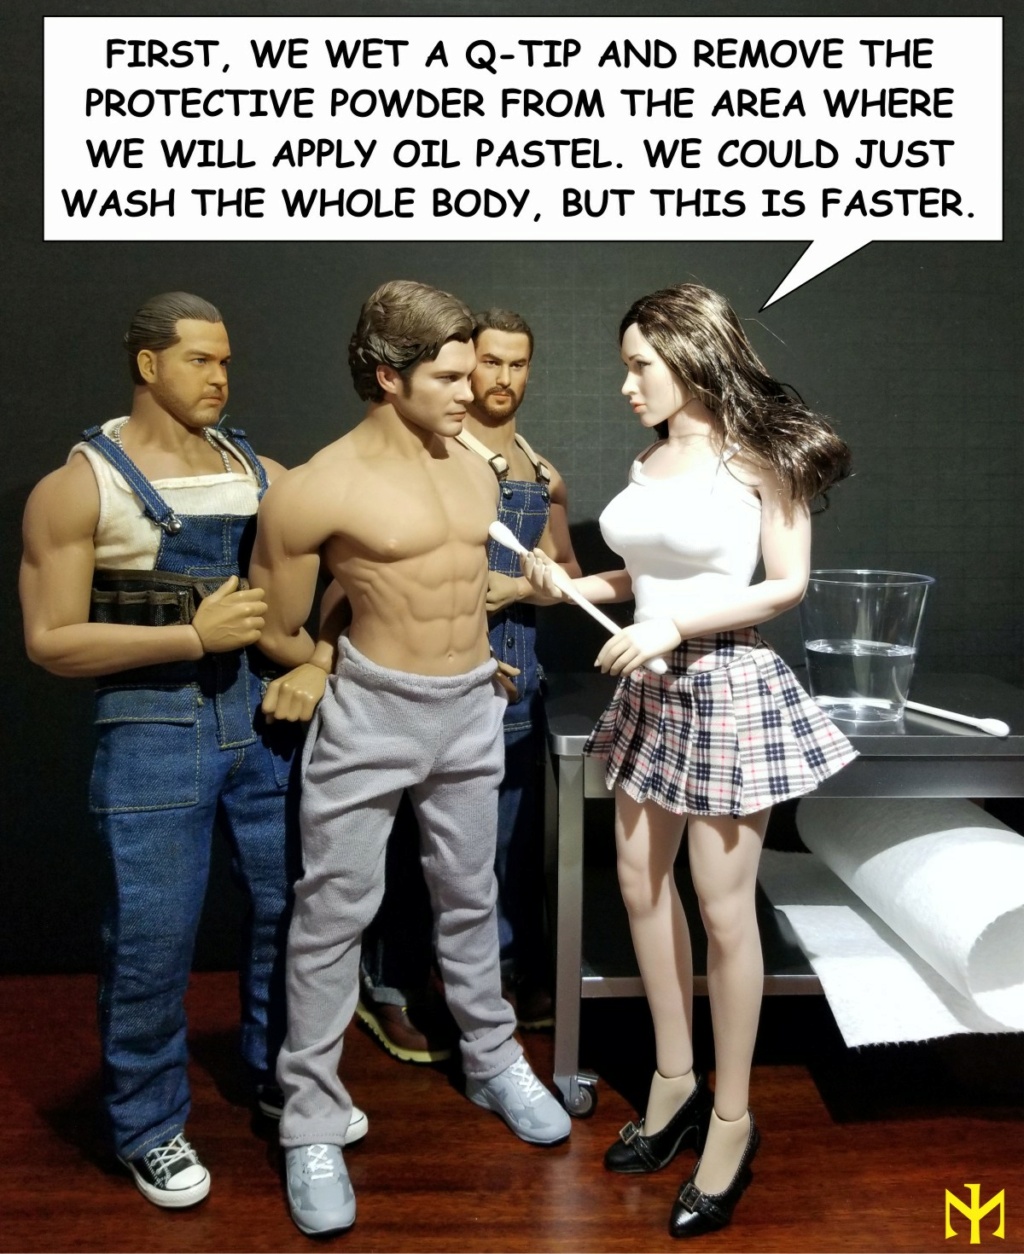
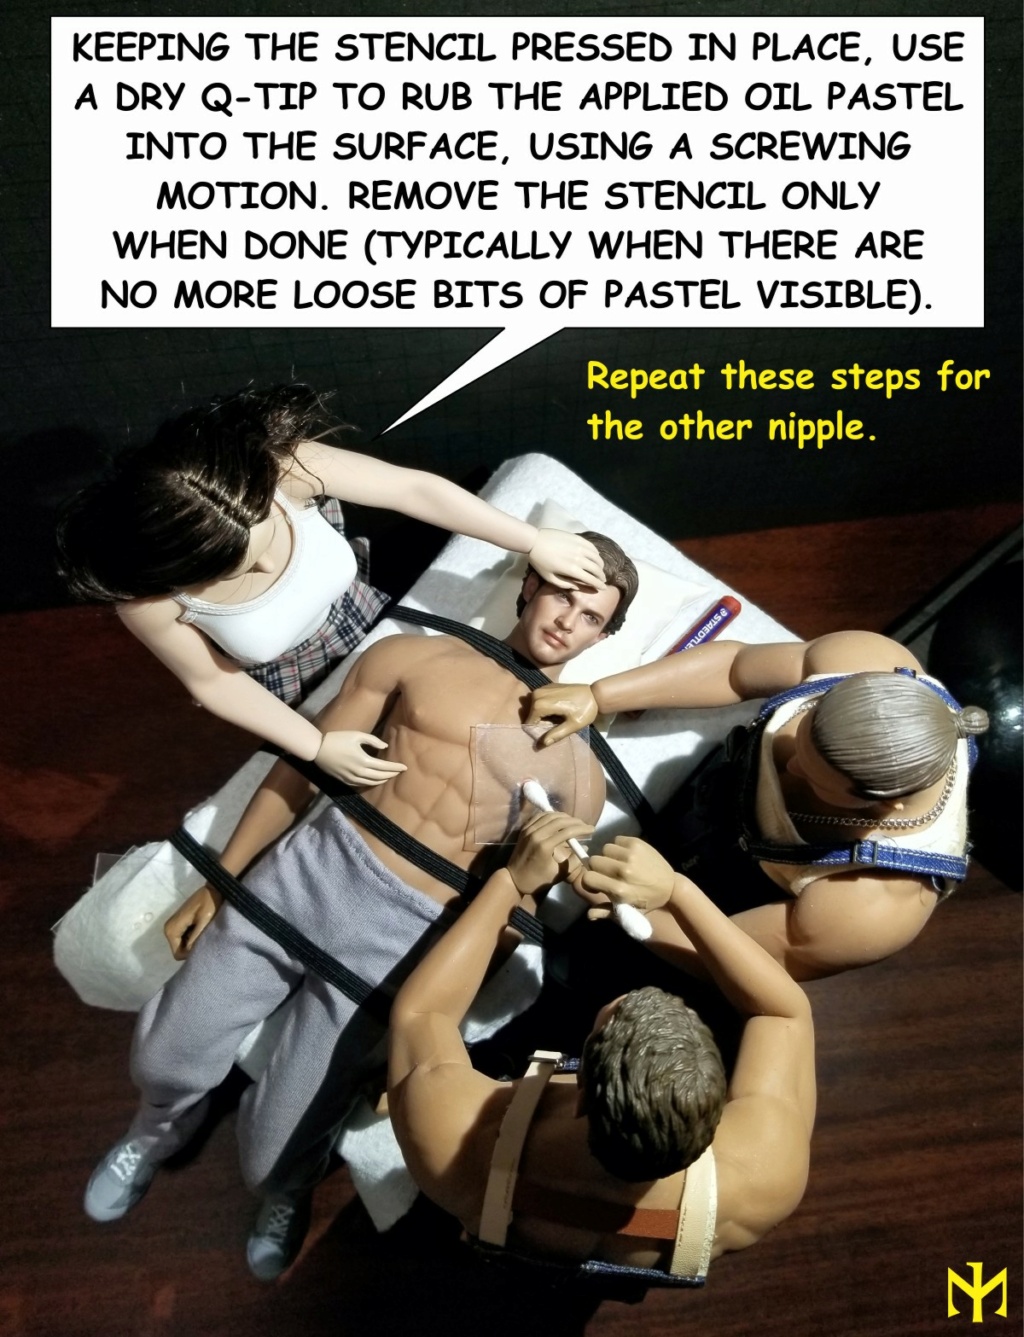
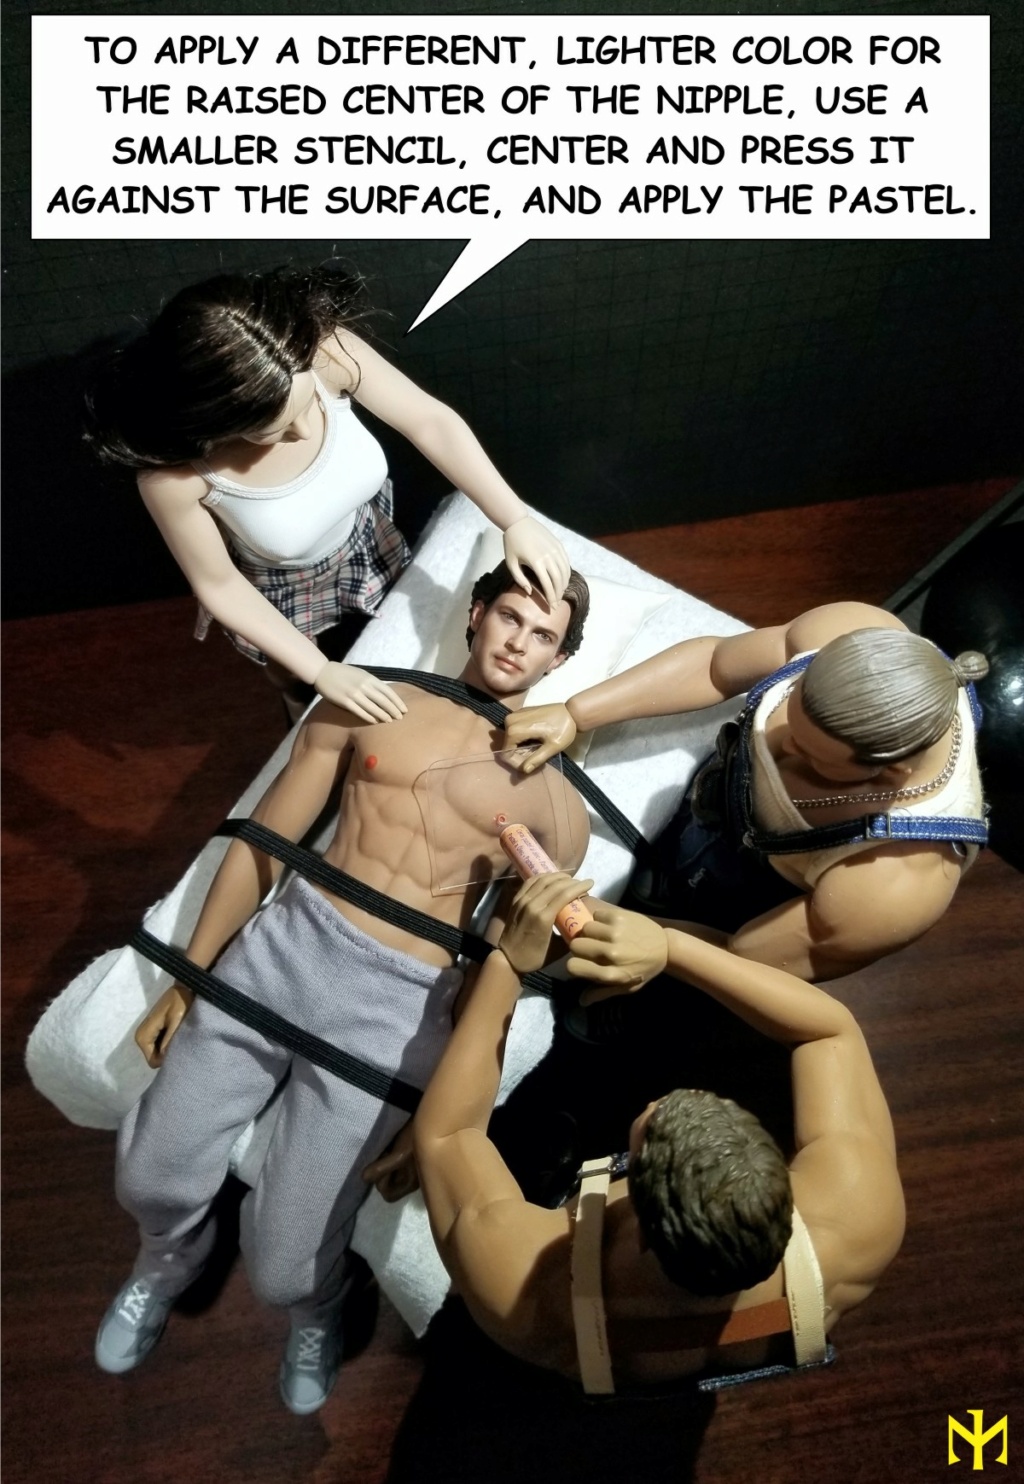
Note: Human nipples come in different shapes and sizes, and your needs or preferences may vary. I use two colors, usually Staedtler's Rose Wood and Dark Sand.
Note: Because the application of the oil pastel is not as intensive as that possible when painting entire bodies or larger areas, this is largely undoable -- with a bit of determined washing with soap and water.
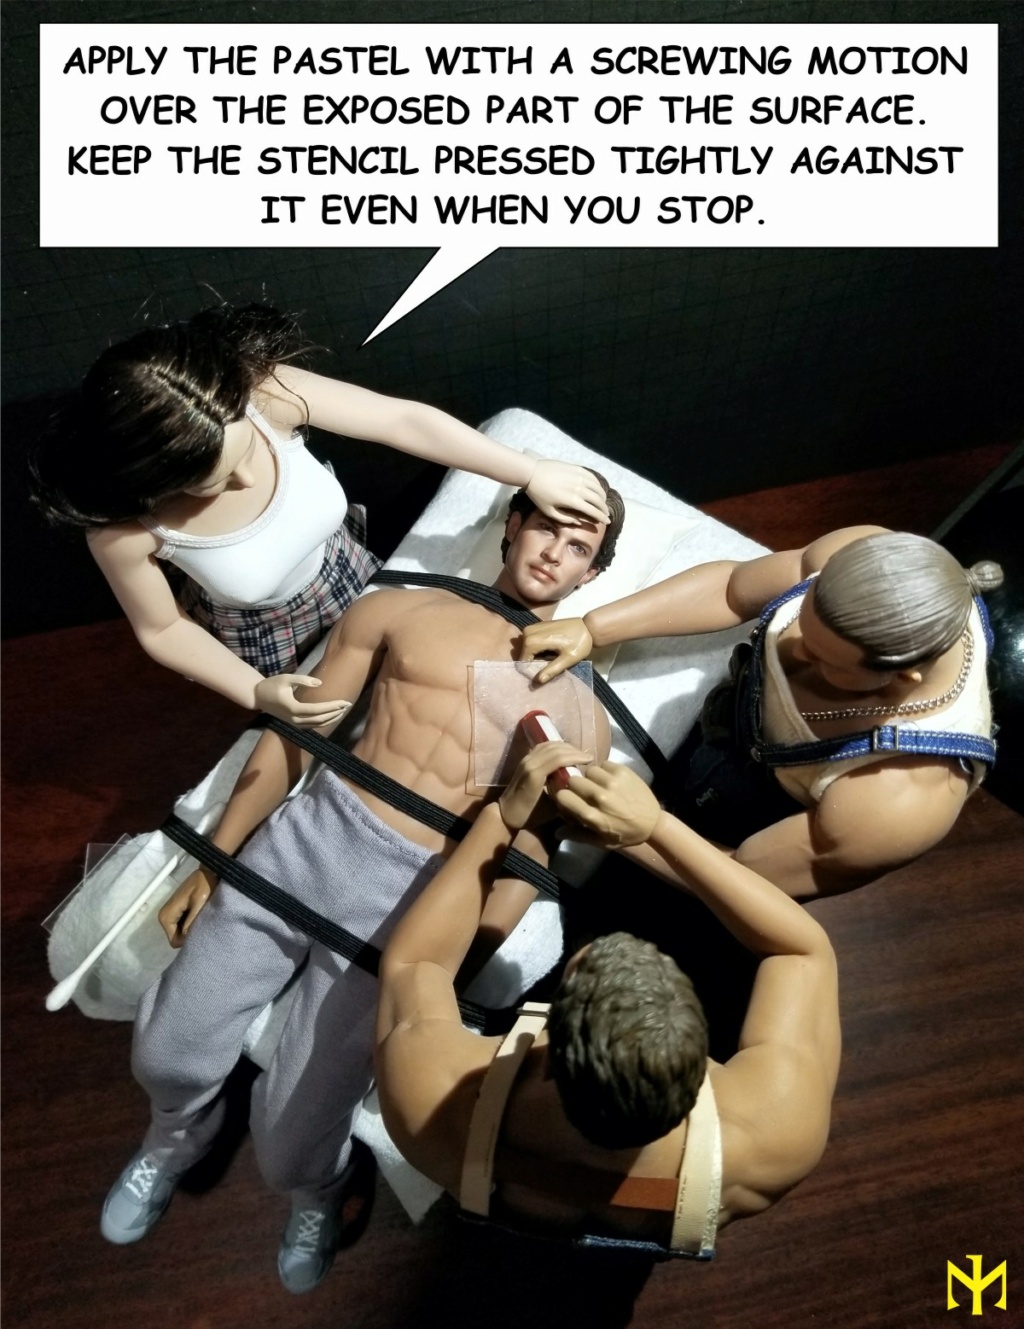
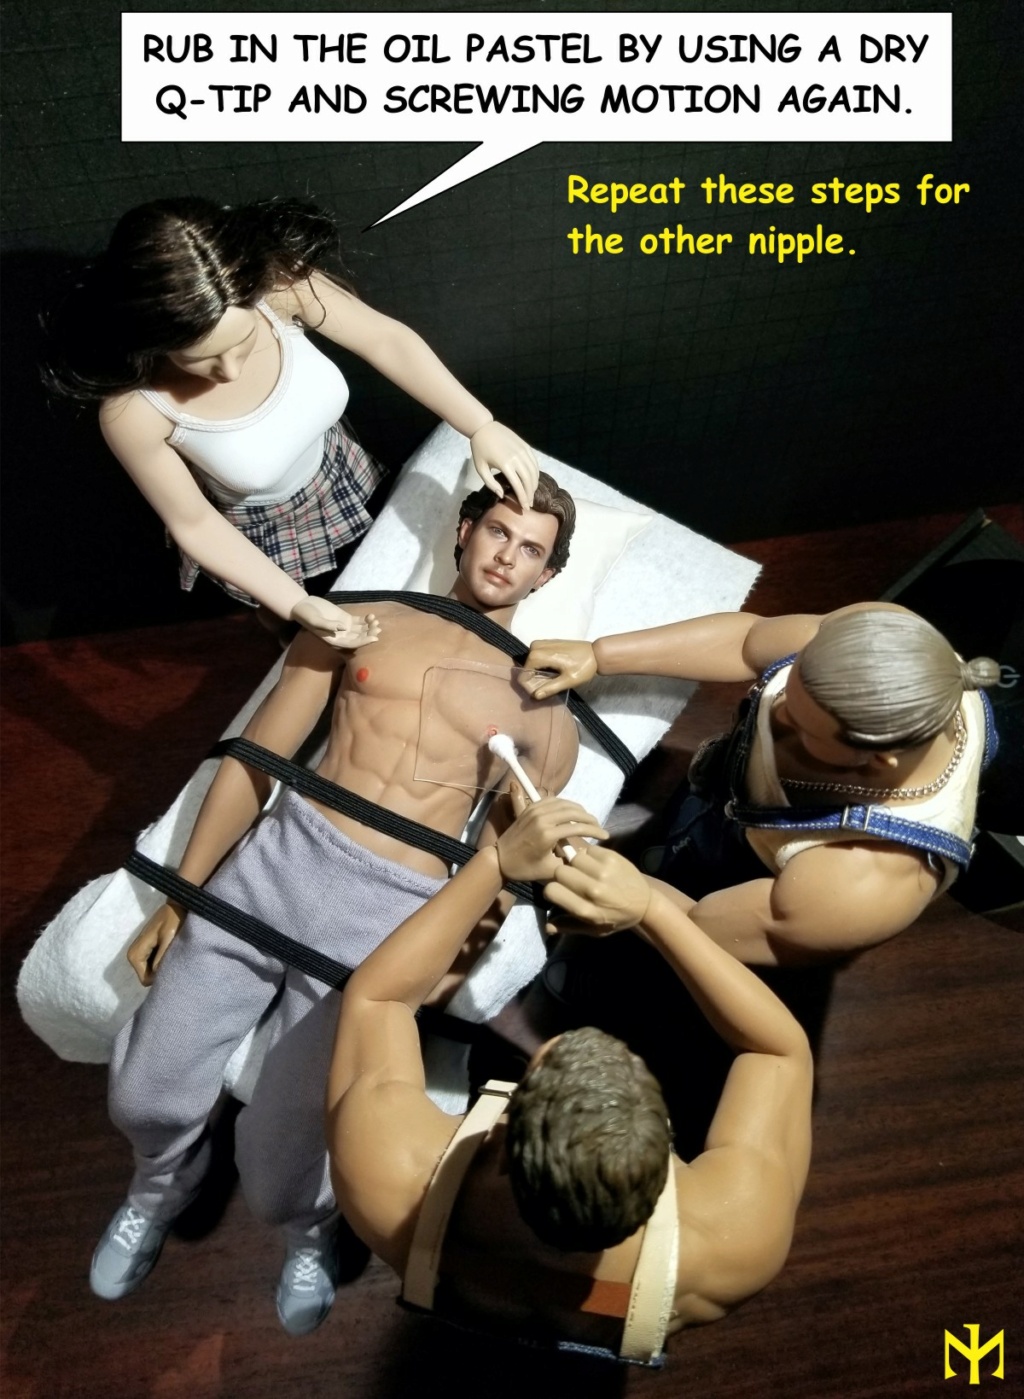

And, just in case something wasn't clear, here is what I call a zoom-in replay for initial painting stage:
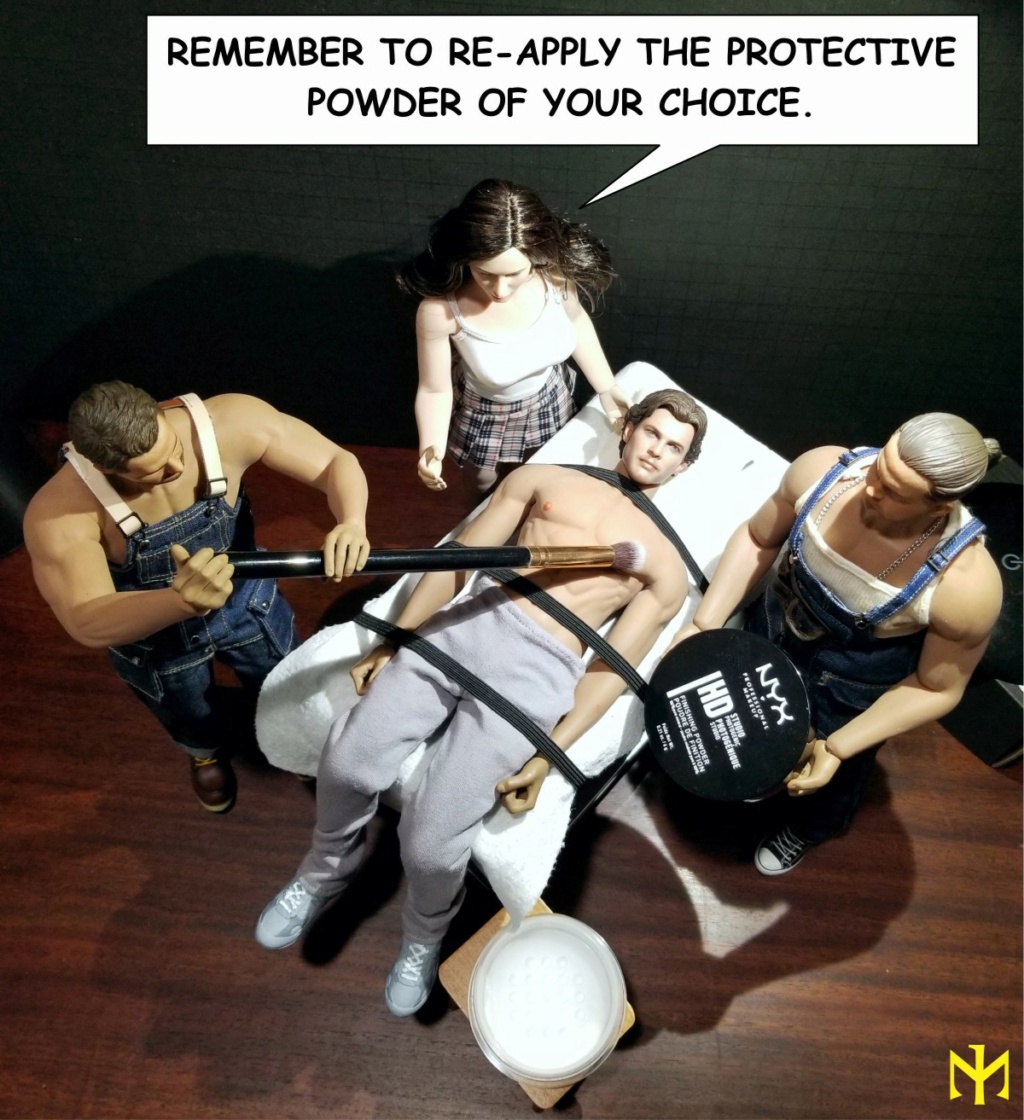
The same or analogous stencil and oil pastels method can be used to paint other areas or designs on the seamless bodies. If using a Jiaou body, remember that its TPE surface is less durable than the TBLeague/Phicen kind, and be very careful rubbing in oil pastel.
For alternatives methods, using Watercolor Pencils, see Posts 21-22 below; using Gundam Real Touch Markers, see Post 35 below.
(More photos in Post 35 below)
(More photos in Post 35 below)
Another Mistress Gina tutorial: TBLeague neck stuffing.
What do you think?
#tutorial #painting #tbleague #phicen #body #nipples #modification #custom #kitbash
For alternatives methods, using Watercolor Pencils, see Posts 21-22 below; using Gundam Real Touch Markers, see Post 35 below.
Another Mistress Gina tutorial: TBLeague neck stuffing.
Several days ago someone asked how to paint nipples and certain other parts on TBLeague female bodies. Both the way the question was posed and the photo illustration were questionably appropriate vis-a-vis our site's regulations, so a moderator removed the post. Nevertheless, since the subject has come up more than once, here is a step-by-step tutorial, using a male figure (thanks to double standards, male nipples are not considered offensive). The process is similar to that for painting seamless bodies with oil pastels (see full thread HERE), but with some more specific techniques. This post will eventually be parked in the Tutorials section.
Note: Human nipples come in different shapes and sizes, and your needs or preferences may vary. I use two colors, usually Staedtler's Rose Wood and Dark Sand.
Note: Because the application of the oil pastel is not as intensive as that possible when painting entire bodies or larger areas, this is largely undoable -- with a bit of determined washing with soap and water.


And, just in case something wasn't clear, here is what I call a zoom-in replay for initial painting stage:

The same or analogous stencil and oil pastels method can be used to paint other areas or designs on the seamless bodies. If using a Jiaou body, remember that its TPE surface is less durable than the TBLeague/Phicen kind, and be very careful rubbing in oil pastel.
For alternatives methods, using Watercolor Pencils, see Posts 21-22 below; using Gundam Real Touch Markers, see Post 35 below.
(More photos in Post 35 below)

(More photos in Post 35 below)
Another Mistress Gina tutorial: TBLeague neck stuffing.
What do you think?
#tutorial #painting #tbleague #phicen #body #nipples #modification #custom #kitbash