OneSixthFigures
Would you like to react to this message? Create an account in a few clicks or log in to continue.
OneSixthFigures

An online community to discuss and share news about sixth-scale figures, with an emphasis on either custom or commercial articulated figures.


You are not connected. Please login or register

Painting TBLeague / Phicen Nipples Tutorial (updated with alternatives)

Go to page : 1, 2, 3  Next

Go down  Message [Page 1 of 3]

GubernatorFan

GubernatorFan
Founding Father
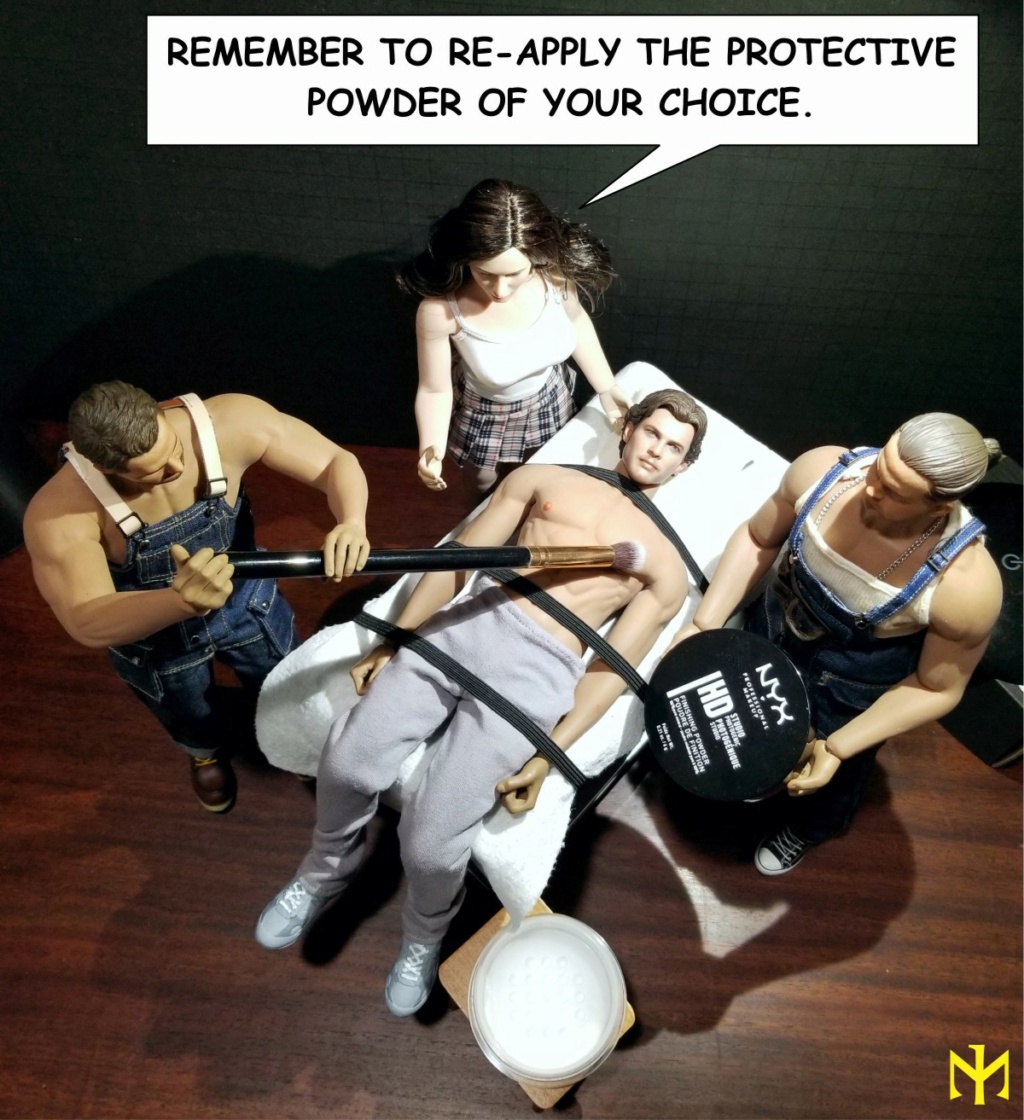
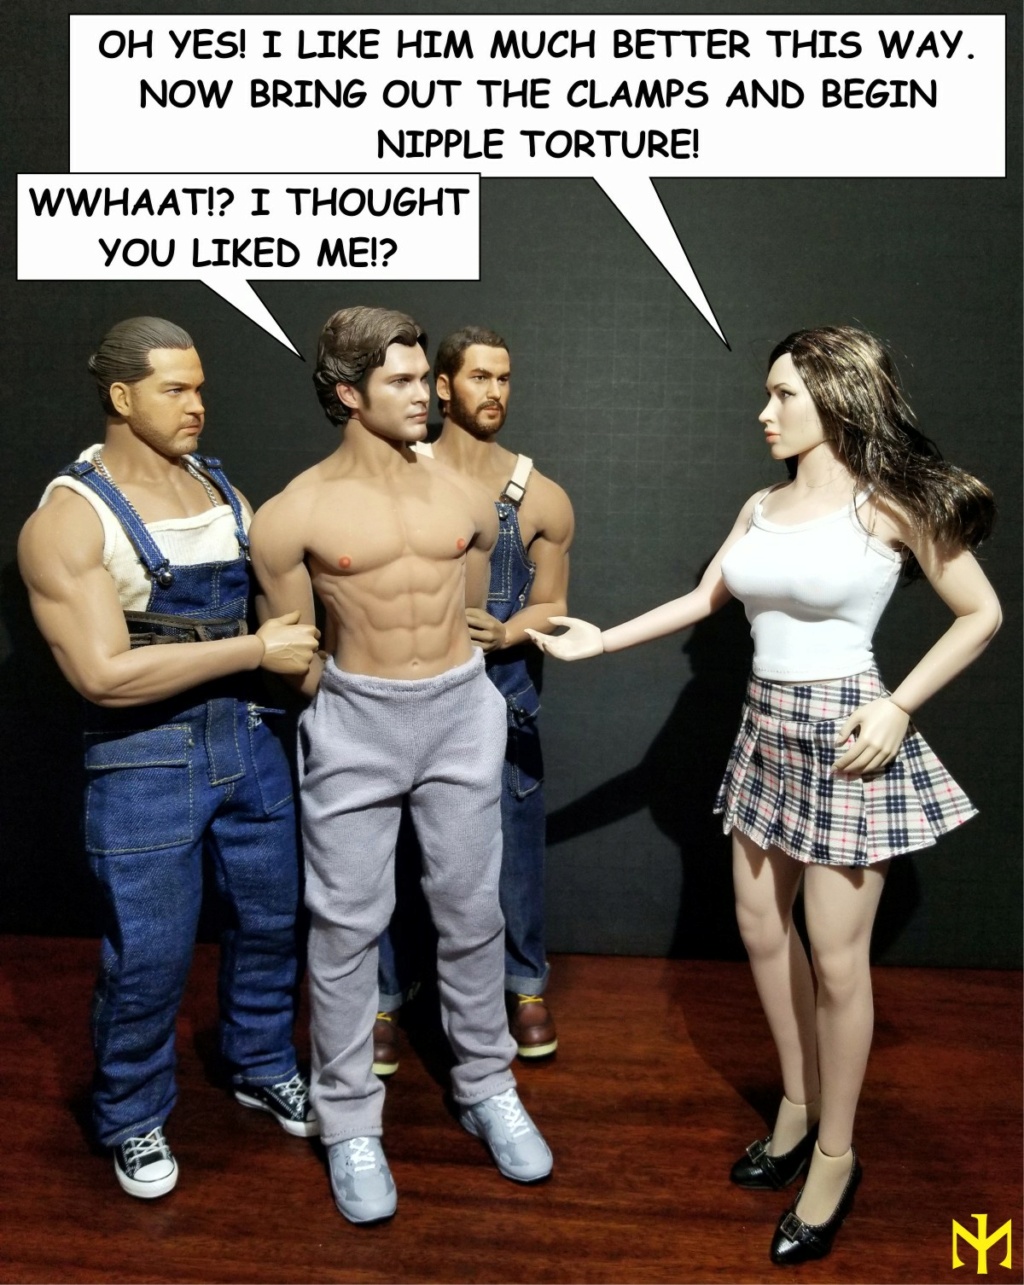
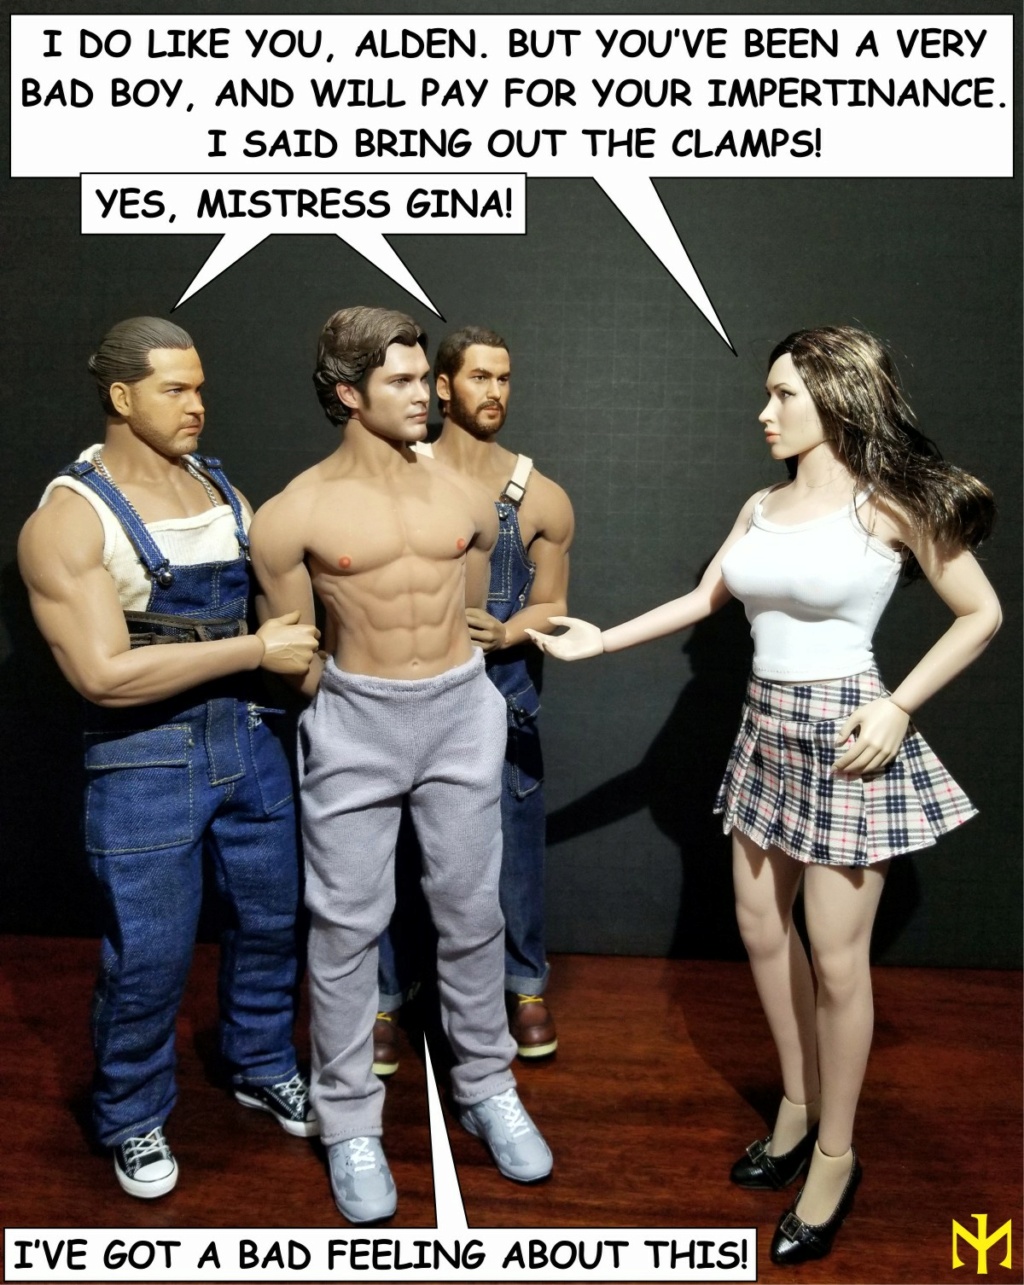
I don't think this is NSFW, but you decide. As usual, I couldn't resist some slightly adult humor.

For alternatives methods, using Watercolor Pencils, see Posts 21-22 below; using Gundam Real Touch Markers, see Post 35 below.

Another Mistress Gina tutorial: TBLeague neck stuffing.

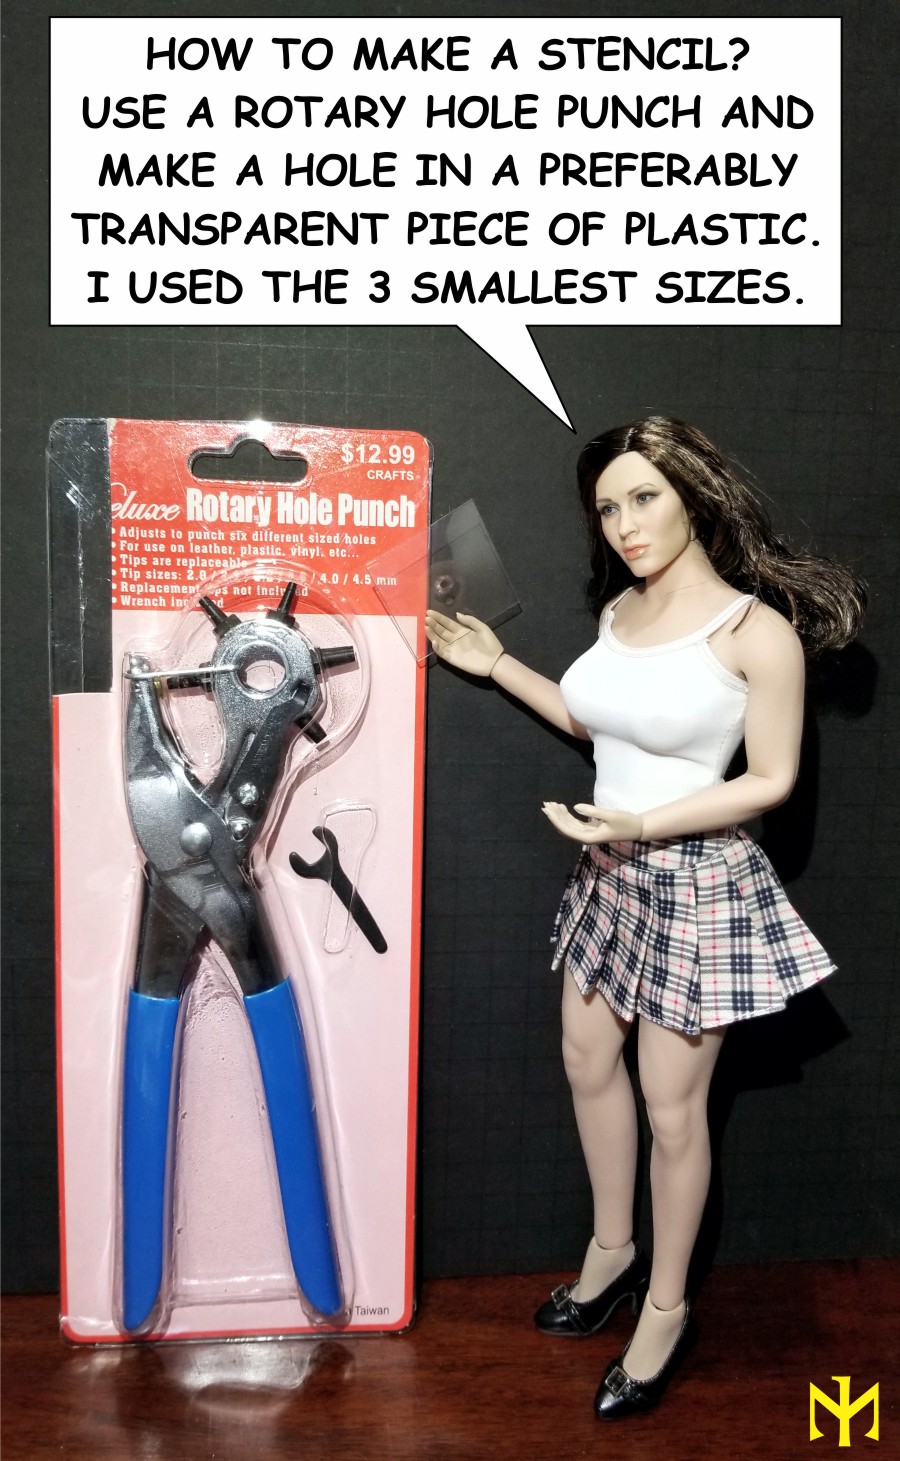
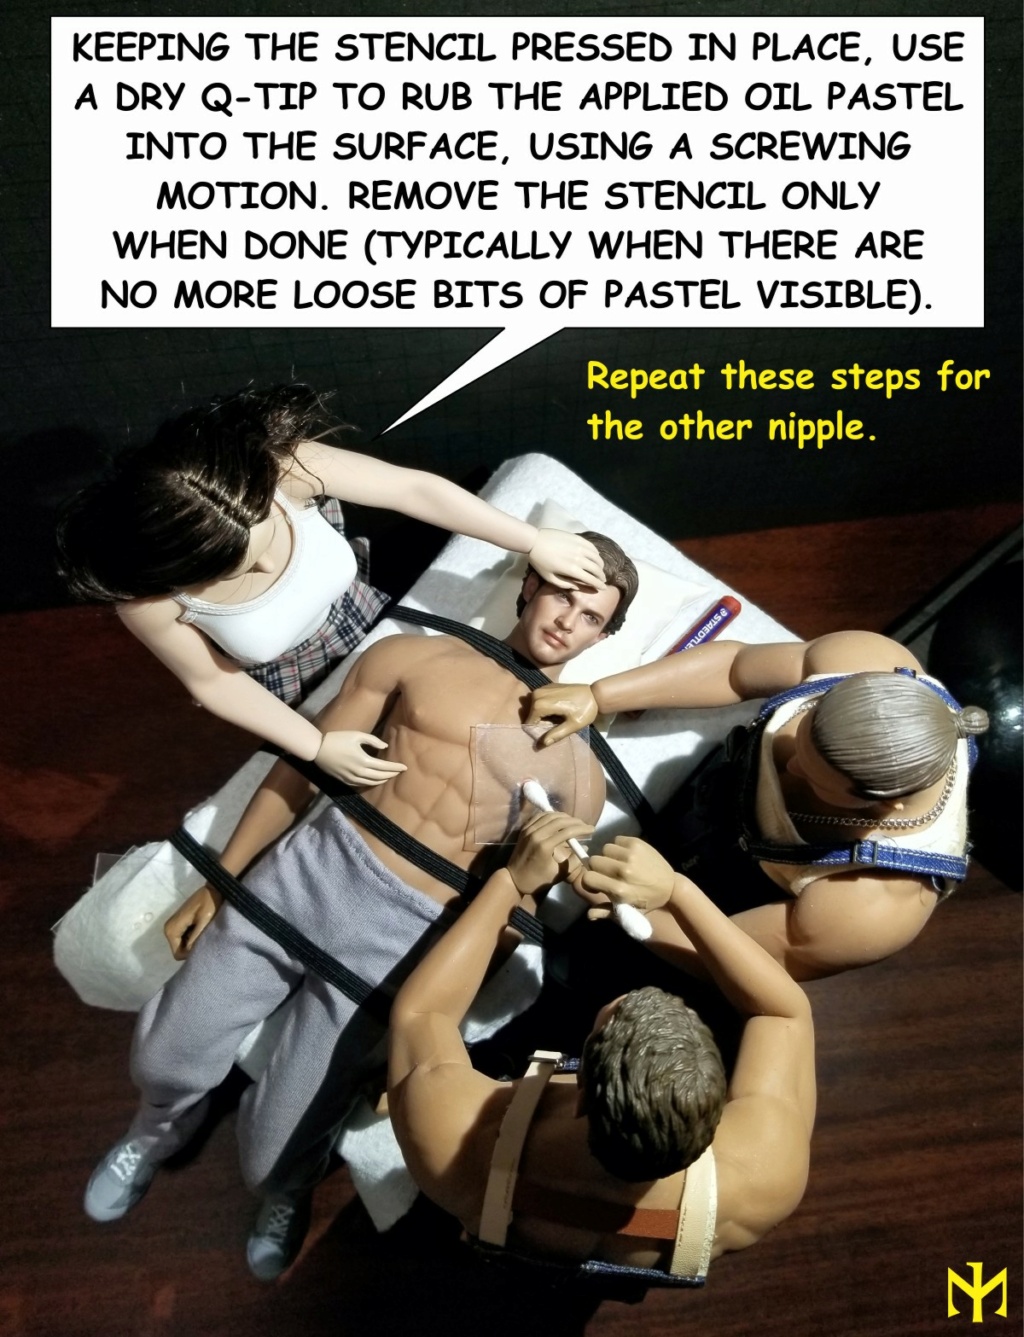
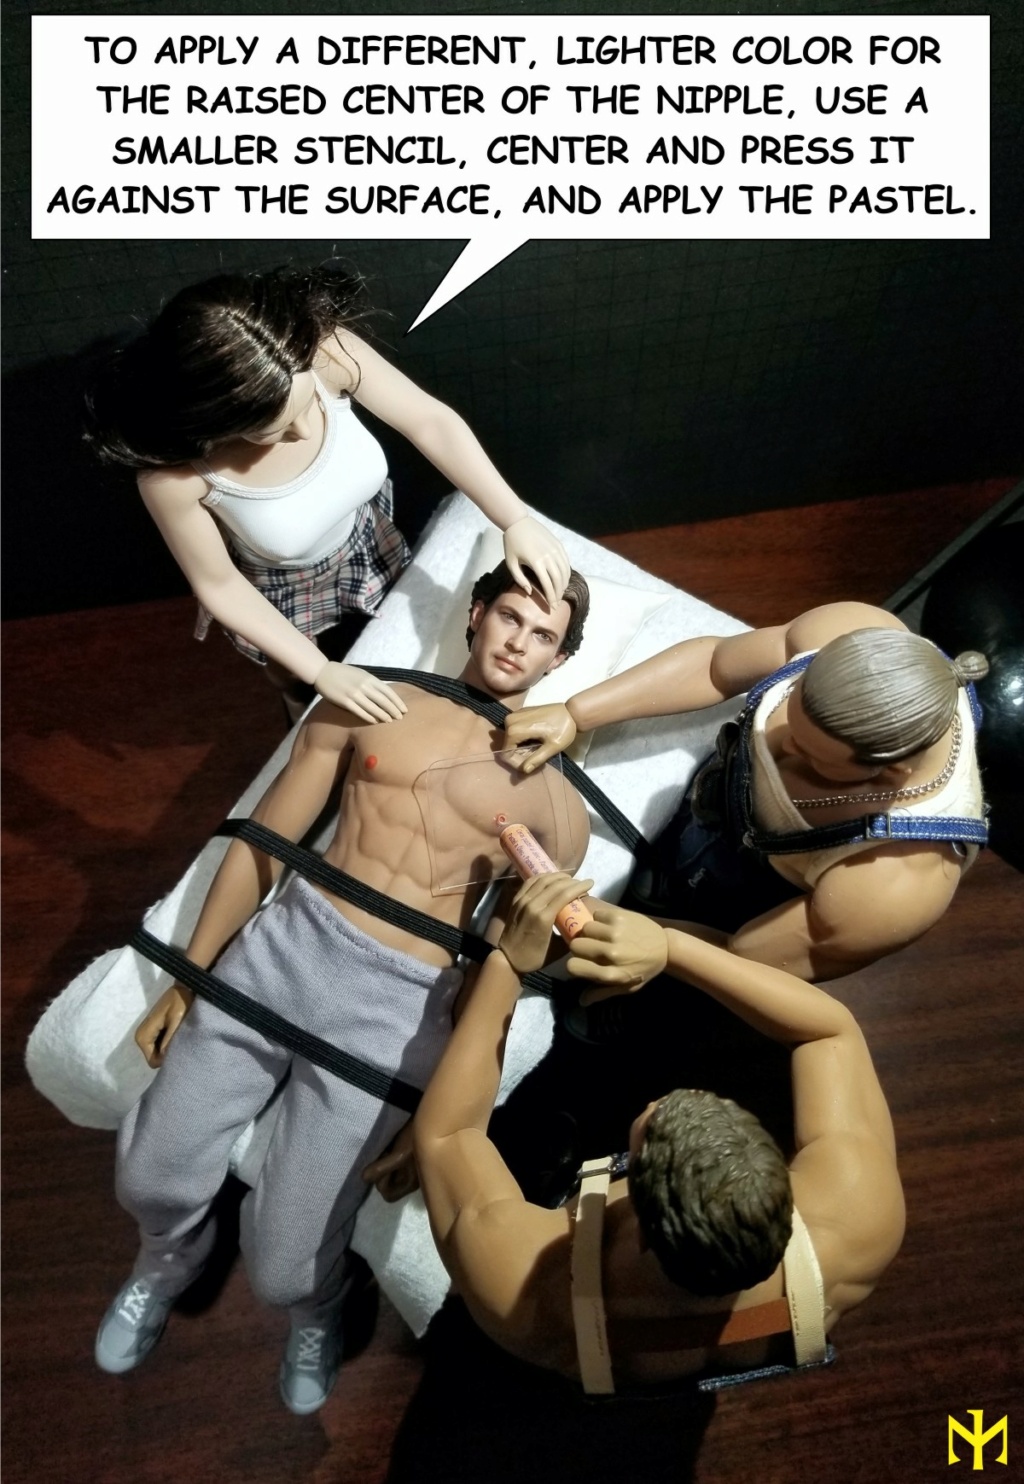
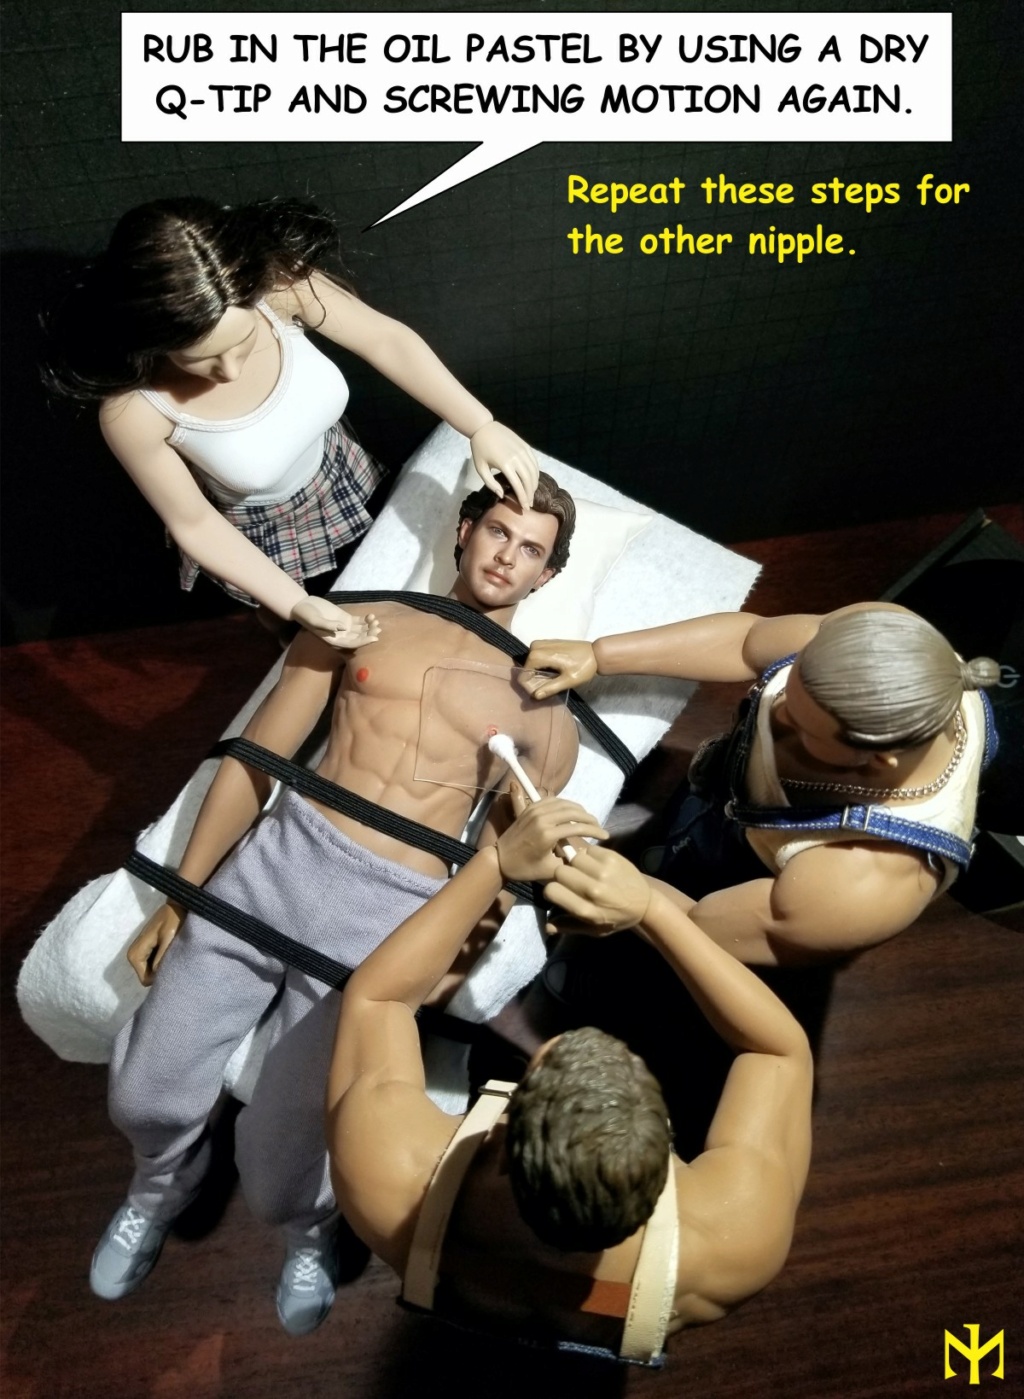
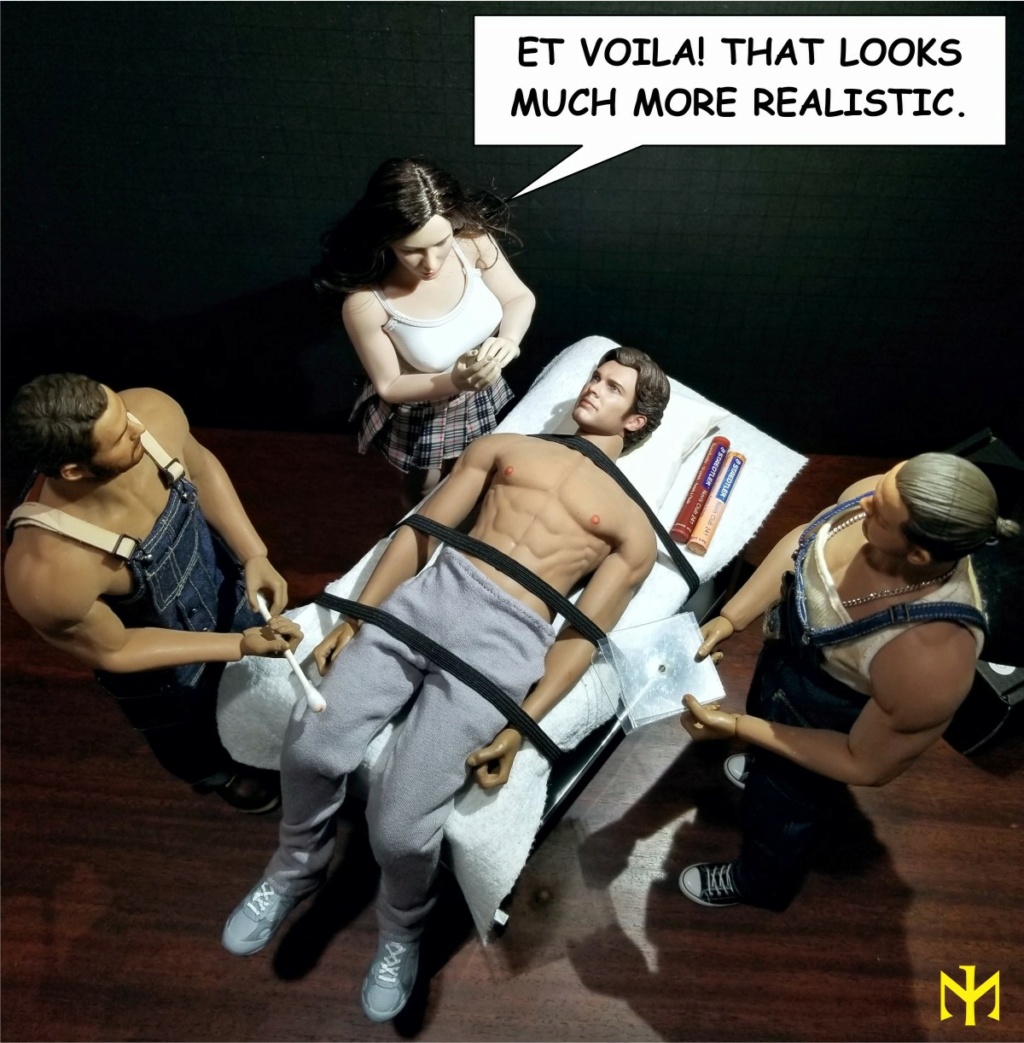
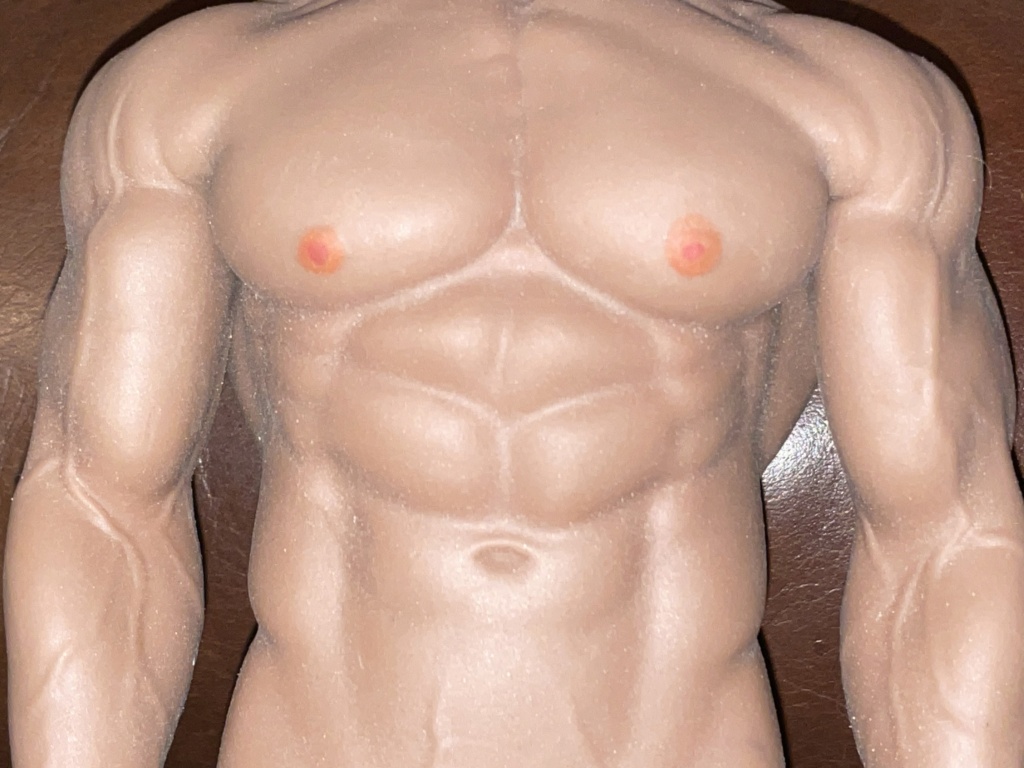
Several days ago someone asked how to paint nipples and certain other parts on TBLeague female bodies. Both the way the question was posed and the photo illustration were questionably appropriate vis-a-vis our site's regulations, so a moderator removed the post. Nevertheless, since the subject has come up more than once, here is a step-by-step tutorial, using a male figure (thanks to double standards, male nipples are not considered offensive). The process is similar to that for painting seamless bodies with oil pastels (see full thread HERE), but with some more specific techniques. This post will eventually be parked in the Tutorials section.

Note: Human nipples come in different shapes and sizes, and your needs or preferences may vary. I use two colors, usually Staedtler's Rose Wood and Dark Sand.

Note: Because the application of the oil pastel is not as intensive as that possible when painting entire bodies or larger areas, this is largely undoable -- with a bit of determined washing with soap and water.
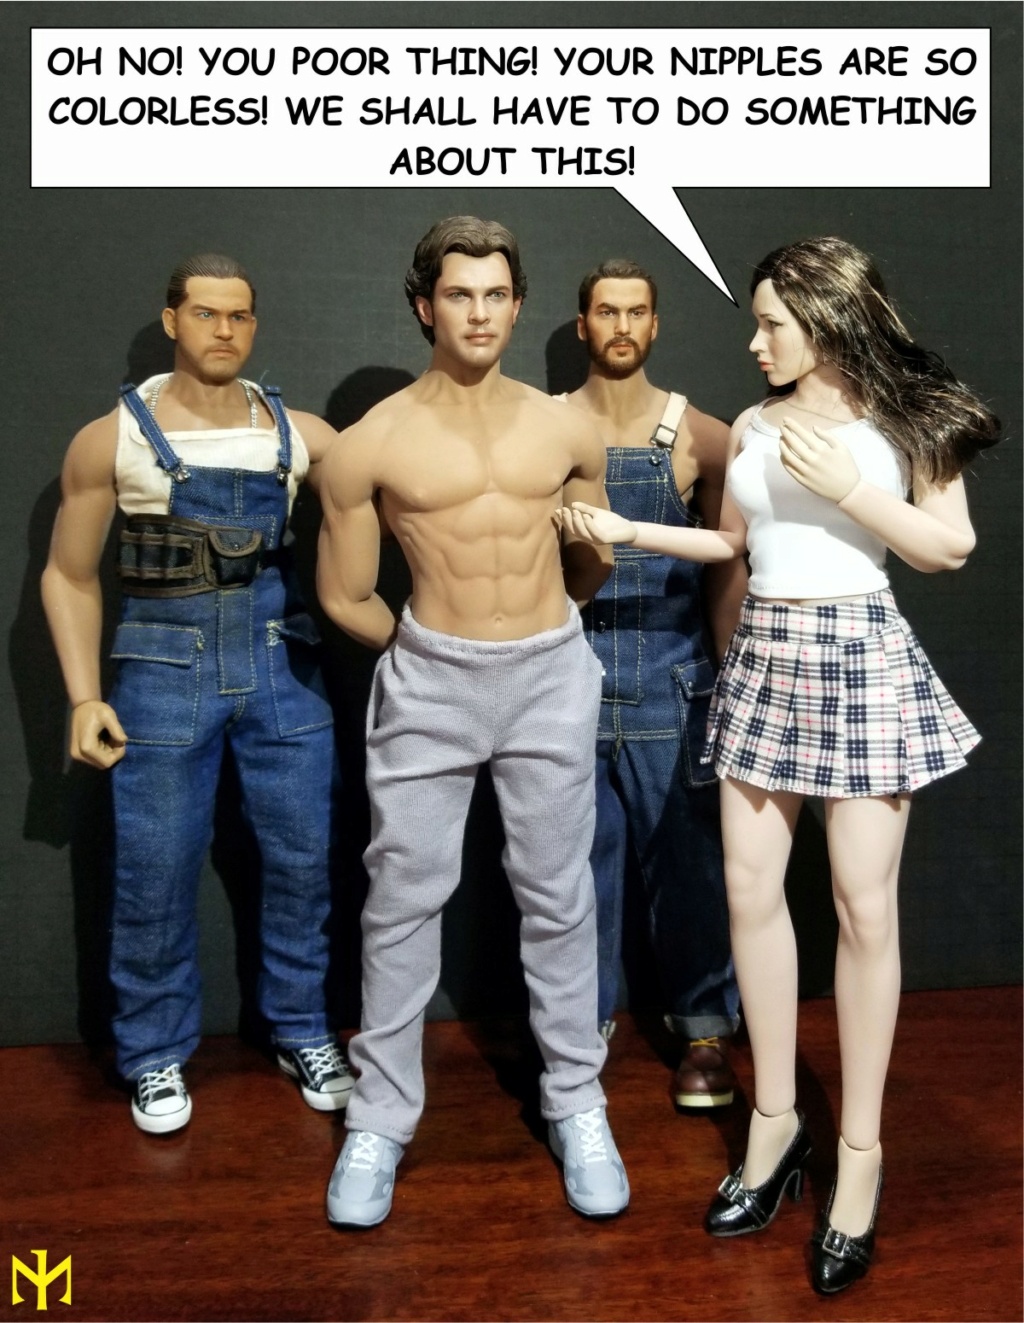
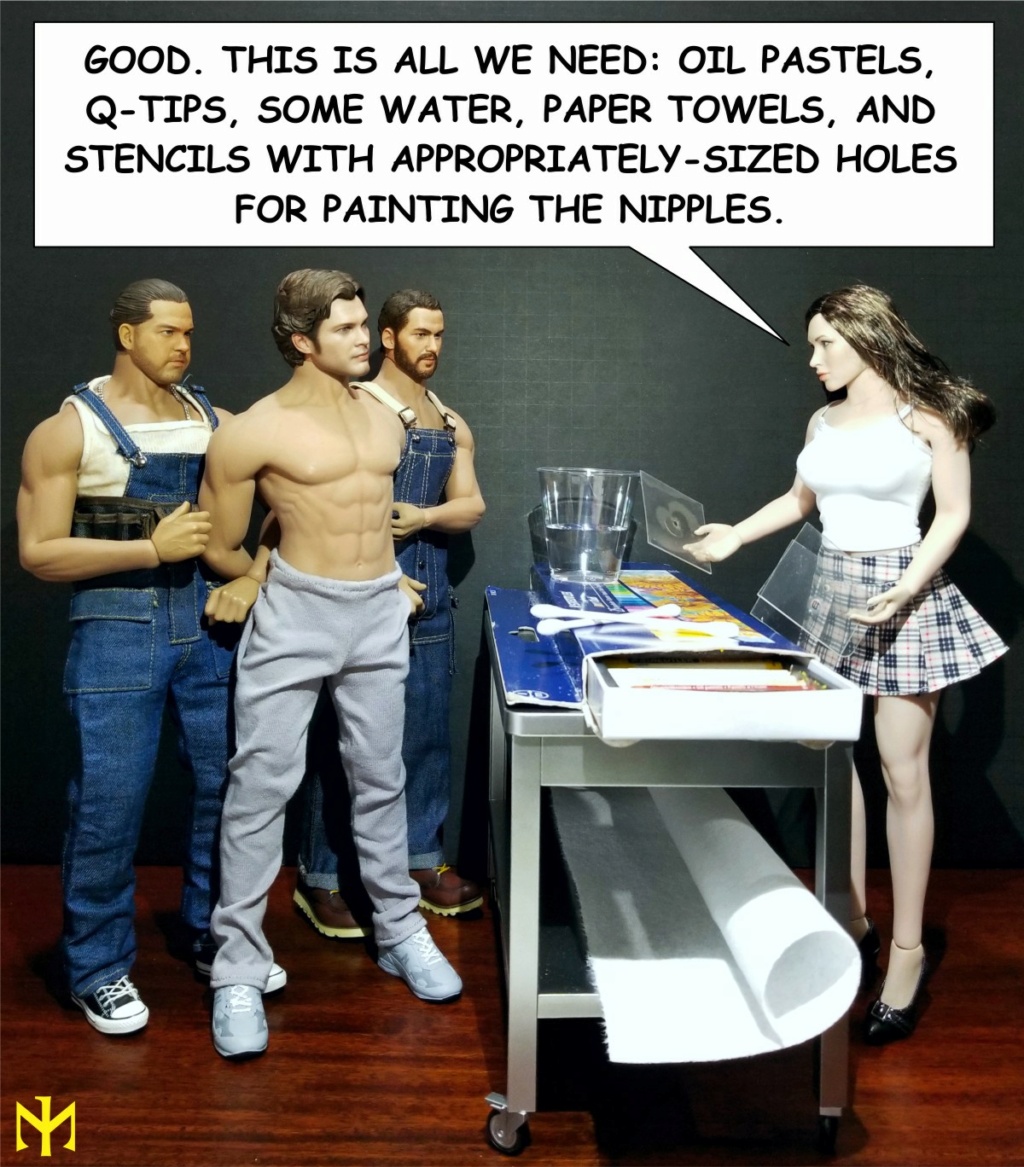
phicen - Painting TBLeague / Phicen Nipples Tutorial (updated with alternatives) Tblnt010

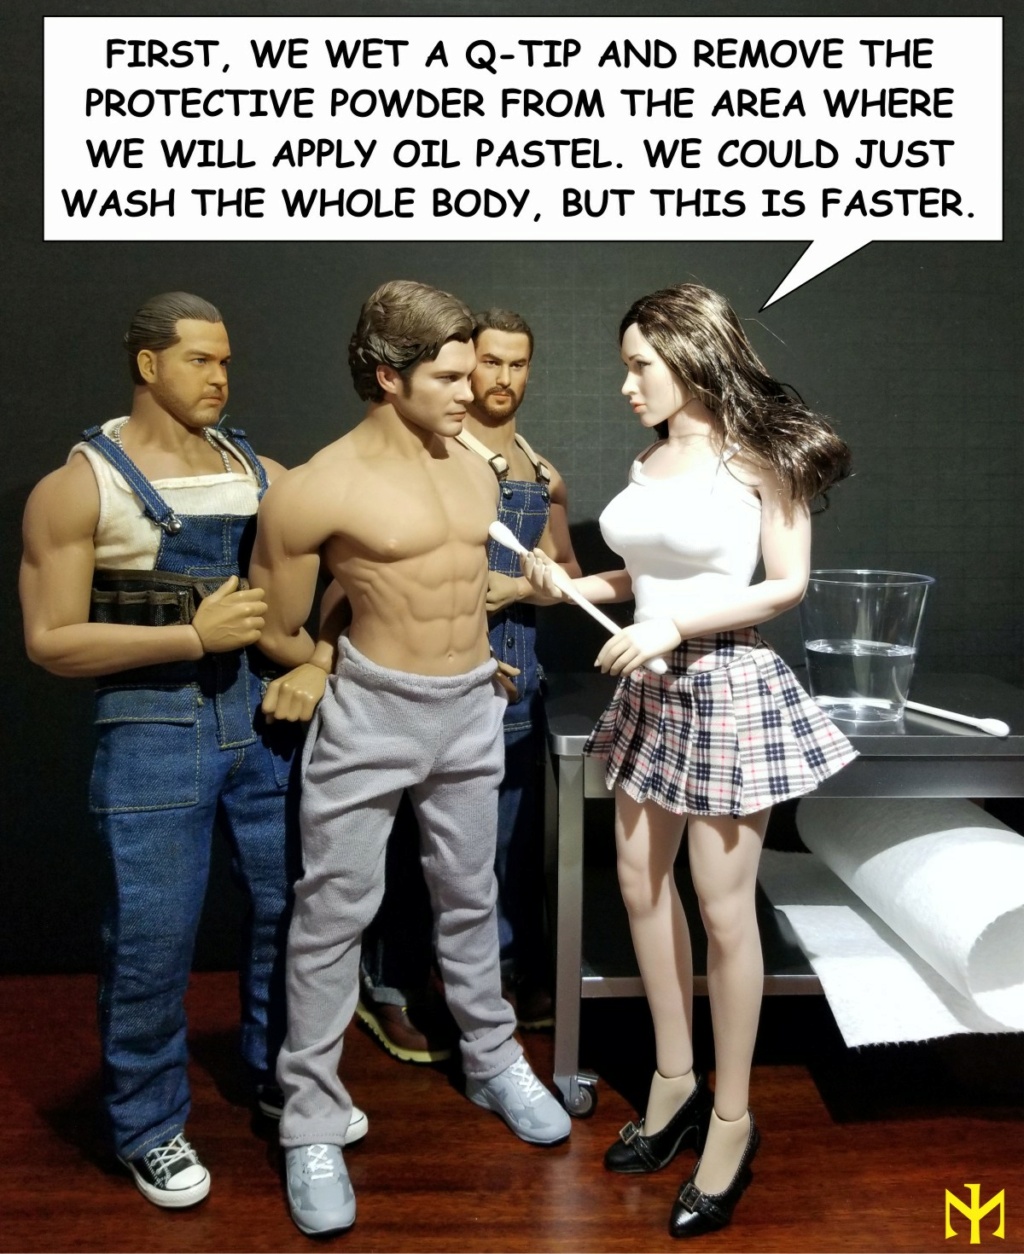
phicen - Painting TBLeague / Phicen Nipples Tutorial (updated with alternatives) Tblnt011

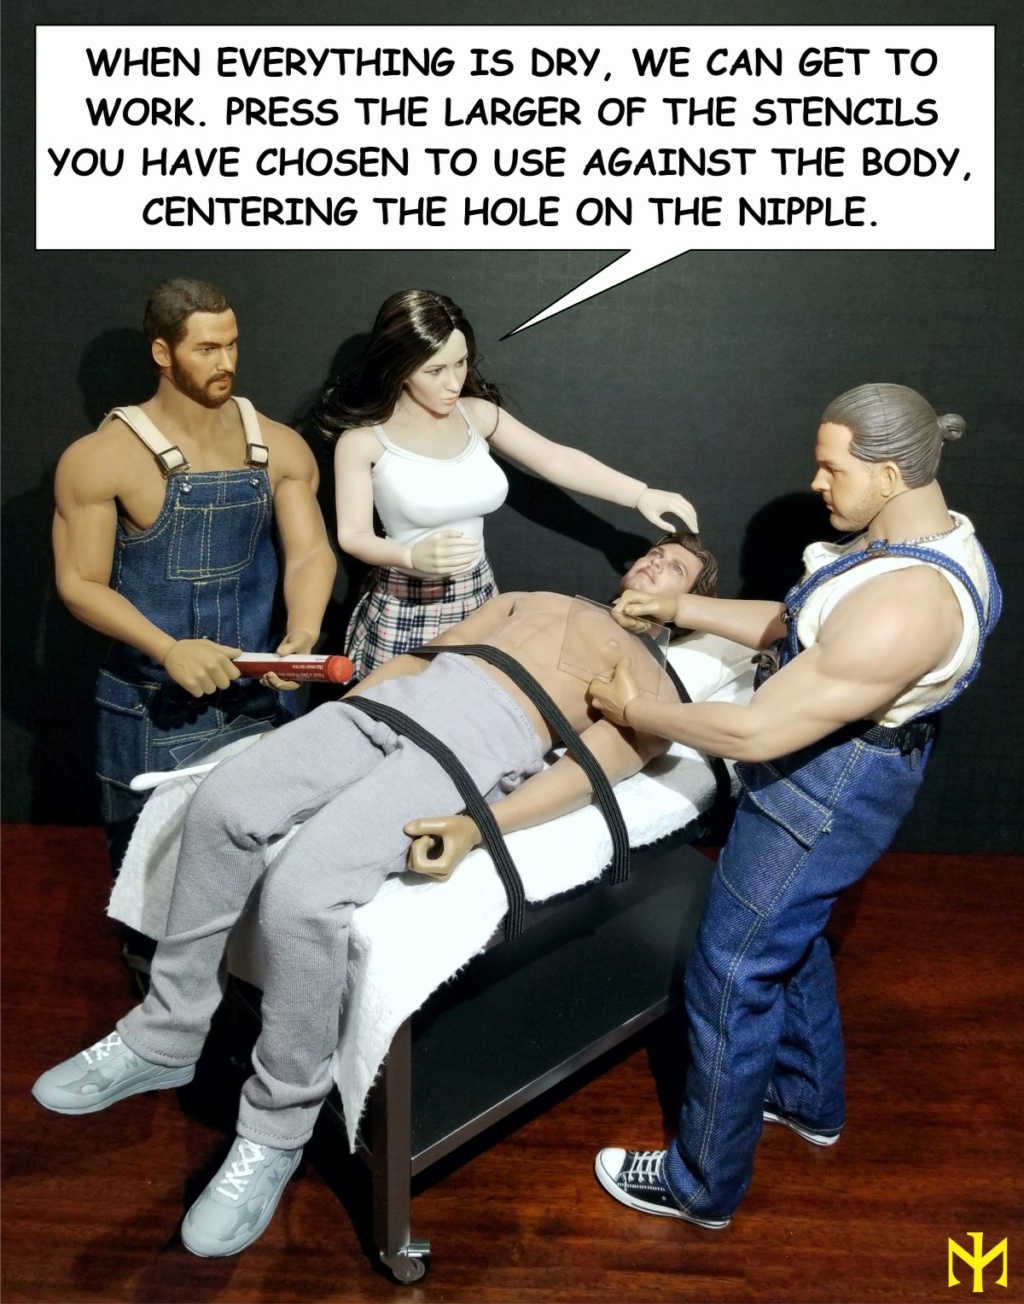
phicen - Painting TBLeague / Phicen Nipples Tutorial (updated with alternatives) Tblnt012

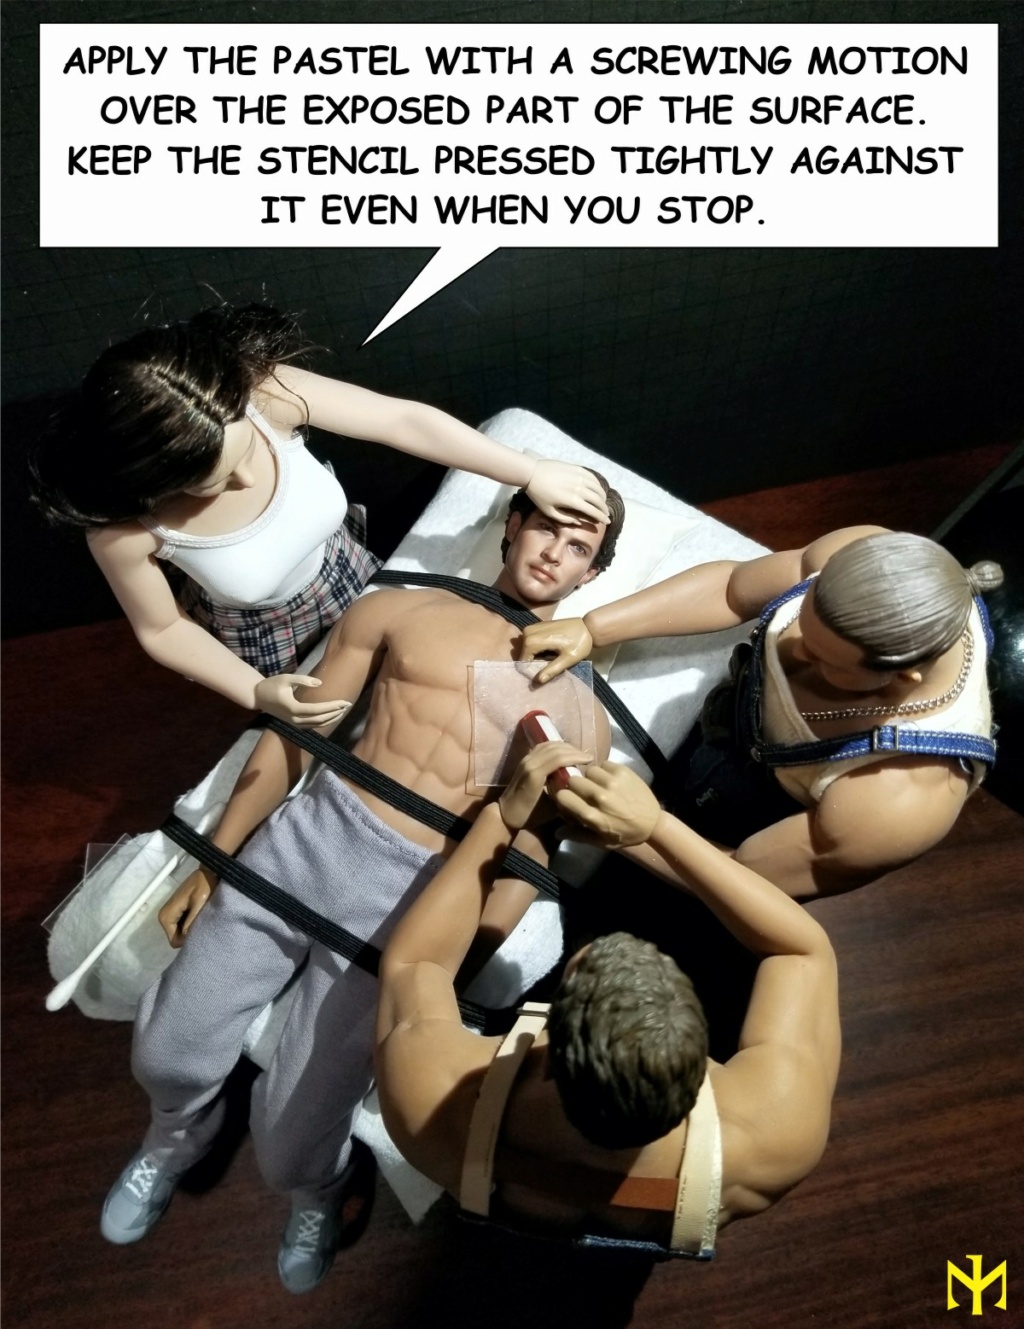
phicen - Painting TBLeague / Phicen Nipples Tutorial (updated with alternatives) Tblnt013

phicen - Painting TBLeague / Phicen Nipples Tutorial (updated with alternatives) Tblnt014

phicen - Painting TBLeague / Phicen Nipples Tutorial (updated with alternatives) Tblnt015

phicen - Painting TBLeague / Phicen Nipples Tutorial (updated with alternatives) Tblnt016

phicen - Painting TBLeague / Phicen Nipples Tutorial (updated with alternatives) Tblnt017

phicen - Painting TBLeague / Phicen Nipples Tutorial (updated with alternatives) Tblnt018

phicen - Painting TBLeague / Phicen Nipples Tutorial (updated with alternatives) Tblnt110

phicen - Painting TBLeague / Phicen Nipples Tutorial (updated with alternatives) Tblnt111

phicen - Painting TBLeague / Phicen Nipples Tutorial (updated with alternatives) Tblnt112

phicen - Painting TBLeague / Phicen Nipples Tutorial (updated with alternatives) Tblnt113

And, just in case something wasn't clear, here is what I call a zoom-in replay for initial painting stage:
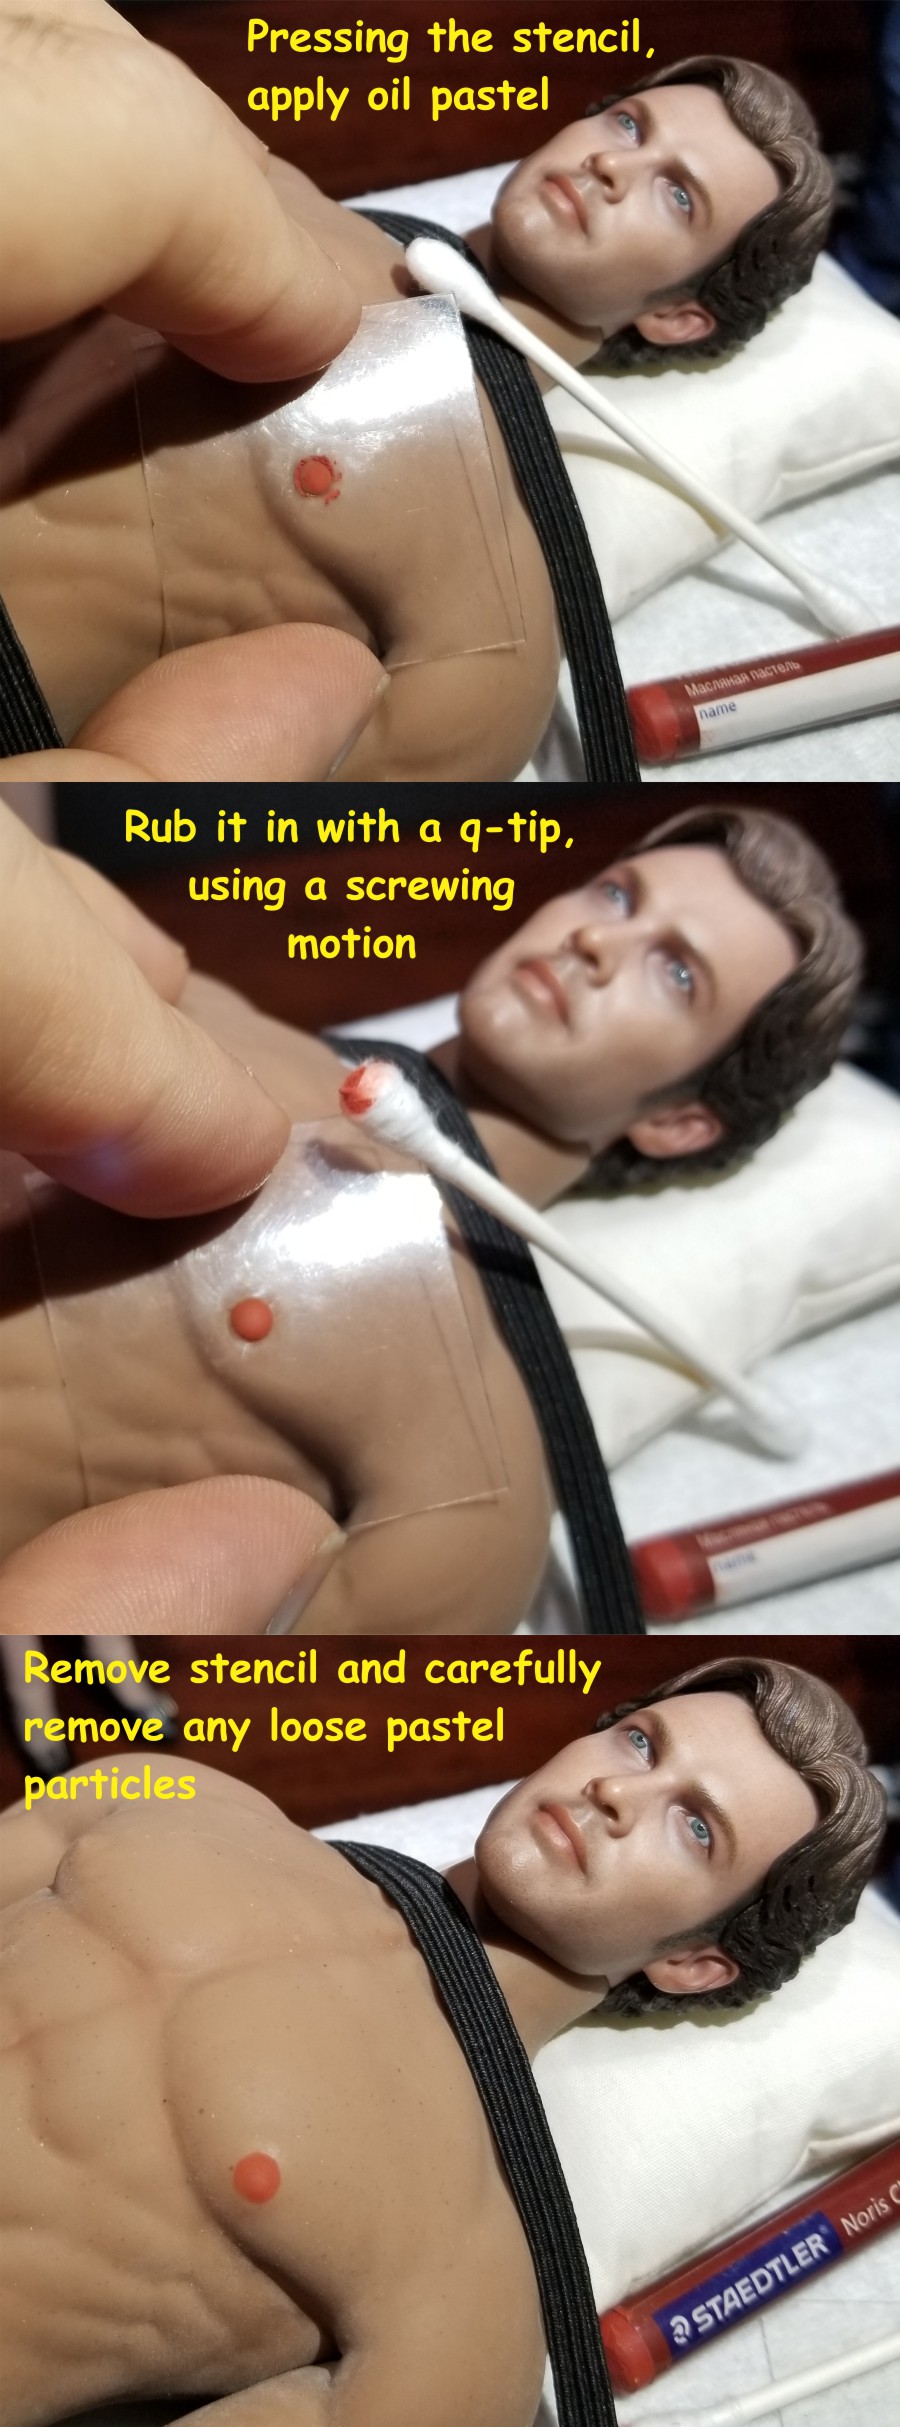
phicen - Painting TBLeague / Phicen Nipples Tutorial (updated with alternatives) Tblnt114

The same or analogous stencil and oil pastels method can be used to paint other areas or designs on the seamless bodies. If using a Jiaou body, remember that its TPE surface is less durable than the TBLeague/Phicen kind, and be very careful rubbing in oil pastel.

For alternatives methods, using Watercolor Pencils, see Posts 21-22 below; using Gundam Real Touch Markers, see Post 35 below.

(More photos in Post 35 below)
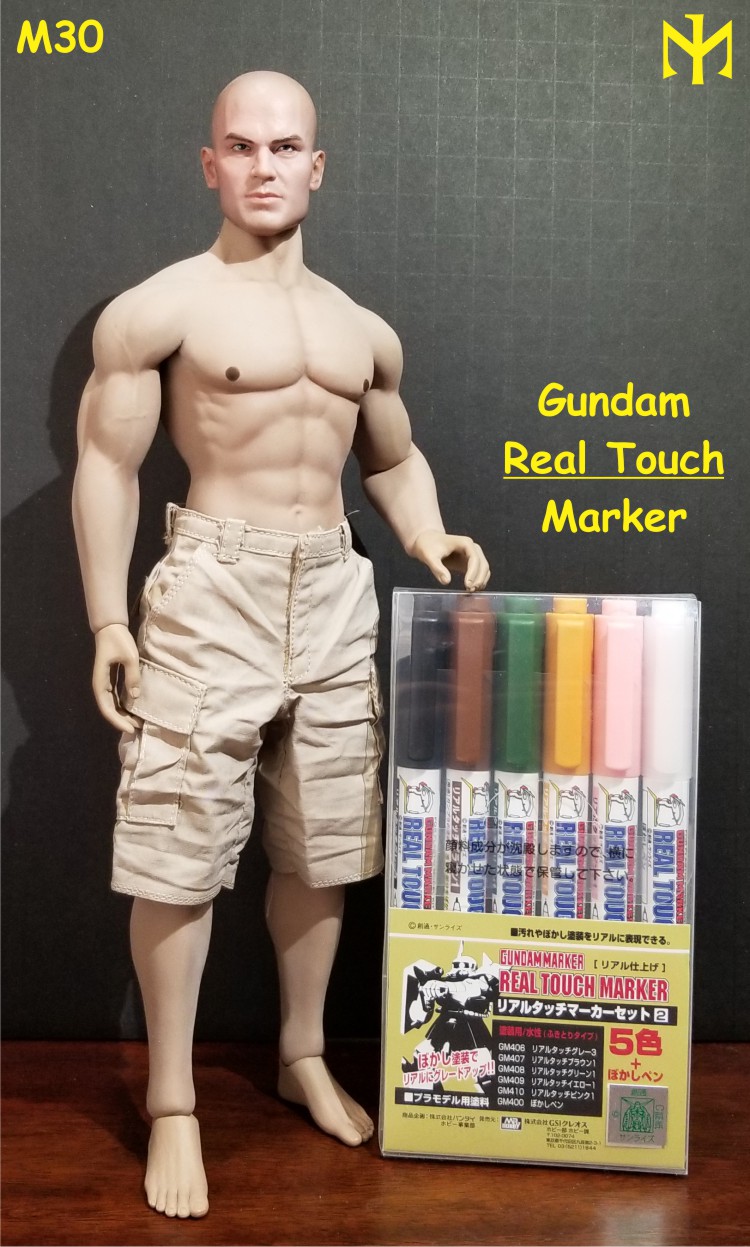
phicen - Painting TBLeague / Phicen Nipples Tutorial (updated with alternatives) Tblnt116
(More photos in Post 35 below)

Another Mistress Gina tutorial: TBLeague neck stuffing.

What do you think?

#tutorial #painting #tbleague #phicen #body #nipples #modification #custom #kitbash


_________________
I'll be back!
https://onesixthfigures.forumotion.com

skywalkersaga

skywalkersaga
Haha, this is great! The way they have him strapped down on the table is such hilarious overkill, lol. Thanks for the laugh, I always enjoy your imaginative tutorials. :'D

Using the rotary hole puncher and the piece of plastic to make a stencil is a brilliant idea, and should make the whole process a lot easier. The one and only time I have ever coloured a male tbleague's nipples was when I put together that custom Conan kit for my husband. Luckily the M35's nipples were large enough that I was able to just apply the pastel to the base of the q-tip and then sort of 'stamp' it onto the nipples directly. It was pure luck that I didn't miss, lol. Your solution will help in future to avoid potential slips of the hand. ;p


_________________
"The happy ending of the fairy tale, the myth, and the divine comedy of the soul, is to be read,
not as a contradiction, but as a transcendence of the universal tragedy of man."

Ignoring current 'official' Star Wars content for my own sanity.

Valiarde

Valiarde
You know something is iffy when the medical workers wear boiler suits. Good luck, Alden.

Nice tutorial and cool way of presenation Smile


_________________
The knight is darkest just before the dawn.

GubernatorFan

GubernatorFan
Founding Father
skywalkersaga wrote:Haha, this is great! The way they have him strapped down on the table is such hilarious overkill, lol. Thanks for the laugh, I always enjoy your imaginative tutorials. :'D

Using the rotary hole puncher and the piece of plastic to make a stencil is a brilliant idea, and should make the whole process a lot easier. The one and only time I have ever coloured a male tbleague's nipples was when I put together that custom Conan kit for my husband. Luckily the M35's nipples were large enough that I was able to just apply the pastel to the base of the q-tip and then sort of 'stamp' it onto the nipples directly. It was pure luck that I didn't miss, lol. Your solution will help in future to avoid potential slips of the hand. ;p

I'm delighted that you liked it and found it both useful and funny, Sky. Originally he was just going to stand there, held fast by the others, but then I thought an operating table sort of thing would both make better sense and be easier to work with. I'm glad the Conan kit worked out ok, I remember all the excitement about it. Yes, applying the oil pastel to the q-tip (especially maybe those smaller, harder hobby q-tips) might work, although I guess one can go "off road" more easily without a stencil. Like I mentioned, because this isn't quite as intensive an application as when you are painting a whole body, you can undo mistakes by washing off with soap and water, then try again. Theoretically, one could do the stencils with those hole punchers they sell for paper, but the holes tend to be a bit too large for our purposes -- hence the use of a rotary hole puncher, which offers smaller holes, and a whole range in one tool.

By the way, have you given up interest in Star Wars stuff?

Valiarde wrote:You know something is iffy when the medical workers wear boiler suits. Good luck, Alden. Nice tutorial and cool way of presenation Smile

Thank you very much, I'm glad you liked it. To be honest, as the story progressed (I'm more Epimetheus than Prometheus, so it really did sort of progress on its own), it occurred to me I should have given them medical outfits, but I didn't have enough in the way of those, or an easy way of getting to them. Similarly, the twist at the end also just kinda happened, although I've probably seen Eurotrip too often for my own good. Anyway, I just stuck to the figures I still had lying around kitted up from a previous presentation. I'm glad they worked.


_________________
I'll be back!
https://onesixthfigures.forumotion.com

Illusion

Illusion
such a hilarious presentation of a useful tutorial... excellent Laughing
looking forward to more of that kind...


_________________
Working tomorrow for a better today.

GubernatorFan

GubernatorFan
Founding Father
Illusion wrote:such a hilarious presentation of a useful tutorial... excellent Laughing
looking forward to more of that kind...

Thank you very much, I'm glad you liked it and found it useful and funny. Not exactly the same thing, but somewhat along these lines, check out the head conversion tutorial, https://onesixthfigures.forumotion.com/t310-head-conversion-tutorial-updated-with-part-iii-june-2019 , especially Part III (Post 31) and its spin-off story here: https://onesixthfigures.forumotion.com/t1852-star-wars-a-negative-body-image-story#24191

Hope you like it, too.


_________________
I'll be back!
https://onesixthfigures.forumotion.com

TravelGuide

TravelGuide
The story is very funny indeed. Nice work too.


_________________
Lexi is my (TBLeague) travel companion.
Lexi's holiday with Allison and Bernadette

skywalkersaga

skywalkersaga
GF -- you're right that the stencils give a lot more control. I will definitely try that method next time (once I get around to affording additional male bodies, that is), so I'm thankful you shared this. : )

GubernatorFan wrote:

By the way, have you given up interest in Star Wars stuff?

Aww, of course not! I'm still into Star Wars! :') But it's somewhat complicated.... I'll PM you. ; )


_________________
"The happy ending of the fairy tale, the myth, and the divine comedy of the soul, is to be read,
not as a contradiction, but as a transcendence of the universal tragedy of man."

Ignoring current 'official' Star Wars content for my own sanity.

GubernatorFan

GubernatorFan
Founding Father
skywalkersaga wrote:GF -- you're right that the stencils give a lot more control. I will definitely try that method next time (once I get around to affording additional male bodies, that is), so I'm thankful you shared this. : )

Just remember to press the stencil tightly onto the surface lest any loose oil pastel particles get where they shouldn't -- until you're done rubbing them in with the q-tip. In the worst case, you'd have to wash it off and start again, but it's a minor hassle that can be avoided.


_________________
I'll be back!
https://onesixthfigures.forumotion.com

GubernatorFan

GubernatorFan
Founding Father
TravelGuide wrote:The story is very funny indeed. Nice work too.

Thank you very much, I'm glad you liked them. PS Not my very best work -- I was a little distracted taking the progress photos for the tutorial, but I also didn't feel like washing off and starting anew.


_________________
I'll be back!
https://onesixthfigures.forumotion.com

Stryker2011

Stryker2011
Founding Father
That was pretty funny, and very informative. That poor guy is in for a world of hurt when the clamps arrive.


_________________
Mark

He who dies with the most toys wins!

phicen - Painting TBLeague / Phicen Nipples Tutorial (updated with alternatives) C8485110

GubernatorFan

GubernatorFan
Founding Father
Stryker2011 wrote:That was pretty funny, and very informative. That poor guy is in for a world of hurt when the clamps arrive.

Thank you very much. Glad you found it funny. I wouldn't know. Who invented those things anyway and do they serve any practical purpose? Just seemed like a bit of a twist (all puns intended) that could be thrown in at the end.


_________________
I'll be back!
https://onesixthfigures.forumotion.com

collectorofmany

collectorofmany
Lookie what I’ve got here...

phicen - Painting TBLeague / Phicen Nipples Tutorial (updated with alternatives) 56385810

I’ll post pics after they’re painted on!

GubernatorFan

GubernatorFan
Founding Father
That looks very promising, collectorofmany. Hope your foray into nipple painting (is it me or does this sound a little dirty?) goes well from the get go. If you are doing two colors like I did in the tutorial, assuming the sizes are the same or comparable to the ones on my leather punch (and I expect they are standard), I would use the smallest and third smallest, but you can check against the (faintly) molded nipple once you punch through the material. Remember, using transparent plastic for the material helps quite a bit. Also remember to wash off the protective powder locally before applying the pastel, and to reapply it when done.


_________________
I'll be back!
https://onesixthfigures.forumotion.com

skywalkersaga

skywalkersaga
Ok, sorry to slightly derail for a second, but whch headsculpt did you use for the lady on the s29b body in those pics?


_________________
"The happy ending of the fairy tale, the myth, and the divine comedy of the soul, is to be read,
not as a contradiction, but as a transcendence of the universal tragedy of man."

Ignoring current 'official' Star Wars content for my own sanity.

GubernatorFan

GubernatorFan
Founding Father
skywalkersaga wrote:Ok, sorry to slightly derail for a second, but whch headsculpt did you use for the lady on the s29b body in those pics?

This one is Stryker's fault (see post 16 in the TBLeague catalog thread). I think it is from the S09 set by TBLeague (back them Phicen). You can still find some of them around.


_________________
I'll be back!
https://onesixthfigures.forumotion.com

collectorofmany

collectorofmany
I ended up using the smallest hole on the tool with the dark maroon for the middle of the nipple, and I ended up using the second to largest hole on the tool with the peach-ish maroon for the larger area of the nipple. I’m not sure if my specific tool varied from the one you used, but the third from the smallest hole on my tool was just too small overall (looked barely larger than the smallest hole.) The only slip up (on my part) was when I was applying the color to the larger area on his left nipple (which is where I started) I think the clear plastic shifted ever so slightly, so that one is a tad larger in diameter than his right. Then again most real nipples are rarely the exact same size, so it is what it is. I’m pleased for sure!

Thanks for this tutorial, GF!

phicen - Painting TBLeague / Phicen Nipples Tutorial (updated with alternatives) 099f5310

GubernatorFan

GubernatorFan
Founding Father
Maybe the tools have different sized punches. Looks like you used appropriately-sized holes. I'm glad it turned out good from the first try. If you do want to fix it or gain more experience, you can try to wash it off with some warm water and soap. Takes a lot of scrubbing. Gentle but firm. Then try again. If you feel you need to, that is. While I'm short on patience, I tend to be OCD about getting these right, so more often than not it turns into a big fight. Smile


_________________
I'll be back!
https://onesixthfigures.forumotion.com

collectorofmany

collectorofmany
GubernatorFan wrote:Maybe the tools have different sized punches. Looks like you used appropriately-sized holes. I'm glad it turned out good from the first try. If you do want to fix it or gain more experience, you can try to wash it off with some warm water and soap. Takes a lot of scrubbing. Gentle but firm. Then try again. If you feel you need to, that is. While I'm short on patience, I tend to be OCD about getting these right, so more often than not it turns into a big fight. Smile

That flash on the photo makes it look way worse on that first photo. I did try to carefully take away a little off the top, lol! But it looks much better, for now. Next time I bath him (this sounds so weird in my head right now! Laughing ) I will likely correct the issue, unless it’s something that is harder to remove once it dries/cures down the line?

Here are a couple of better non-flash photos. While you can still see it’s not perfect, it does look much better to the naked eye.

phicen - Painting TBLeague / Phicen Nipples Tutorial (updated with alternatives) 7f8d6610phicen - Painting TBLeague / Phicen Nipples Tutorial (updated with alternatives) 97e2eb10phicen - Painting TBLeague / Phicen Nipples Tutorial (updated with alternatives) 5605df10

GubernatorFan

GubernatorFan
Founding Father
I agree, it is much less discernible without the flash. Speaking of flash, you will find that the protective powder -- or some protective powders -- tend to show with flash, and you might want to avoid using the flash when photographing your figures. Anyway, I don't think the passing of time would make washing off oil pastel detail from the body harder or easier. It is generally a hard thing to do, even if just applied. Don't scrub with anything abrasive, just use water, soap, and your fingers. It comes out eventually, after some effort and repetition. Which is what is so great about the oil pastel method -- it is practically permanent, unless you really want to reverse it. Smile That said, I haven't tried reversing it on something that has stayed colored for a very long time, and I don't know how good it is going to look if you try to remove an oil pastel treatment to the whole body surface (i.e., whether it can wash off completely and evenly, without leaving any trace at all).


_________________
I'll be back!
https://onesixthfigures.forumotion.com

Alcina2k


Hello 👋
I am new here at this forum (brilliant forum BTW) - I will try the stencil method with faber castell Albrecht Dürer (AD) watercolor pencil for the nipple of my M34 this weekend... AD is the highest colour saturation for FC’s watercolor pencil...
About the permanence of water colour pencil - i have tried on some of the “unused” parts for M33. I did the usual prep with the part (washing away the powder with water) - i use the pencil directly in the silicone surface... it take a few gentle stroke of the pencil on the surface for the colour to catch - and the colour would go from very light to darker shades as one continues to apply .... I also attempted to blend the two shade of browns together - and it works well - I think the key is patience.
What surprises me is how “permanent” the colour was .... after I coloured  the parts - I tried to wash off the colours with dishwashing detergent (pretty harsh soap I would think...) and the colour did not come off at all!
I think oil pastel is great and it gives a very brilliant colour and with the stencil method it also give great demarcation of the color border. I am fairly happy with the experience with the M33 spare parts. So this weekend I will be strapping Paolo (M34) down a la mode GubernatorFans and give his naughty nipples the colour treatment.  I love the stencil method as I believe it will give an extra protection as well as will provide uniformity in size...
I think watercolour pencil might be “safer” to use as it take a few many strokes for the silicone surface to register the colour. But Once the colour is on ... it is ON Smile

Alcina2k


phicen - Painting TBLeague / Phicen Nipples Tutorial (updated with alternatives) F1b8c010
Seems to be fairly nice - I am happy with the results

Stryker2011

Stryker2011
Founding Father
Welcome aboard, Alcina2k. Looks like you did a good job.


_________________
Mark

He who dies with the most toys wins!

phicen - Painting TBLeague / Phicen Nipples Tutorial (updated with alternatives) C8485110

24phicen - Painting TBLeague / Phicen Nipples Tutorial (updated with alternatives) Empty Faber-C Watercolour pencil on Phicen Fri Mar 26, 2021 12:47 pm

Alcina2k


Stryker2011 wrote:Welcome aboard, Alcina2k. Looks like you did a good job.
Thanks - I am pretty happy about the result.
The stencil is good to have as well... so I do not go over the edge of the nipple.
Definitely a softer look. I think if i kept going the colour would have been even more deep - but this is the intensity I wanted so it is all good!

collectorofmany

collectorofmany
Alcina2k wrote:phicen - Painting TBLeague / Phicen Nipples Tutorial (updated with alternatives) F1b8c010
Seems to be fairly nice - I am happy with the results

Wow! This colored pencil method seems to work just as well! I also like how much more natural the colors you chose were. Great job, Alcina2k!


_________________
—Steven

Sponsored content


Back to top  Message [Page 1 of 3]

Go to page : 1, 2, 3  Next

Permissions in this forum:
You cannot reply to topics in this forum