OneSixthFigures
Would you like to react to this message? Create an account in a few clicks or log in to continue.
OneSixthFigures

An online community to discuss and share news about sixth-scale figures, with an emphasis on either custom or commercial articulated figures.


You are not connected. Please login or register

My first ever Diorama

Go to page : 1, 2  Next

Go down  Message [Page 1 of 2]

1My first ever Diorama Empty My first ever Diorama Sat Sep 10, 2022 11:10 pm

MeMyself&I

MeMyself&I
Gub/Stryker and the powers that be, if this needs to be combined, or moved, then please do so. I am only starting a new topic as I am going to go through the process of the dio I made and am not sure where would be best.

*Warning, LONG post incoming*

Hello all!

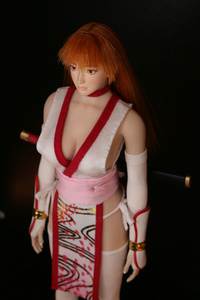
A couple months back I completed my first ever custom figure (Kasumi. Though ironically she was not the first completed figure I posted about (Ayane)) and made a post about her here.

A few months later (and about 3 weeks ago) I completed her new home, my first diorama. This post will show the process I went through, and talk about the good, the idiotic, and the things I would do differently for the future. It isn't exactly a tutorial, but if it is, learn from my stupidity!

Preparation

I started planning this back in early 2021 as I knew I would want to show Kasumi off. I had never attempted this sort of thing before but I knew I wanted it to be on theme for the character. It started as being something I could fit in an IKEA cabinet, but I realized that I did not like the look of it. See, I had one requirement I am not willing to bend on: The boring museum pose. This was, from all I could tell, the safest pose for her in the long run. Her diorama would need to accommodate this and well.

The trick was that I needed her to stand on a flat surface, but still utilize her display arm (gotta love the S07C and the floppy feet brigade). Having never done this before my thought immediately turned to a wooden based display case. I contacted a friend who does woodworking and talked him through my plan. By this point I was looking at a display with about a 20"x18"x12" interior. He agreed to make it.

While he was busy with that project, I turned my attention to the design of the dio itself and the main feature: Trees. Not just any trees mind you, but Sakura trees (Cherry Blossom trees). If there is anything that is more "on theme" with Kasumi, I don't know about it (for those that don't know, one of her dodges in the DOA games is to teleport, which results in the opponent attacking through a cloud of cherry blossom petals).

It was now early spring 2022 and the red bud tree in my parents front yard needed a good trim after the winter. By this point I had my display case (which turned out great!) though the design was still alluding me aside from "it has trees." Using the branches from the tree in the yard, I started to figure out the layout a bit more.

My first ever Diorama Img_9412

My first ever Diorama Img_9413

The branches that had been cut down were perfect. Not too thick, not too thin, I could make them work in a number of ways. I found their general position and, once happy with that, moved on to the rest.

I decided that I wanted a pathway. Now, weight was never a concern for me as my desire to keep her safe outweighed ease of transport. I decided to go with backsplash tile to mimic the paths one might see in a garden. I started with a small, grey, 6 sided tile and worked it into a path inside the case which had the bottom lined with paper so I could better make a blueprint of the design.

My first ever Diorama Img_9414
My first ever Diorama Img_9415

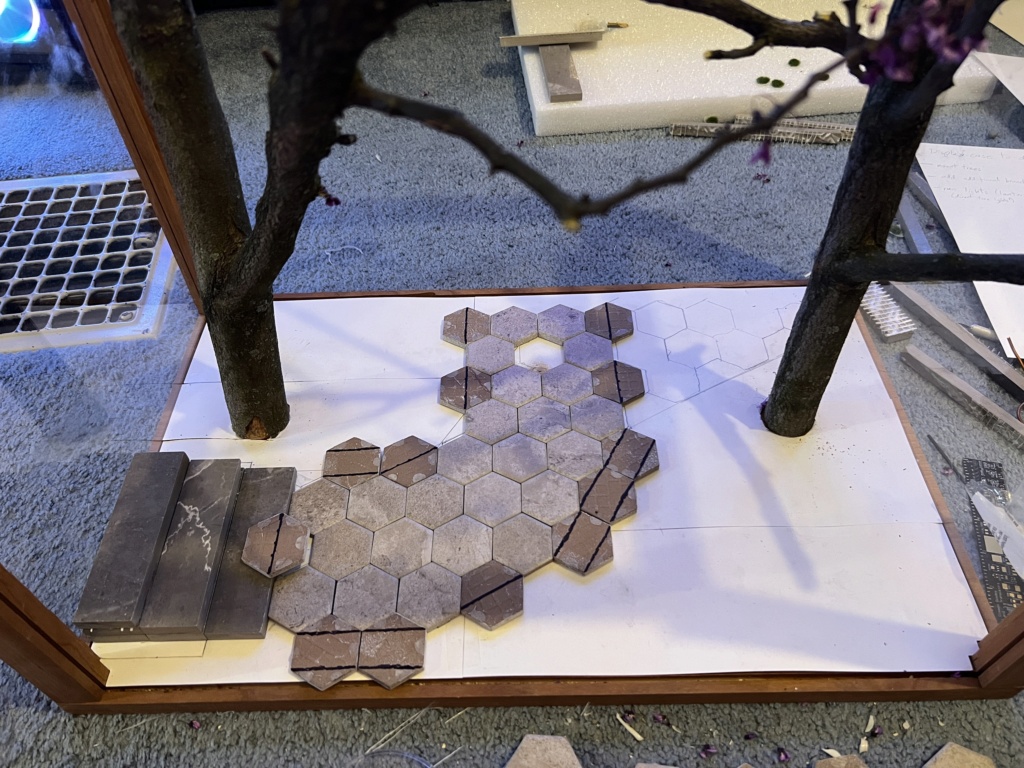
There were originally going to be some steps, as if she was going to walk along and up them towards something. I also used some wire and clay to mimic lanterns in the trees as I knew I wanted that feature at this point in the process. Since I had some earlier versions of Kasumi's outfit and head sculpt stashed, I threw together a stand-in to help me visualize it all.

My first ever Diorama Img_9416

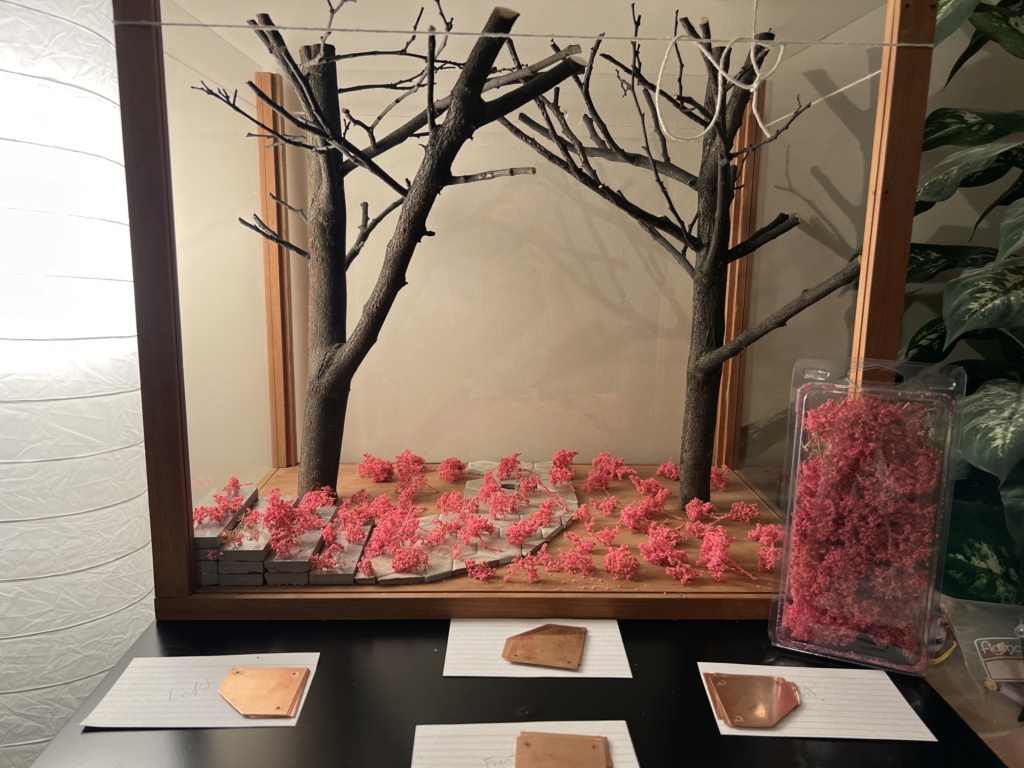
I was pretty content with the overall look, so I moved on to filling out the trees. As you may know from the pictures, Sakura trees are pretty full when in bloom, so much so that it is a WALL of pink and white. I needed to add branches to my main trees. I cut smaller branches, used a Dremel, some thick wire and a pin vise to get it all dry fitted.

My first ever Diorama Img_9610
My first ever Diorama Img_9611

I then baked it all off, used some superglue, and put it all together. Next came imitating the pink and white petals, which thanks to a few different youtubers (Luke Towan, Geek Gaming Scenics) I was able to find what I needed. The foliage is mainly a hot pink foam flock covered sea foam that I hit with some spray adhesive and covered in white/pink foam flocking. The result was fantastic!

My first ever Diorama Img_9716
My first ever Diorama Img_9911
My first ever Diorama Img_9910

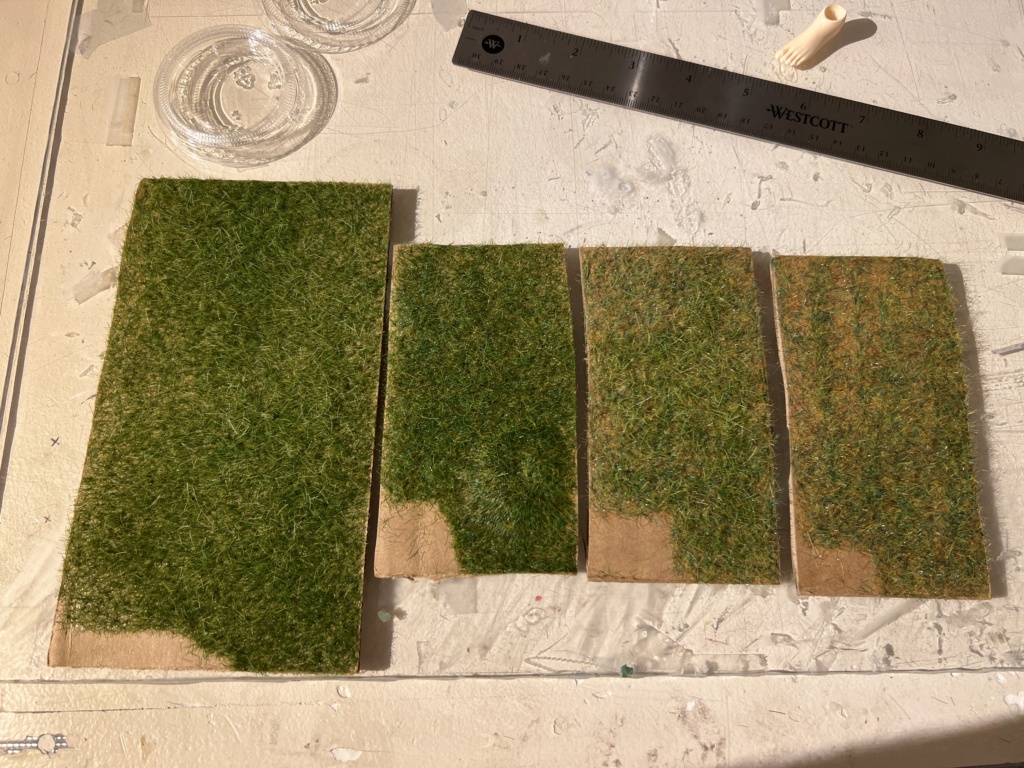
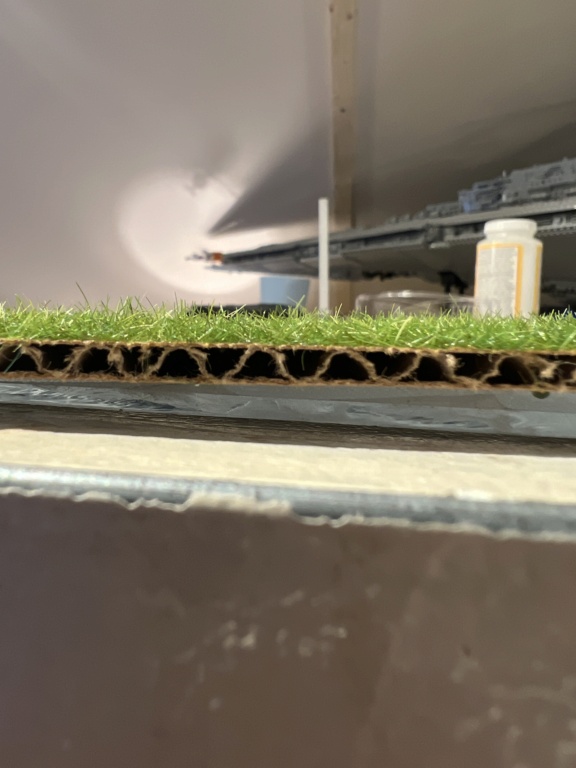
Next was the grass (ignore that lantern for a moment). Really pulling heavily on the youtube creators, I learned what is the single most satisfying (if not messy) part of this: Static Grass. Using some cardboard I learned the dos and don'ts of this, as well as what colors I wanted. I ran with a more vibrant grass (this is set in spring after all). One thing was clear at this point, the color pallet was going to be rich and vibrant.

My first ever Diorama 67816011
My first ever Diorama 67816010

The last bit of prep to do was the lanterns and lighting. How to do all of this?

Thanks again to the youtube crowd (especially with the wiring part) I was able to figure out how to run a total of 20 LEDs and not burn the whole thing down and not run it off battery. The lantern design was trial and error, but after a few attempts I went with "simple is better" and made the design you saw above.

continued...

2My first ever Diorama Empty Re: My first ever Diorama Sat Sep 10, 2022 11:54 pm

MeMyself&I

MeMyself&I
Building

Now for the fun part! Putting it all together.

Step 1 was the lanterns. Since they were wired, they would require the most time. I made the lanterns out of balsa wood, cut to size using a general template and glued together in 4 separate pieces for each lantern. I needed 20 lanterns, and yes, my hand was very tired at the end! Using my air brush I hit all the pieces with Vallejo Mahogany Brown, and when dry I weathered them using some sand paper. I used some yellow tissue paper that I glued several layers together with clear school glue on a piece of plastic to make the inserts for the lanterns. I then glued it all together very carefully. I forgot to grab a pic of all the LEDs attached, but you can imagine the mess lol.

My first ever Diorama Img_9914
My first ever Diorama Img_9913
My first ever Diorama Img_9912My first ever Diorama Img_9915
My first ever Diorama Img_9916

I had one more light source (technically 2?) to make: The lamp posts. I wanted more traditional themed again, so I came up with what you see below. Classic red color, black roof, gold accent, and nice and bright. I used styrene tubes running along the back of the post to run the wire for the LED so it would be hidden. I now had 22 LEDs (all painted over with sand yellow paint to help dull the brightness) ready to roll.

My first ever Diorama Img_0013
My first ever Diorama Img_0011
My first ever Diorama Img_0012
My first ever Diorama Img_0014

All these wires presented a problem: hiding them in the trees. My solution? Mod Podge and dirt. Not only did it blend amazingly well with the bark of the trees, but would hold and hide the wires for the long haul. Nothing about this build is meant to leave, so I was happy. The best part of the wiring was that it all used quick connects, so I could easily work with each tree. Testing it all out and, well Smile

My first ever Diorama Img_0015
My first ever Diorama Img_0016
My first ever Diorama Img_0017


**You may have noticed at this point that the pathway and tile used changed, uh, drastically. Well, I found a much better and more similar to an actual Japanese garden option at Lowes, so I switched to that.

Now for the delicate part: adding the foliage. It was a simple process, just take what was made and carefully glue it on until satisfied with the coverage.

My first ever Diorama Img_0018

Putting it all together

It was time to put it all together, so I started with the base for the ground: Sculpt-a-mold. Great product, easy to use. Took nearly a 3lb bag. I had all the wires ran and covered in electrical tape to protect them, as well as having some strips of wood glued down to help things hold. I used some pipe insulation I had around from another project to keep the spots for the trees open. I spread the plaster out, cleaned up the stone, and let it dry.

My first ever Diorama Img_0019
My first ever Diorama Img_0020

I then painted it a dark brown to hide the white of the plaster, put on some mod podge once dry and went to town with dirt.

My first ever Diorama Img_0021
My first ever Diorama Img_0022


Next was the fun part: static grass. I would know reallllly quick if I liked the look. The richness of the grass and the black of the stone mixed perfectly with the red of the lamp posts (which had to be added ahead of time because of how the wiring worked out).

My first ever Diorama Img_0023
My first ever Diorama Img_0024


The final major step, which I did not grab photos of, was to add the trees and do final details. Lets just say that between the wire pins, plaster, and 5 minute Loctite epoxy, those trees are going nowhere.

Lastly, I did the final details such as flocking around base of the trees, and scattering the Sakura petal foam flocking around generously to mimic the ground cover one would normally see.

Continued...

3My first ever Diorama Empty Re: My first ever Diorama Sun Sep 11, 2022 12:06 am

MeMyself&I

MeMyself&I
This was not as simple as those two posts make it seem (if it did at all). There were numerous issues that I needed to work around.

First, the display should have been a "shell" and not a "case." Namely, no bottom. I should have taken the hint and used hard foam. I forgot how wood reacts to moisture. Generally it is fine, but the plaster did some work on it, not to mention a typical, hot and humid Mid-West USA summer. The bow runs the depth of the case, not the width, so my goals for how she displays were not ruined. I am already planning a better version of this (I'm a perfectionist) where it is a foam base with a nice wood trim and actual glass instead of plexi (and a cooling system because I am crazy). Lesson = learned.

Second, plexiglass side panels were a bad idea. They suck to work with, and the above issue made them a royal nightmare. The worst part though, despite making it work and work well, was that it hit about 70F and 60+% humidity inside with the panels on. The room temp is about 65F and 45% humidity on a 85F day outside. Simply not acceptable conditions. I was not happy about it, because protection from the elements like dust, but I had to leave the panels off. Will be great for transport, but not for display. She is protected pretty well by the trees thankfully.

Third, and this is a true #firstworldproblem, but my camera hates the lighting. It is a Canon 70D, and has seen a TON of action from my years as a wedding photog, so it's time might just be up. I can't do much with the lighting overall, and this camera has always been weird in low light. No sense in blasting a night scene with light, right? I hope I can upgrade in the future, but it is not a priority.

If you made it until the end, thank you! Thank you all for the support. She is special to me, so any other dioramas will be much less, uh, "ambitious." Thank you all again!

4My first ever Diorama Empty Re: My first ever Diorama Sun Sep 11, 2022 12:51 am

brassco

brassco
Fun! The time spent would be so worth it, when u have completed it! Exactly the way you wanted!

Till now, I haven't even did something like what you did...merely off the box with whatever was provided.

Have fun!

5My first ever Diorama Empty Re: My first ever Diorama Sun Sep 11, 2022 4:58 am

shazzdan

shazzdan
Nice job. You may have to switch off the lanterns (or turn down the brightness) and use external lighting for the photos. Just use the lanterns for live display.


_________________
More of my work can be found at One Sixth Arsenal
https://www.etsy.com/au/shop/OneSixthArsenal

6My first ever Diorama Empty Re: My first ever Diorama Sun Sep 11, 2022 6:21 am

Diana

Diana
More ambitious projects PLEASE! Very Happy

Love the lanterns, the trees, the grass (what's static about it?), the lanterns, the uneven ground, ... admittedly I really liked your first design with that curved path and the steps. That made it look like a more complete environment, but this works, too, of course.

And the lessons learned are just as valuable. Thank you so much for documenting and sharing your progress. 💚🌸💚

7My first ever Diorama Empty Re: My first ever Diorama Sun Sep 11, 2022 7:00 am

Lynkhart

Lynkhart
DUDE. This is incredible and it’s your first dio???? Damn, I can’t wait to see what you create in the future in that case because…wow. 😍


_________________
- - lastalliancestudios.blogspot.co.uk - -
http://lastalliancestudios.blogspot.co.uk

8My first ever Diorama Empty Re: My first ever Diorama Sun Sep 11, 2022 10:25 am

TravelGuide

TravelGuide
If this is your first dio without previous experience, then you did an awesome job!
Diana wrote: the grass (what's static about it?)
Static grass is a way of applying the grassfibers so they stand upright (using static electricity).


_________________
Lexi is my (TBLeague) travel companion.
Lexi's holiday with Allison and Bernadette

9My first ever Diorama Empty Re: My first ever Diorama Sun Sep 11, 2022 2:50 pm

Stryker2011

Stryker2011
Founding Father
Beautiful work, and the behind the scenes information is excellent. Fantastic work.


_________________
Mark

He who dies with the most toys wins!

My first ever Diorama C8485110

10My first ever Diorama Empty Re: My first ever Diorama Sun Sep 11, 2022 2:54 pm

GubernatorFan

GubernatorFan
Founding Father
Like the others, I'm very impressed. That it was your first time and that you are on to further improvements, even more so. Ambitious and very successful, even if you are going to do it again and better. A complicated and thorough job that certainly looked very good. But I also understand perfectionism and how some invisible flow you know about can eat at you. Looking forward to seeing what you do next, with this or another project.


_________________
I'll be back!
https://onesixthfigures.forumotion.com

11My first ever Diorama Empty Re: My first ever Diorama Sun Sep 11, 2022 3:15 pm

MeMyself&I

MeMyself&I
brassco wrote:Fun! The time spent would be so worth it, when u have completed it! Exactly the way you wanted!

Till now, I haven't even did something like what you did...merely off the box with whatever was provided.

Have fun!

That was the best part of this whole process, making it how I wanted. Definitely some areas to improve upon, but for now it is just fine Smile

shazzdan wrote:Nice job. You may have to switch off the lanterns (or turn down the brightness) and use external lighting for the photos. Just use the lanterns for live display.

Thanks! The "day time" photos are generally fine, and I have some good images of it that way. The spot it sits makes it hard to manage my lighting in general, especially any backfill as I have minimal room to physically put any controlled lighting. The lanterns are not dimmable (something for V2, so that's a great idea!), so for "night time" shots and those more moody shots I need to trust my camera. The 70D is an old boy, and compared to the current stuff I might as well be on film (I was able to use the Sony alpha 7iii and 7iv at my old job, but I don't own either. Those cameras couldn't care less about your lighting, there was so much they could do). All things that can be improved, but in the future Smile

Diana wrote:More ambitious projects PLEASE! Very Happy

Love the lanterns, the trees, the grass (what's static about it?), the lanterns, the uneven ground, ... admittedly I really liked your first design with that curved path and the steps. That made it look like a more complete environment, but this works, too, of course.

And the lessons learned are just as valuable. Thank you so much for documenting and sharing your progress.  💚🌸💚

Thanks! And more ambitious stuff is the plan (a real ambitious one is floating around in my mind, but I physically do not have the space for it lol) Smile

As TravelGuide said, static grass is a material that uses static electricity to make it stand up. It is made of nylon fibers, which takes to static like one's hair to a balloon. You have an applicator that you fill with the grass (any length between 1mm up to 12mm, and in a combo even of sizes), and it creates a charge in the chamber with the grass. The applicator has a sort of "sifter" kind of top so the grass is able to come out. There is a ground wire that comes out that you touch to the base you are looking to cover that will complete the circuit and create the field. Tip the applicator over, shake gently an inch or so above the base (which has glue on it), and in seconds you have a field of grass! Once the glue is dry, use a vacuum to get up the excess (a stocking is great for collecting the excess to use later). Once you've done it once or twice, super easy to do and satisfying in a way I can't describe.

As for the path, I just felt that the original path just wasn't right for it. The more I looked at the mockup, the more it just didn't sit well. Seemed like it led to nowhere, and that bothered me. lol. The darker stone and straight path just sat so much better with me. As you said though, it works too Smile

Lynkhart wrote:DUDE. This is incredible and it’s your first dio???? Damn, I can’t wait to see what you create in the future in that case because…wow. 😍

Thanks!! That means a lot!

TravelGuide wrote:If this is your first dio without previous experience, then you did an awesome job!

Thanks! I cannot stress enough the quality of instruction from Luke Towan's youtube channel. Dude may well be the best out there.

Stryker2011 wrote:Beautiful work, and the behind the scenes information is excellent. Fantastic work.

Thanks Stryker!

GubernatorFan wrote:Like the others, I'm very impressed. That it was your first time and that you are on to further improvements, even more so. Ambitious and very successful, even if you are going to do it again and better. A complicated and thorough job that certainly looked very good. But I also understand perfectionism and how some invisible flow you know about can eat at you. Looking forward to seeing what you do next, with this or another project.

Thanks Gub! Yeah, there are a bunch of little things that I saw and went "well ****, can't fix that now..." One wouldn't notice normally, but I notice. lol. The next project is being decided still, and will be a much smaller scale. I don't even know for which figure yet.

As a side note, I have to say that a favorite part of this is that the display arm is practically invisible.

12My first ever Diorama Empty Re: My first ever Diorama Mon Sep 12, 2022 11:28 am

Diana

Diana
TravelGuide wrote:Static grass is a way of applying the grassfibers so they stand upright (using static electricity).

I had a feeling it was going in this direction though I was wondering whether it was a product or a technique. Smile

MeMyself&I wrote:As TravelGuide said, static grass is a material that uses static electricity to make it stand up. It is made of nylon fibers, which takes to static like one's hair to a balloon. You have an applicator that you fill with the grass (any length between 1mm up to 12mm, and in a combo even of sizes), and it creates a charge in the chamber with the grass. The applicator has a sort of "sifter" kind of top so the grass is able to come out. There is a ground wire that comes out that you touch to the base you are looking to cover that will complete the circuit and create the field. Tip the applicator over, shake gently an inch or so above the base (which has glue on it), and in seconds you have a field of grass! Once the glue is dry, use a vacuum to get up the excess (a stocking is great for collecting the excess to use later). Once you've done it once or twice, super easy to do and satisfying in a way I can't describe.

Aww, thank you for explaining! That's a good one to know about! Very Happy

13My first ever Diorama Empty Re: My first ever Diorama Mon Sep 12, 2022 12:37 pm

skywalkersaga

skywalkersaga
Wow, I missed this earlier.... extremely impressive work, especially for your first one! You can tell how much you love this character that you put so much effort into a dio for her. Beautiful!


_________________
"The happy ending of the fairy tale, the myth, and the divine comedy of the soul, is to be read,
not as a contradiction, but as a transcendence of the universal tragedy of man."

Ignoring current 'official' Star Wars content for my own sanity.

14My first ever Diorama Empty Re: My first ever Diorama Mon Sep 12, 2022 12:38 pm

Stryker2011

Stryker2011
Founding Father
Thanks for the explanation on the grass. Brilliant technique.


_________________
Mark

He who dies with the most toys wins!

My first ever Diorama C8485110

15My first ever Diorama Empty Re: My first ever Diorama Mon Sep 12, 2022 10:28 pm

MeMyself&I

MeMyself&I
Diana wrote:
TravelGuide wrote:Static grass is a way of applying the grassfibers so they stand upright (using static electricity).

I had a feeling it was going in this direction though I was wondering whether it was a product or a technique. Smile

MeMyself&I wrote:As TravelGuide said, static grass is a material that uses static electricity to make it stand up. It is made of nylon fibers, which takes to static like one's hair to a balloon. You have an applicator that you fill with the grass (any length between 1mm up to 12mm, and in a combo even of sizes), and it creates a charge in the chamber with the grass. The applicator has a sort of "sifter" kind of top so the grass is able to come out. There is a ground wire that comes out that you touch to the base you are looking to cover that will complete the circuit and create the field. Tip the applicator over, shake gently an inch or so above the base (which has glue on it), and in seconds you have a field of grass! Once the glue is dry, use a vacuum to get up the excess (a stocking is great for collecting the excess to use later). Once you've done it once or twice, super easy to do and satisfying in a way I can't describe.

Aww, thank you for explaining! That's a good one to know about! Very Happy

Stryker2011 wrote:Thanks for the explanation on the grass. Brilliant technique.

skywalkersaga wrote:Wow, I missed this earlier.... extremely impressive work, especially for your first one! You can tell how much you love this character that you put so much effort into a dio for her. Beautiful!


Thank you Sky!

For those interested, go to 10:30 in this video to see a fairly simple and quick application of static grass. It's such an easy technique, though the grass ain't cheap ( Shocked  ). Easily the most fun part of putting it all together!

16My first ever Diorama Empty Re: My first ever Diorama Tue Sep 13, 2022 2:06 am

BAMComix

BAMComix
Very clever, it looks amazing. Looking forward too seeing more as it progress's

17My first ever Diorama Empty Re: My first ever Diorama Tue Sep 13, 2022 2:36 pm

Valiarde

Valiarde
Well done! Thoughtful planning and learning to do modelling is great fun. And you even made a "real diorama" = lightbox.
The lanterns are awesome, always a fan of LED stuff. making them all by yourself is impressive. I guess I would have used fairy lights or sth bc I'm bad at electronic stuff lol

Very cool love the result.


_________________
The knight is darkest just before the dawn.

18My first ever Diorama Empty Re: My first ever Diorama Tue Sep 13, 2022 3:31 pm

davidd

davidd
I'm impressed that you chose to work with wired LED lighting run from a plug-in source rather than with battery-operated fairy lights. That added a level of challenge to the project.

The cherry blossoms are truly astonishing in their realism.

19My first ever Diorama Empty Re: My first ever Diorama Wed Sep 14, 2022 12:48 am

MeMyself&I

MeMyself&I
BAMComix wrote:Very clever, it looks amazing. Looking forward too seeing more as it progress's

Thanks! It's done btw, I guess I didn't make that super clear earlier, sorry about that! Finished pics coming.

Valiarde wrote:Well done! Thoughtful planning and learning to do modeling is great fun. And you even made a "real diorama" = lightbox.
The lanterns are awesome, always a fan of LED stuff. making them all by yourself is impressive. I guess I would have used fairy lights or sth bc I'm bad at electronic stuff lol

Very cool love the result.

Thanks! Building it all was very fun and satisfying. I was terrified to do the electrical on this as I too am not so great with electrical work. But youtube to the rescue, plus bouncing things off my electrician dad helped. It all worked out in the end and nothing burned down  lol!  lol!  lol!

davidd wrote:I'm impressed that you chose to work with wired LED lighting run from a plug-in source rather than with battery-operated fairy lights. That added a level of challenge to the project.

The cherry blossoms are truly astonishing in their realism.

Thanks! I was extremely happy with the cherry blossom effect when I first tried it out. I sealed it all with a misting of Dulcoat, so I hope to avoid fading for awhile.

So the reason I went wired instead of battery powered is pretty simple at the end of the day: I have smart switches. TpLink Kasa switches to be exact. Don't get me wrong, I spent a full day wiring this. However, the fact I can now set a schedule for it to turn on and off at, turn it on at will, or tie it in with any of my other smart lights, was worth the trouble. I do have fairy lights, but with the way everything is spaced in the dio, I determined it would be more difficult to add them plus hide the battery pack. I've got an idea for them though, which just popped into my mind. Smile


All that said, I went after work today and picked up some good ol' black felt. I was thinking about Shazzdan's comment about the lanterns, as well as Valiarde's "lightbox" comment and I thought "what if....". The dio itself is positioned where it has about 2in from the wall, the corner pieces are solid and the top is sealed. I could, if careful, try a new backdrop. So I did. I played with some lighting, and my camera's settings (including shooting through wifi off a tripod to remove any shaky hands) as well. I can't say they're perfect, but they are an improvement and are better than a rushed phone pic.

My first ever Diorama Img_1415
My first ever Diorama Img_1416
My first ever Diorama Img_1419
My first ever Diorama Img_1420
My first ever Diorama Img_1421
My first ever Diorama Img_1422
My first ever Diorama Img_1424
My first ever Diorama Img_1423
My first ever Diorama Img_1425

20My first ever Diorama Empty Re: My first ever Diorama Wed Sep 14, 2022 12:55 am

GubernatorFan

GubernatorFan
Founding Father
I'm glad to see the finished diorama in its full effect. Simply magical. Beautifully done! I know there are things we do not see that could bear improvements, as you indicated. But from what we can see, the only thing that could improve this is a slightly less assembly-line pose. It doesn't have to be extreme at all to look natural. Or perhaps this is how she appears in source material, I wouldn't know.


_________________
I'll be back!
https://onesixthfigures.forumotion.com

21My first ever Diorama Empty Re: My first ever Diorama Wed Sep 14, 2022 2:03 am

BAMComix

BAMComix
Stunning work Very Happy .

22My first ever Diorama Empty Re: My first ever Diorama Wed Sep 14, 2022 2:09 am

csyeung

csyeung
Whoa this looks amazing! Thanks for sharing the process! Always great to see handcrafted dioramas. I think the lanterns are the best part and I learned about the static grass. Did you end up buying one of those contraptions in the video?


_________________
Craig

23My first ever Diorama Empty Re: My first ever Diorama Wed Sep 14, 2022 6:35 am

Diana

Diana
Oooh, these photos are even better. Good call on the black backdrop!

24My first ever Diorama Empty Re: My first ever Diorama Wed Sep 14, 2022 8:14 am

blackpool

blackpool
wooooaaaaaaaaa... Amazing work!!! The result is absolutely stunning, those last pictures are so atmospheric!!! Phenomenal work, and superb creation!

25My first ever Diorama Empty Re: My first ever Diorama Wed Sep 14, 2022 9:05 am

ukshaun

ukshaun
Good work!

Starting with the 1st image, i thought it looked like a Vivarium. As worked progressed, things picked up.
One area i really like, is the floor constructed of hexagonal tiles.
The light up lanterns look excellent!

..later on, the blossom floor works well.

https://www.youtube.com/channel/UCmPNvCoky6KhyaPUd25EHgw/videos?

Sponsored content


Back to top  Message [Page 1 of 2]

Go to page : 1, 2  Next

Permissions in this forum:
You cannot reply to topics in this forum