OneSixthFigures

An online community to discuss and share news about sixth-scale figures, with an emphasis on either custom or commercial articulated figures.


You are not connected. Please login or register

OneSixthFigures » Advanced Search

Go to page : 1, 2, 3, 4, 5  Next

Search found 115 matches for custom

Star Ace James Dean head repaint - Fri Mar 26, 2021 4:31 pm

Seems like almost a pattern. Just as in the case of Freddie Mercury (see the customized result HERE), I have no special attachment to James Dean, but when I saw the Star Ace head parted out, I thought it had potential that even my feeble skills could improve with some repainting. The idea was to add more realism, and also to make the head skin tone match that of a TBLeague body (since I tend to make all loose heads compatible with those bodies). I tried to keep the paint subtle enough to allow some measure of transparency and not to obscure the detail of the sculpt. It matches pretty well. As for whether it is improved for realism, I think so, but as usual I don't have the sharpest eye for that sort of detail. Let me know what you think.

Topics tagged under custom on OneSixthFigures Jdsa1110

I didn't pick up most of the pieces from the Cowboy or Rebel sets, and have extremely little in the way of Western gear, so I settled (for the purposes of the photos) for the more minimalist costume I've seen in some photos from the set of Giant (I don't know whether this was ever in the film or just Dean goofing around practicing his skills with the lasso and tying up Elizabeth Taylor). Of course the Star Ace hat was out of any sensible proportion (so as to fit over that slightly-too-bellowing hairdo), and normal hats wouldn't fit, so he is going to be mostly hatless.

Topics tagged under custom on OneSixthFigures Jdsa0110

Topics tagged under custom on OneSixthFigures Jdsa0210

Topics tagged under custom on OneSixthFigures Jdsa0310

Topics tagged under custom on OneSixthFigures Jdsa0410

Topics tagged under custom on OneSixthFigures Jdsa0510

Topics tagged under custom on OneSixthFigures Jdsa06110

Topics tagged under custom on OneSixthFigures Jdsa0710

Topics tagged under custom on OneSixthFigures Jdsa0810

Topics tagged under custom on OneSixthFigures Jdsa0910

Topics tagged under custom on OneSixthFigures Jdsa1010

And finally one for the ladies! I guess this outfit was just lending itself to this... Wink

Topics tagged under custom on OneSixthFigures Jdsa1210

What do you think?

#starace #jamesdean #head #custom #kitbash #male
Search in: GENERAL TALK  Topic: Star Ace James Dean head repaint  Replies: 15  Views: 1248
I got a few of the pieces from the Art Figure Dark Furyan set. And when I say a few, I mean a lot. Of course I used a TBLeague seamless body instead, an M34, and I think it worked out pretty well. The first six images are where I tried to be more artistic (though I think I ended up with a videogame feel). Check out the translucent lenses in the third photo. And note that although the promotional images did not show that, the eyes are reflective silverish to imitate the glowing effect in the film; perhaps they should have made them a little more bluish, but they work well. Since I didn't get this as a complete set, it is not a review. The remaining photos are reference shots, some of them the same as the ones in the "artistic images", some different, that are intended to show the whole body from different angles for more information.

Topics tagged under custom on OneSixthFigures Rid0110

Topics tagged under custom on OneSixthFigures Rid0210

Topics tagged under custom on OneSixthFigures Ric0310

Topics tagged under custom on OneSixthFigures Rid0410

Topics tagged under custom on OneSixthFigures Rid0510

Topics tagged under custom on OneSixthFigures Rid0610

Topics tagged under custom on OneSixthFigures Rid0710

Topics tagged under custom on OneSixthFigures Rid0810

Topics tagged under custom on OneSixthFigures Rid0910

Topics tagged under custom on OneSixthFigures Rid1010

Topics tagged under custom on OneSixthFigures Rid1110

Topics tagged under custom on OneSixthFigures Rid1210

Topics tagged under custom on OneSixthFigures Rid1310

Topics tagged under custom on OneSixthFigures Rid1410

Topics tagged under custom on OneSixthFigures Rid1510

What do you think?


#riddick #artfigure #darkfurian #scifi #male #tbleague #phicen #m34 #kitbash #custom
Search in: GENERAL TALK  Topic: Riddick gets a body transplant and goes exploring  Replies: 25  Views: 1296
I don't think this is NSFW, but you decide. As usual, I couldn't resist some slightly adult humor.

For alternatives methods, using Watercolor Pencils, see Posts 21-22 below; using Gundam Real Touch Markers, see Post 35 below.

Another Mistress Gina tutorial: TBLeague neck stuffing.

Several days ago someone asked how to paint nipples and certain other parts on TBLeague female bodies. Both the way the question was posed and the photo illustration were questionably appropriate vis-a-vis our site's regulations, so a moderator removed the post. Nevertheless, since the subject has come up more than once, here is a step-by-step tutorial, using a male figure (thanks to double standards, male nipples are not considered offensive). The process is similar to that for painting seamless bodies with oil pastels (see full thread HERE), but with some more specific techniques. This post will eventually be parked in the Tutorials section.

Note: Human nipples come in different shapes and sizes, and your needs or preferences may vary. I use two colors, usually Staedtler's Rose Wood and Dark Sand.

Note: Because the application of the oil pastel is not as intensive as that possible when painting entire bodies or larger areas, this is largely undoable -- with a bit of determined washing with soap and water.

Topics tagged under custom on OneSixthFigures Tblnt010

Topics tagged under custom on OneSixthFigures Tblnt011

Topics tagged under custom on OneSixthFigures Tblnt012

Topics tagged under custom on OneSixthFigures Tblnt013

Topics tagged under custom on OneSixthFigures Tblnt014

Topics tagged under custom on OneSixthFigures Tblnt015

Topics tagged under custom on OneSixthFigures Tblnt016

Topics tagged under custom on OneSixthFigures Tblnt017

Topics tagged under custom on OneSixthFigures Tblnt018

Topics tagged under custom on OneSixthFigures Tblnt110

Topics tagged under custom on OneSixthFigures Tblnt111

Topics tagged under custom on OneSixthFigures Tblnt112

Topics tagged under custom on OneSixthFigures Tblnt113

And, just in case something wasn't clear, here is what I call a zoom-in replay for initial painting stage:

Topics tagged under custom on OneSixthFigures Tblnt114

The same or analogous stencil and oil pastels method can be used to paint other areas or designs on the seamless bodies. If using a Jiaou body, remember that its TPE surface is less durable than the TBLeague/Phicen kind, and be very careful rubbing in oil pastel.

For alternatives methods, using Watercolor Pencils, see Posts 21-22 below; using Gundam Real Touch Markers, see Post 35 below.

(More photos in Post 35 below)
Topics tagged under custom on OneSixthFigures Tblnt116
(More photos in Post 35 below)

Another Mistress Gina tutorial: TBLeague neck stuffing.

What do you think?

#tutorial #painting #tbleague #phicen #body #nipples #modification #custom #kitbash
Part II in Post 18 below.

Spinoff Photo Story HERE.

It has occurred to me that we should be wishing each other stress-free Christmases rather than just Merry Christmases (or Happy ones, if you speak the more proper royal form of English). Given how long a certain key ingredient took to get here, it was a miracle I got it done before Christmas. And although it is not particularly holiday-oriented, I figured I'd post it up as a way of relaxing in the calm between two Christmas storms (figuratively, not literally).

While you are waiting for the photos to load, you might want to take a look at what turned out to be a whole research essay -- this time I had taken plenty of notes, as this one took a lot of effort to figure out with plausible accuracy. Was it worth it? To me, yes. So here it goes...

Introduction
Call it a Christmas miracle. I thought I will never have one. No company had produced one in any scale, nor had it acknowledged its existence. But after never really looking into it, I ended up kitbashing and customizing a sixth-scale recreation of what may be one of cinema history’s ultimate amissible background characters (even if there was a whole formation of them lined up behind the two dark lords of the original Star Wars universe). I am referring to what has been called an Imperial ground crewman or 
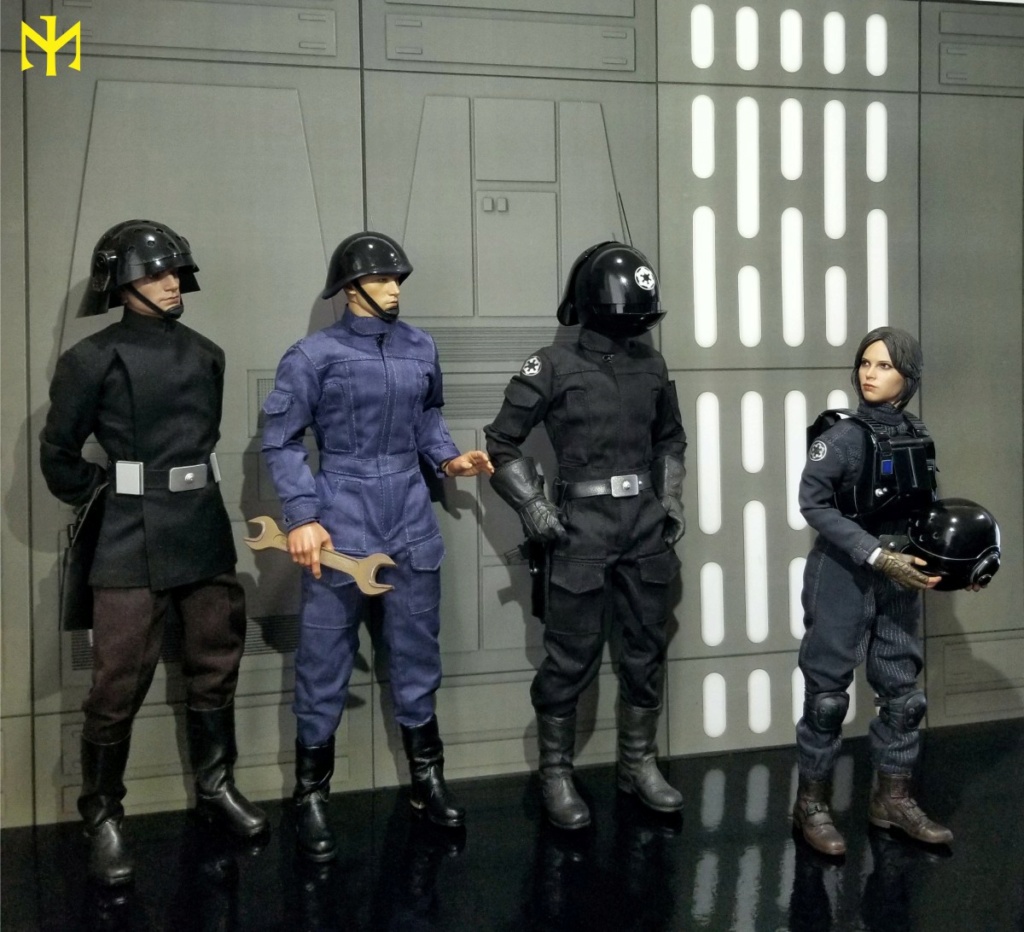
Imperial mechanical crewman. No, I do not mean the newly invented closed-helmeted ground crew that provided an Imperial uniform disguise for Jyn Erso in Rogue One; and I do not mean the so-called “scanning crew technicians” (who wear black caps and grey jumpsuits, but surely do other things than simply operate scanners) or the various naval communications crewmen aboard Star Destroyers in The Empire Strikes Back (who wear standard caps and jumpsuits in either olive and grey or black and black). Blink twice and you will miss them. The guys I am talking about are both the creation and the victim of Lucas’ vision for the emperor’s arrival scene in The Return of the Jedi.
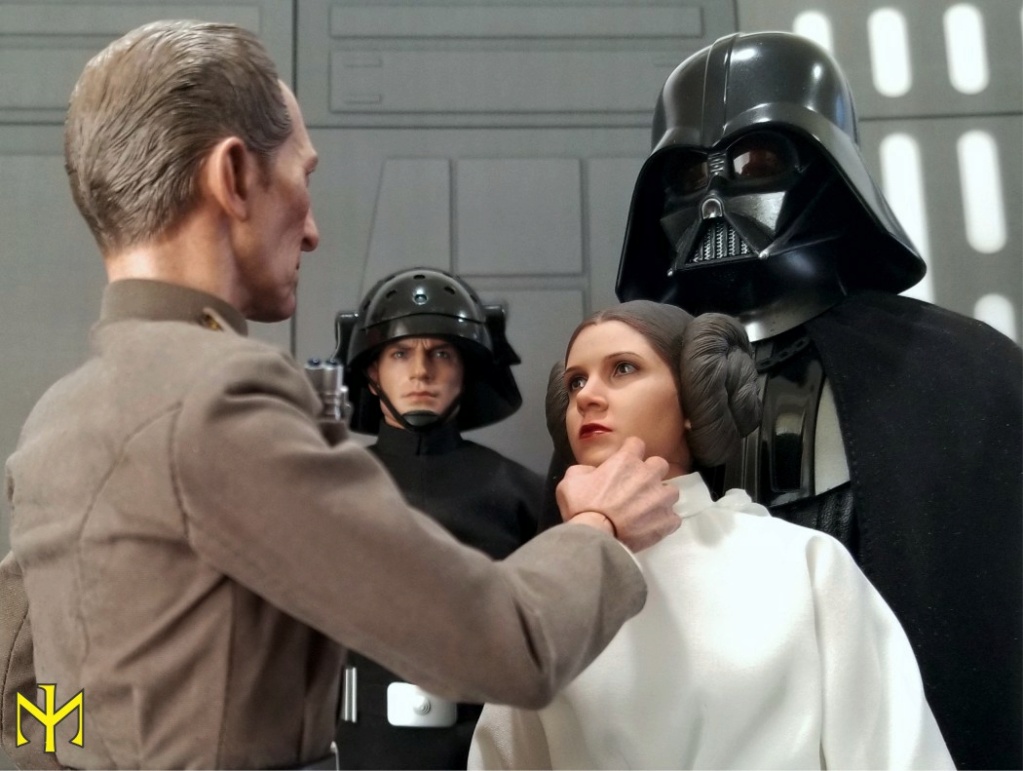
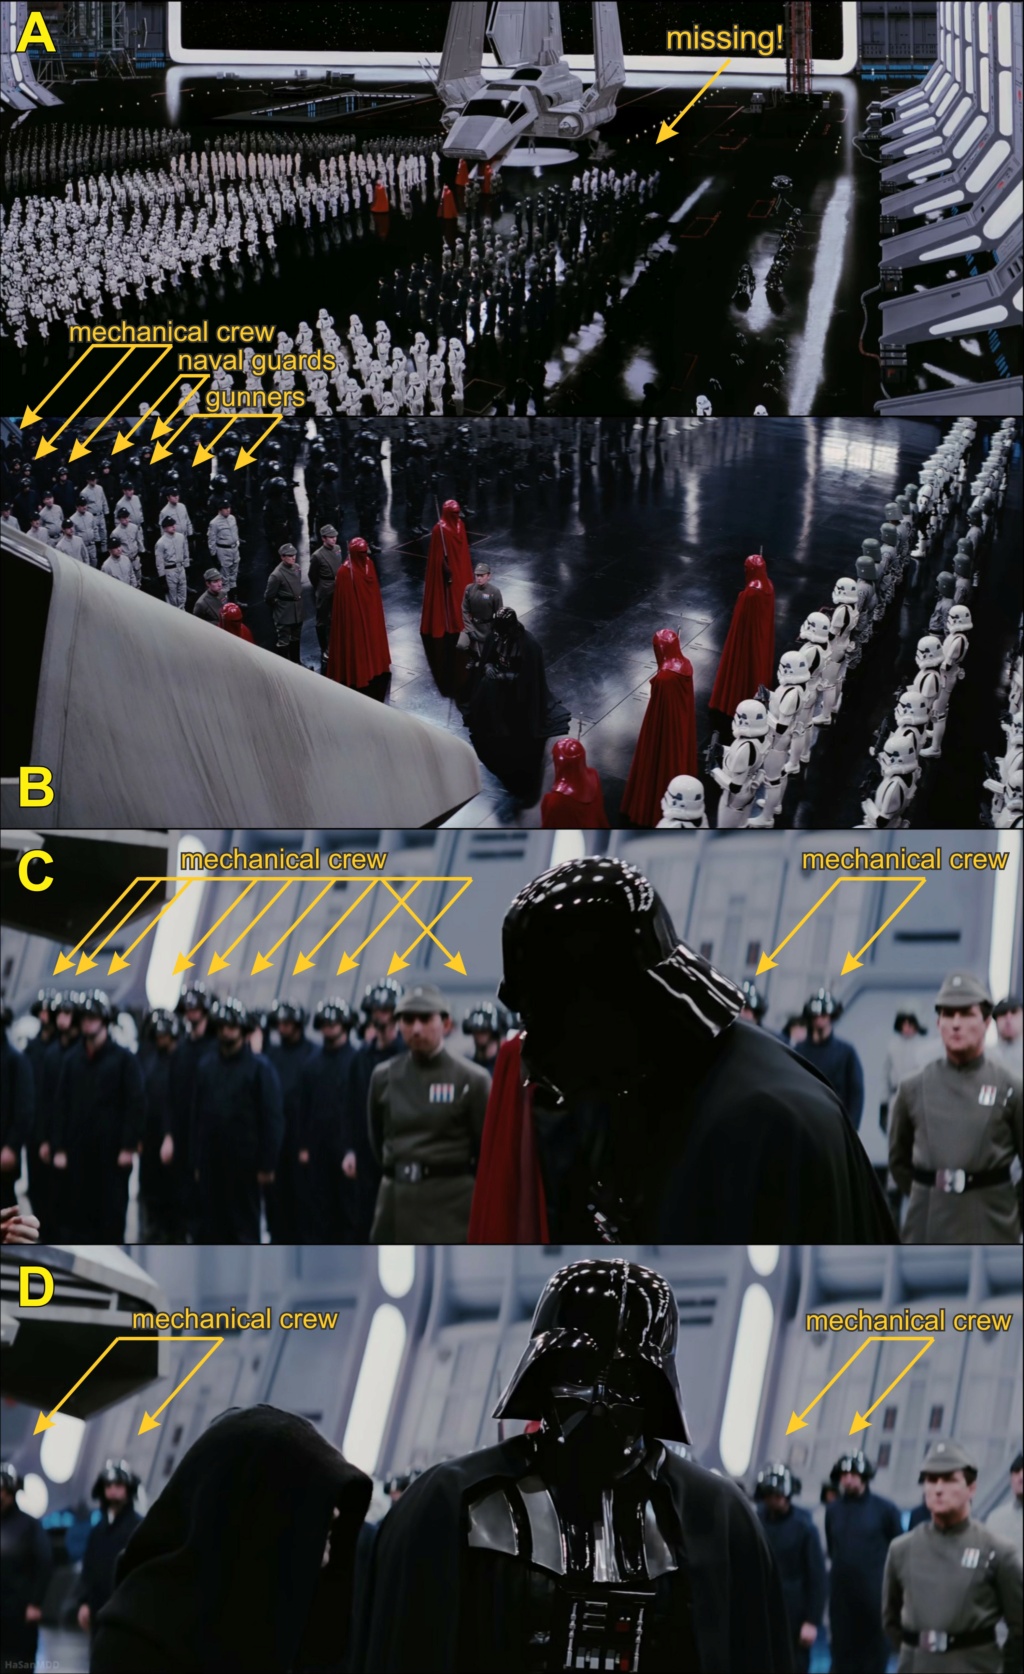
The Evidence
It is no secret that Lucas needed as many Imperial characters as he could to fill out the (artificially) vast hangar that served for the emperor’s arrival aboard the second Death Star. Stormtroopers, scout troopers, the newly-designed regular army troopers (“AT-ST drivers”), TIE-Fighter pilots, gunners, naval guards (“Death Star/Squad troopers”), “scanning crew technicians,” various officers, and a smattering of droids were called up in formation to greet the diminutive wizard-like emperor. The whole thing was supposed to evoke the military parades of totalitarian regimes, and the number of characters and vastness of space required for that led to the infamous decision to combine actual film with a matte painting, mixing real and painted characters for our viewing pleasure. The wide shot of this scene (photo A), the one combined with the matte painting, does not even feature the background characters that are the subject of this kitbash/custom: they must have been late for the set or, more likely, overlooked as unnecessary from that perspective; there is no one beyond or behind the formation of four rows of “scanning crew technicians” to the left (camera right) of the landed shuttle. But then the angle of view changes (photo B), and one can discover our new characters in formation (at least four rows deep) just to the left of the emperor’s shuttle, standing behind the aforementioned four rows of “scanning crew technicians.” Then the angle of the camera changes again (photos C and D), as we see the emperor and Vader begin their conversation and walk on: the “scanning crew technicians” have disappeared (they were apparently redeployed to swell numbers farther down the line), and our guys have advanced to the very front. This is confirmed by a set photo (
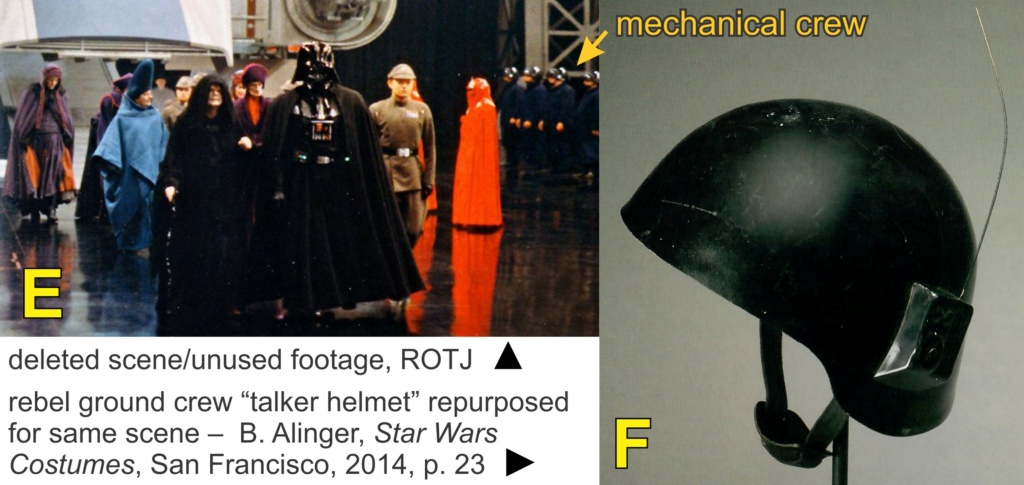
photo E) of unused footage (which would have been nice to see in the film), where we see them lined up at the front, with only the red-robed Imperial royal guards between them and their ultimate boss. And, apart from a rare photo of one of their helmets (photo F), that is all the “primary” evidence on these guys I have been able to dig up.

Topics tagged under custom on OneSixthFigures Swimc010
Topics tagged under custom on OneSixthFigures Swimc011

Following the standard established or accepted by the 501st Legion, let us call them Imperial mechanical crew. The out-of-focus and limited footage led to a fairly late recognition of the characters as belonging to a new type of unit, as well as all sorts of misconceptions about both their purpose and their actual appearance. Actually, their true purpose is clear: they were there to take up space, swell up the ranks of the Imperials lined up to greet the emperor, and provide just a bit of additional variety for the assembled Imperial forces; possibly for the emperor and his officials, certainly for Lucas’ camera lens. Strangely so, since some previously attested uniforms are not seen here, like the cream-colored tunics of the security bureau from A New Hope or the olive and grey get up of the Star Destroyer crewmen from The Empire Strikes Back (who are also conspicuously absent from the deck of the Executor in The Return of the Jedi!), among others. These choices confirm the apparent and misleading preoccupation with overall optics in the staging of the scene. Closer inspection reveals plenty of missing elements, apparently deemed too minor to be noticed even when contradicting established uniform appearances: some “AT-ST drivers” helmets without chin-straps, some jumpsuits without Imperial cog emblems on their upper arms at the shoulder, some belts without utility boxes (they were there in A New Hope), all gunners without their ribbed tops and leather chest protectors (ditto), one of them infamously with his “bib” out over the collar of his jumpsuit -- surely a wardrobe oversight, not an intended uniform look or fashion statement; but Kenner stuck a photo of that one on the action figure card back (HERE), and it has caused a minor controversy). And I have already noted the inconsistencies and redeployment in the formation of attendees between different shots in the same scene. Our mechanical crewmen were put together to contribute to this slightly slapshot environment, and their fairly basic outfit is quite consistent with such basic needs.

Interpretation or Misinterpretation
Let us take a look at the costume and dispel some misconceptions. As mentioned above, the footage is limited and out-of-focus. So it is not altogether surprising that misconceptions should arise. One fairly detailed source, Curtis Saxton (HERE), who may have been the first to make me realize these characters existed, describes their appearance as follows, sometime before 2006:

"Enlisted (unclassified)
• Blue-black overalls, single-breasted top.
• Black open helmet, cockroach brim absent or not clearly visible.
• Black belt with silver buckle and holster, no utility boxes.
• Long-sleeved black gloves.
• No rank badge or code cylinders.
Images: Standing at attention, left of Lord Vader.
These men probably aren't regular naval sailors, guards or technicians, because those uniforms are already identified. They must specialists of some kind, or have mildly dangerous working conditions, otherwise they wouldn't have helmets. They don't work in vacuum, otherwise the helmet would be sealed. Since the next two types of servicemen on this side of the bay are naval (black-capped technicians, then gunners) I tentatively guess that the mysterious men are also in the Navy.
Jason Mitchell notes that the holster implies combat/security, and the lack of belt boxes common to specialists, crew and technicians. For these reasons, he suggests that these personnel could belong to Military Police unit or a Shore Patrol unit."


Much of this is correct, but there are also a lot of errors, some of them unexpected, given the image he supplied: the overalls/jumpsuit IS navy blue (which can appear almost black on film), there are NO silver belt buckles and apparently NO belts or holsters, and there are NO long-sleeved (or otherwise) black gloves. Even without these mistakes, some of the otherwise interesting implications drawn by Saxton and Mitchell do not necessarily follow (presence of helmets and absence of utility boxes do not keep these characters from being ground/mechanical crew any more than their very similarly equipped Rebel counterparts -- see below).

Seemingly unaware of Saxton’s notes, Cal Pierce and associates drew attention to this character type in 2011, submitting the costume specifications to the 501st Legion, and posting their recreation of the costume on the Rebelscum forum (HERE). They correctly concluded the characters were thrown in “to fill in space,” that the jumpsuits were navy blue, and they created the “mechanical crew” designation. They also noted that “the costume is really plain Jane in the movie” and admitted adding (or being tempted to add) embellishments extrapolated from other Imperial uniforms, “such as gloves, belt, comm pad, code cylinders, cogs on shoulder,” in other words correctly realizing none of these were present in the actual film costumes; the featured photos of the recreated costume and the specifications adopted by the 501st Legion (HERE) ignored any such embellishments.

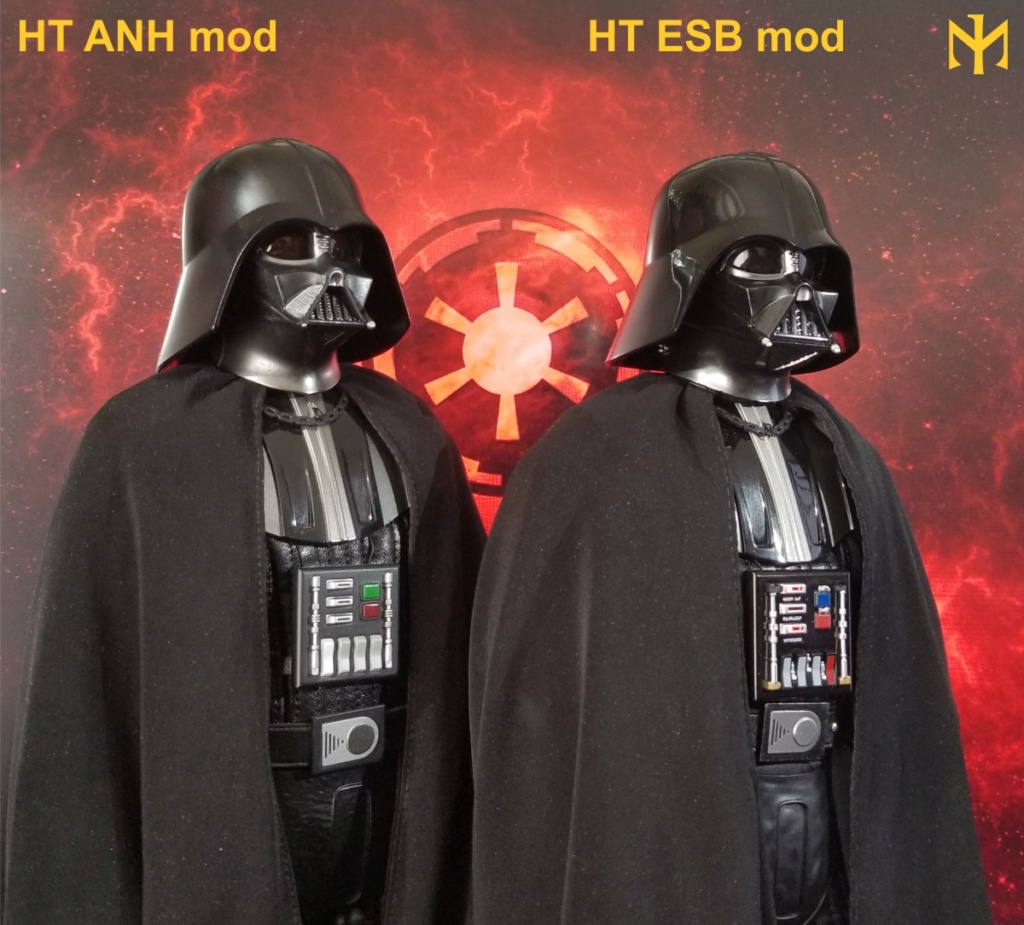
While Pierce et al. in effect corrected most of the earlier misconceptions (about the presence of belts, holsters, gloves), they introduced what appears to be a glaring, if somewhat easy to make, error, which has been overlooked and allowed into the 501st Legion guidelines. This is the Imperial cog emblem on the front (“forehead”) of the helmet. The glossy black helmets reflected the overhead lighting of the set like those of the gunners and “Death Star troopers” and TIE-Fighter pilots. The gunners and pilots do have cog emblems on their helmets, and the decoration on the gunner helmet (which in fact incorporates into a more complex design the same basic “talker” helmet as that of the mechanical crewmen) is in fact a single large cog emblem on the front (“forehead”). However, for all the reflection, distance, and out-of-focus imagery, it does NOT appear that the mechanical crewmen had a cog-emblem on their helmets; the evidence is as follows:

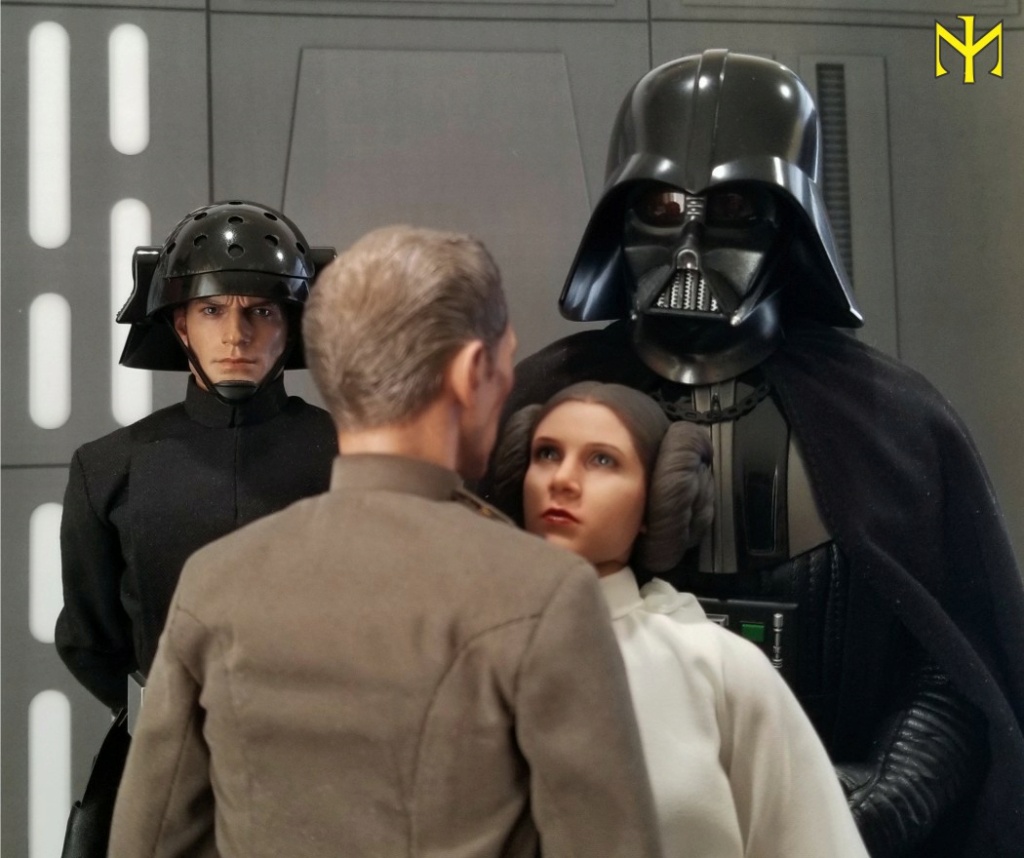
Exhibit A: in a movie still (photo B), the mechanical crewmen are seen standing alongside “Death Star troopers” and gunners; the reflection effect is identical for the mechanical crewmen and the “Death Star troopers,” while in the case of the gunners the cog emblem can be seen as a white circle with a darker center separate from and additional to the reflection of the lights.

Exhibit B: at least one photograph (photo F) of a mechanical crewman helmet exists, showing no trace of an Imperial cog emblem on it, despite some scuffing.

Between these two pieces of evidence, we can be certain that a reconstruction of the mechanical crew costume with an emblem on the helmet is incorrect. Like the “Death Star troopers,” the mechanical crewmen had NO emblem on their helmet. One imagines this should be good news to anyone trying to recreate this costume in either 1:1 or smaller scale – unless they have already gone though the trouble of applying an emblem where there should not be any.

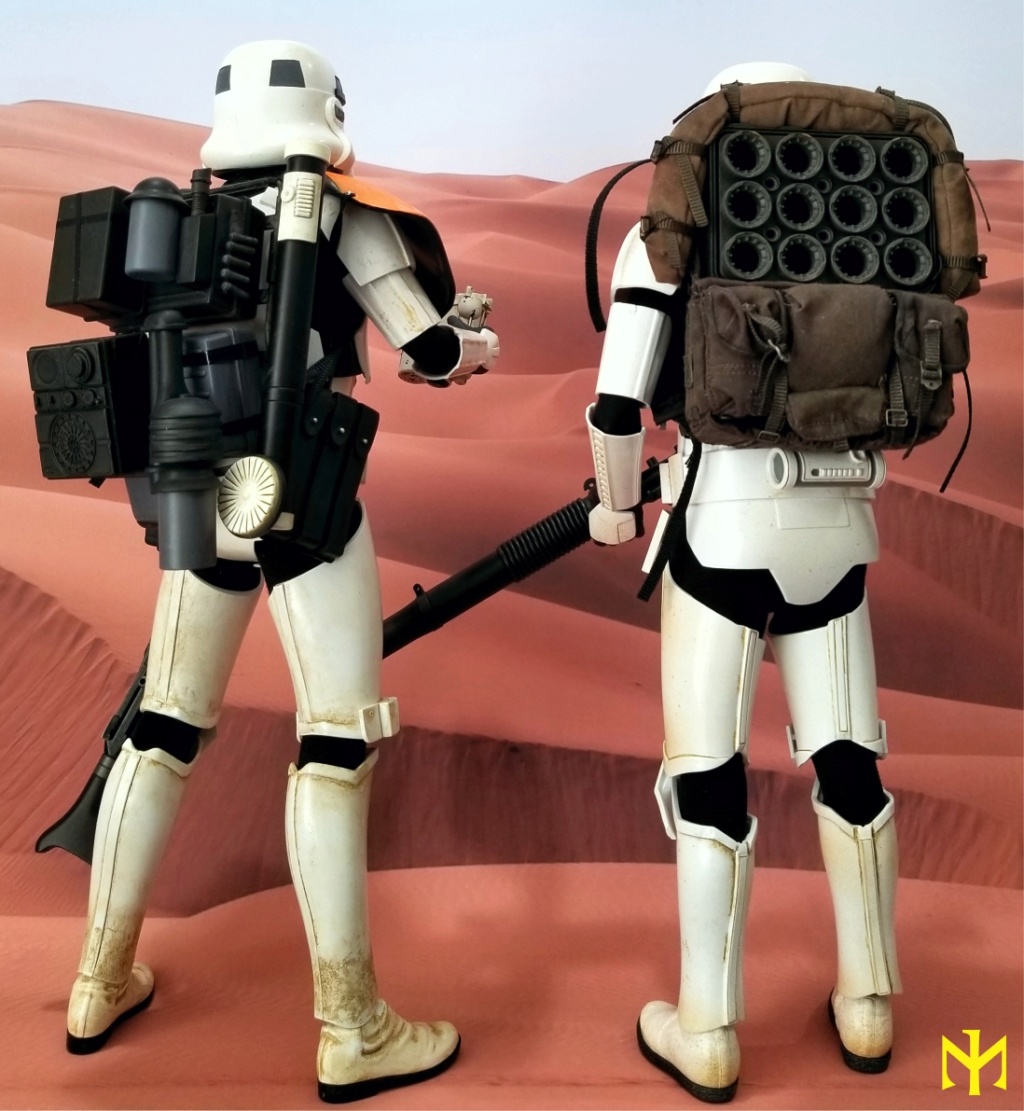
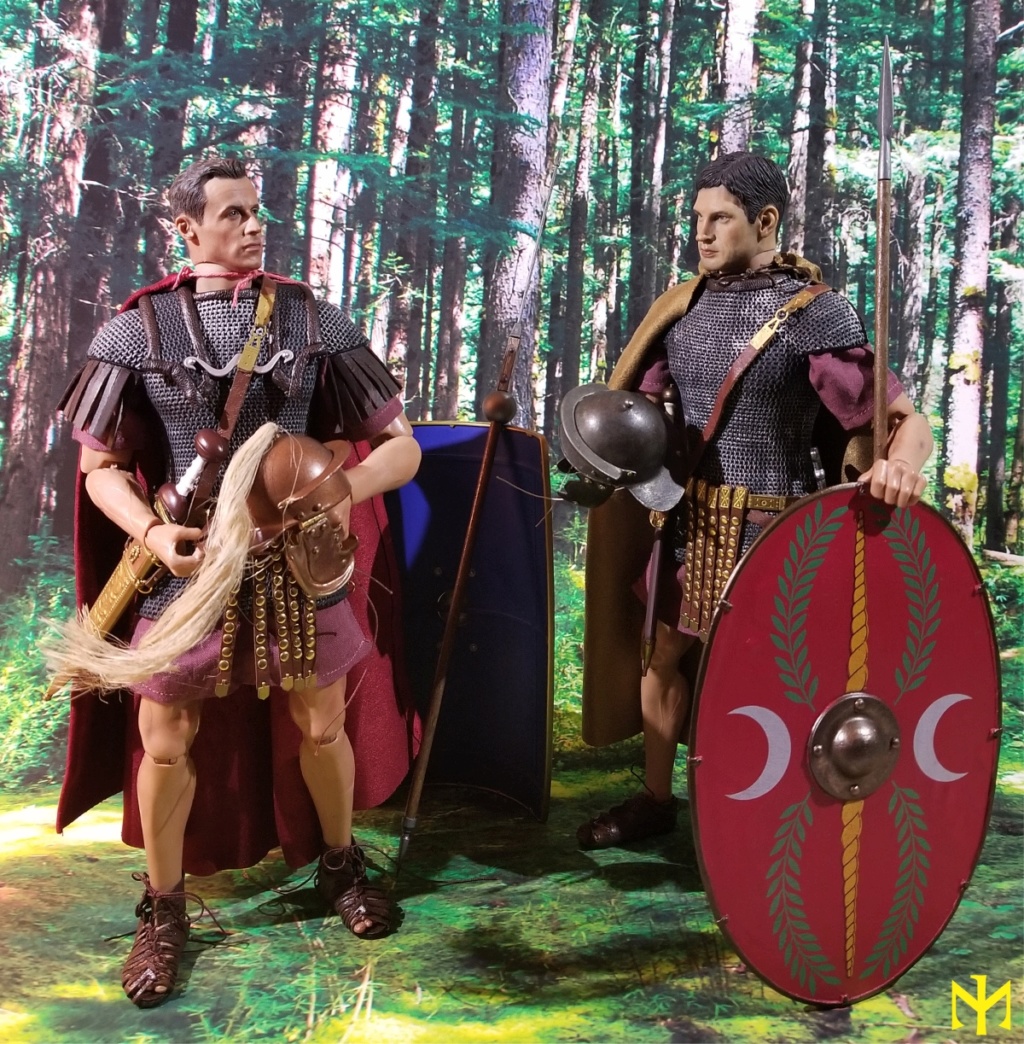
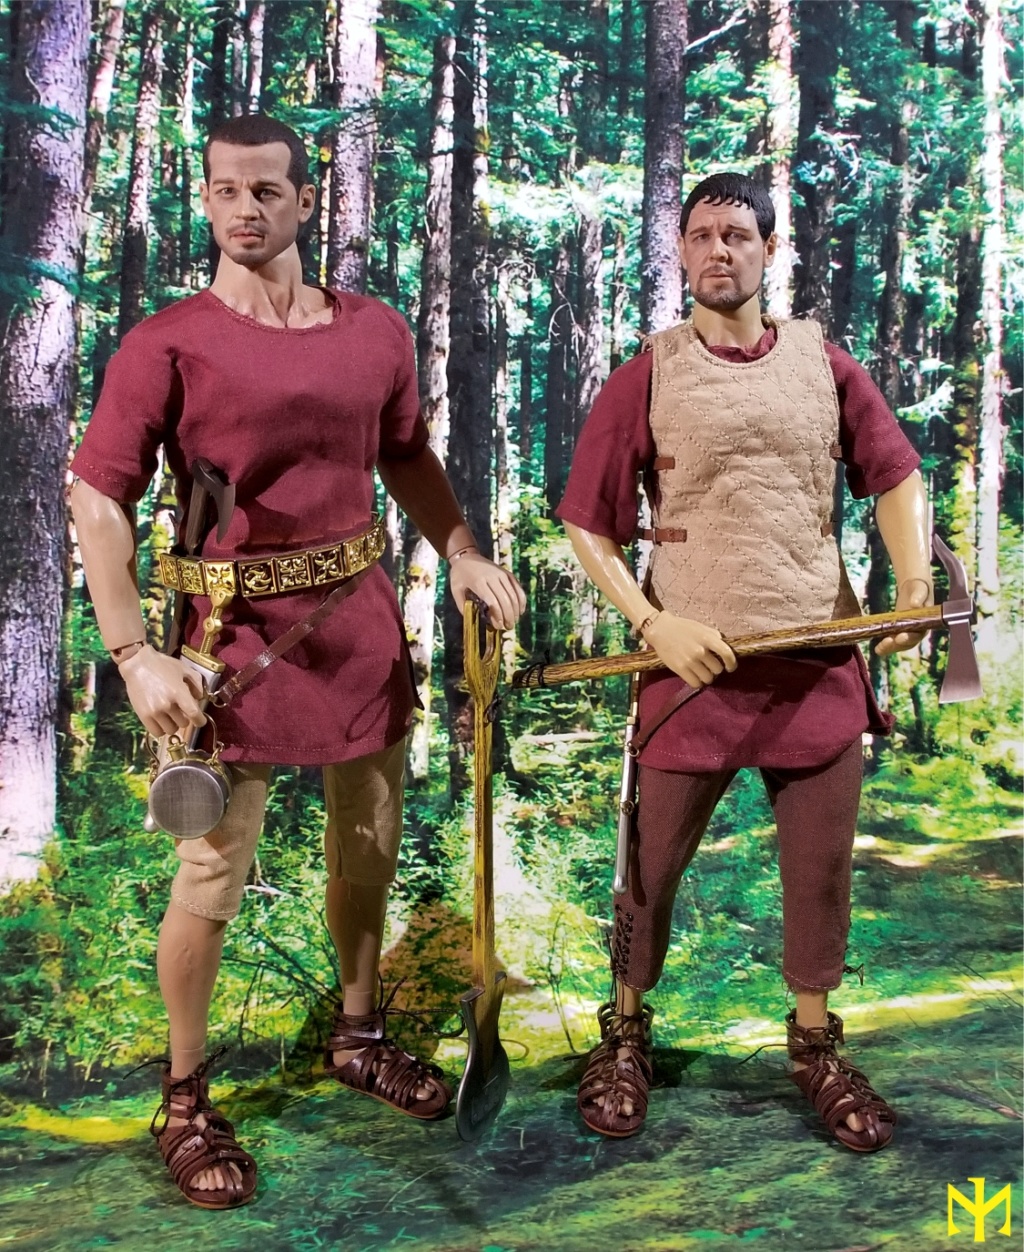
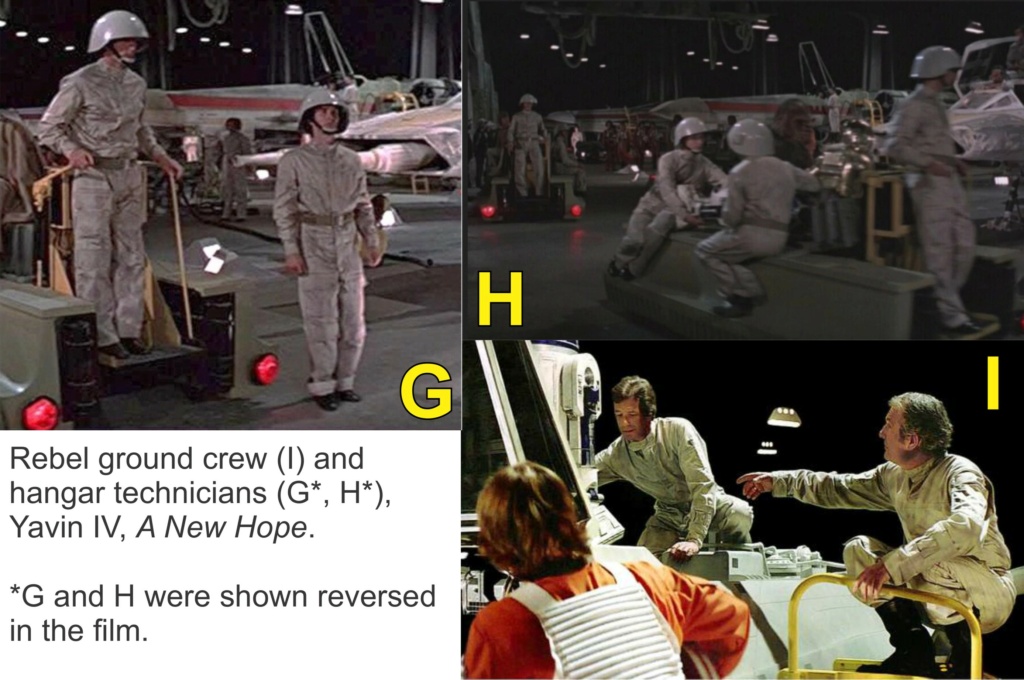
Comparative Evidence and Reinterpretation
The costume of the Imperial mechanical crew is a fairly minor variation of the costume of the Rebel ground crew on Yavin IV in A New Hope. I use the term “ground crew” generally, following Brandon Alinger (Star Wars Costumes, San Francisco 2014: 22-23), whose close collaboration with Lucasfilm makes him an authority in my book; the Rebel Legion costume guidelines distinguish between two variations, which they label Rebel ground crew (HERE) and Yavin hangar technicians (HERE). Generally speaking, these wear grey jumpsuits that are identical to the Imperial ones except in having rectangular rather than chevron pocket flaps, and having four leg pockets instead of only two. The more specific “ground crew” variation appear to forego a helmet and a belt, but tuck in their pant legs into their black boots (photo I); the more specific “hangar technicians” variation wear light grey “talker” (US naval gunner Mk II, HERE) helmets with an added communication unit and antenna (usually in the same color), a modern-looking khaki or olive belt with mini-flare loops, and do not tuck their pant legs into their black boots (photos G and H).

Topics tagged under custom on OneSixthFigures Swimc012

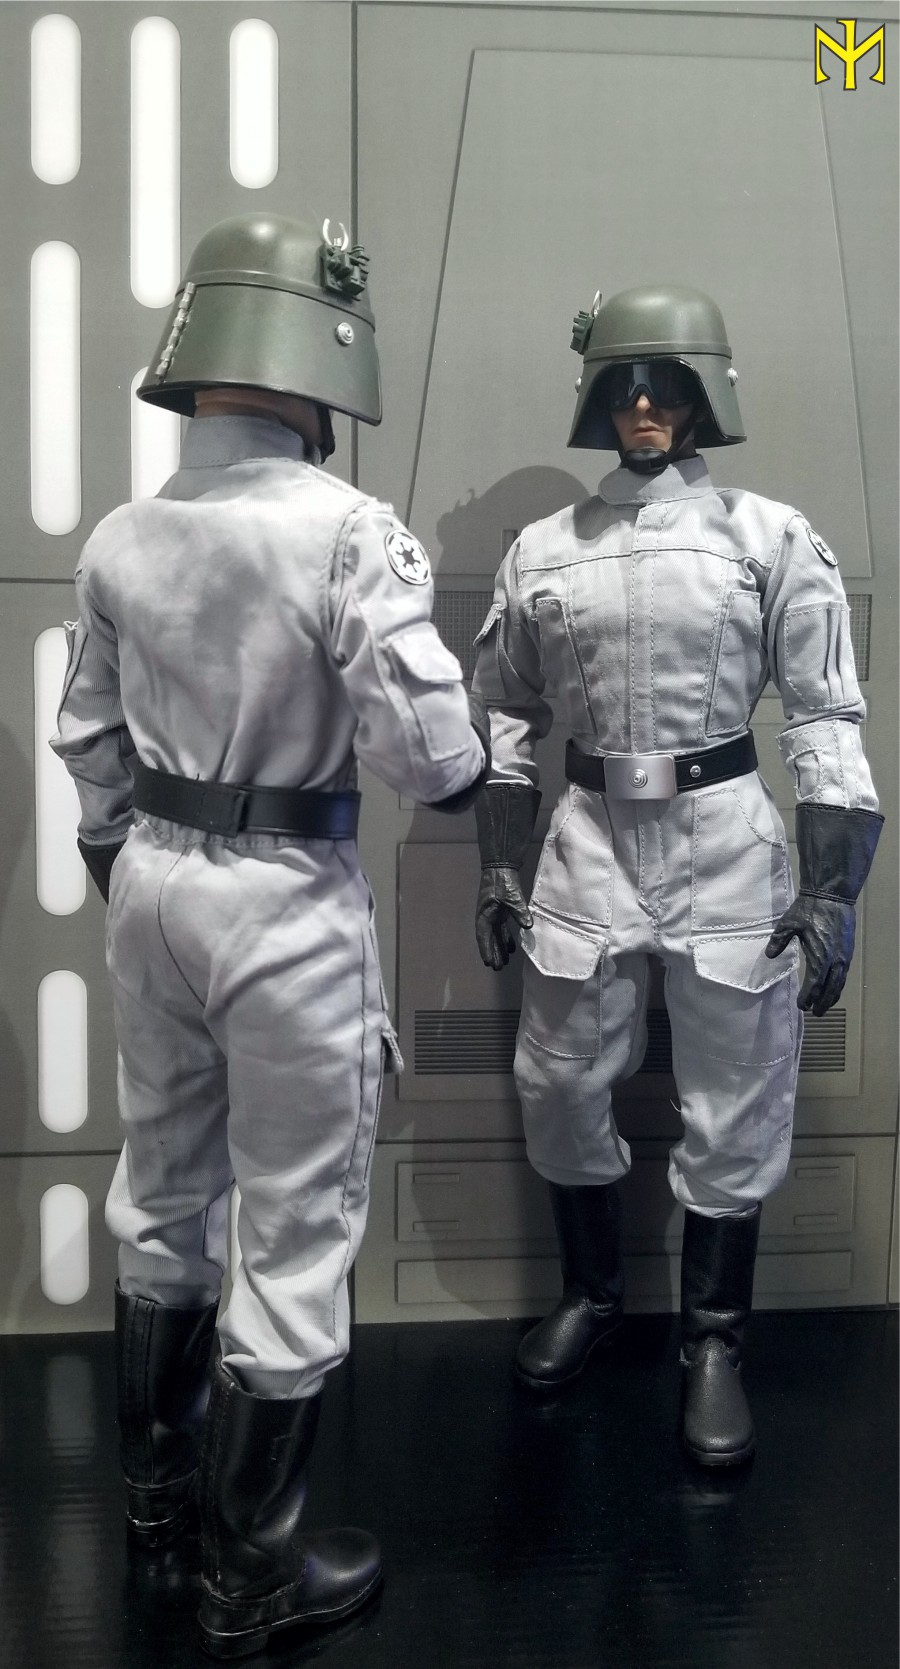
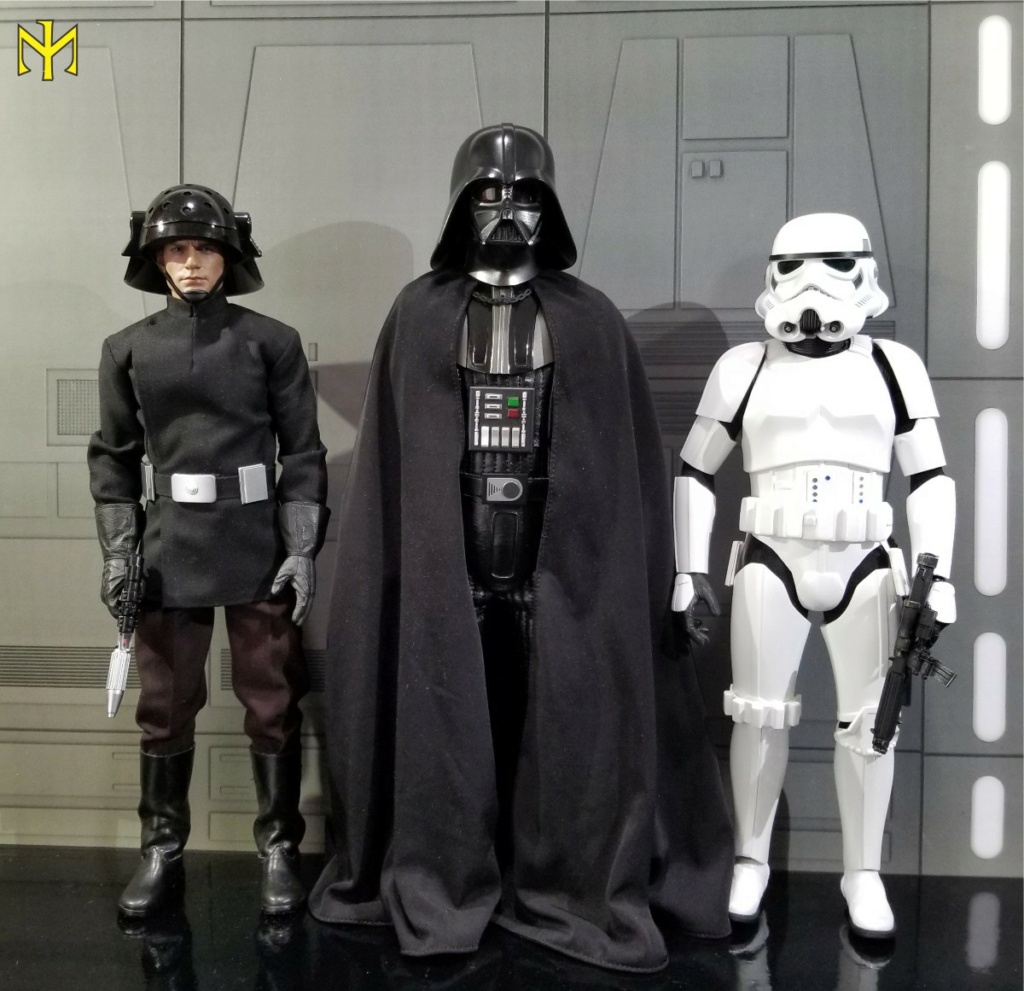
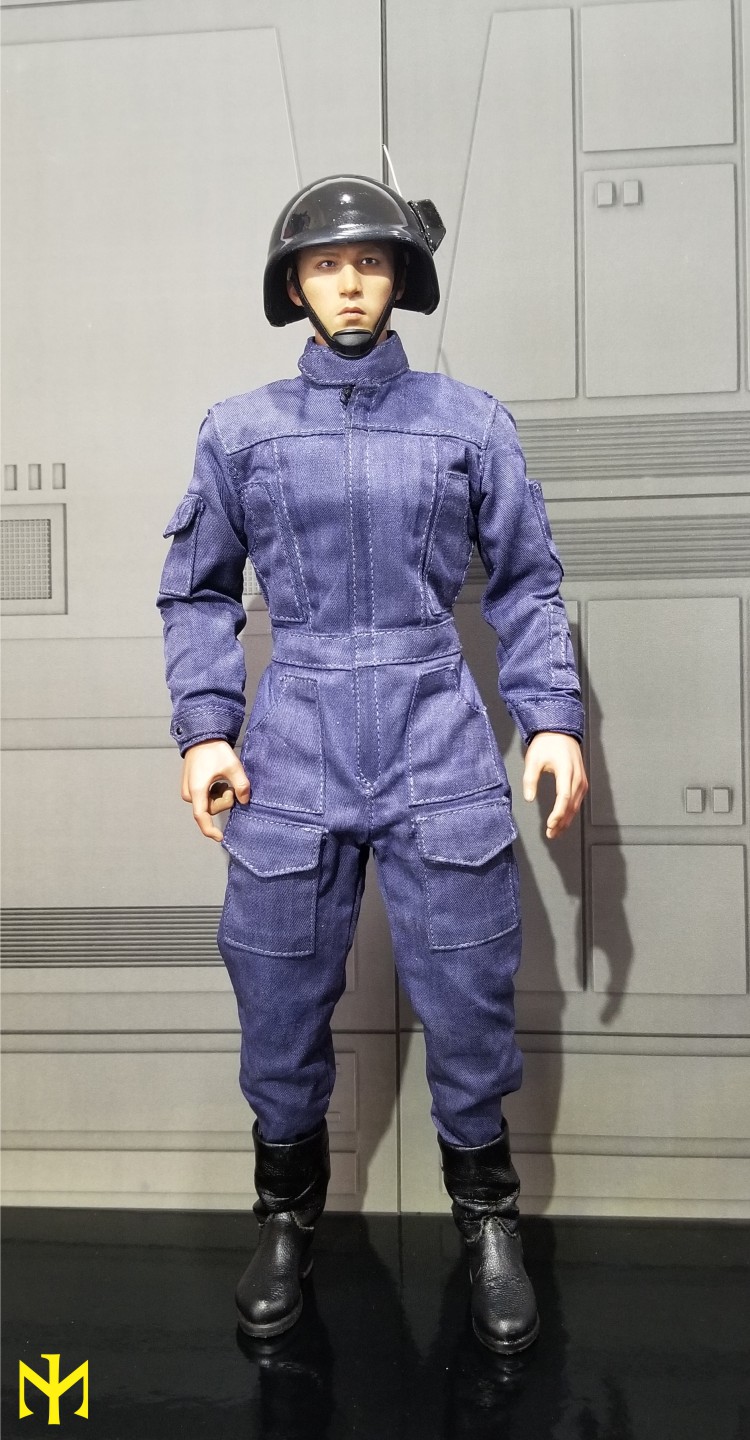
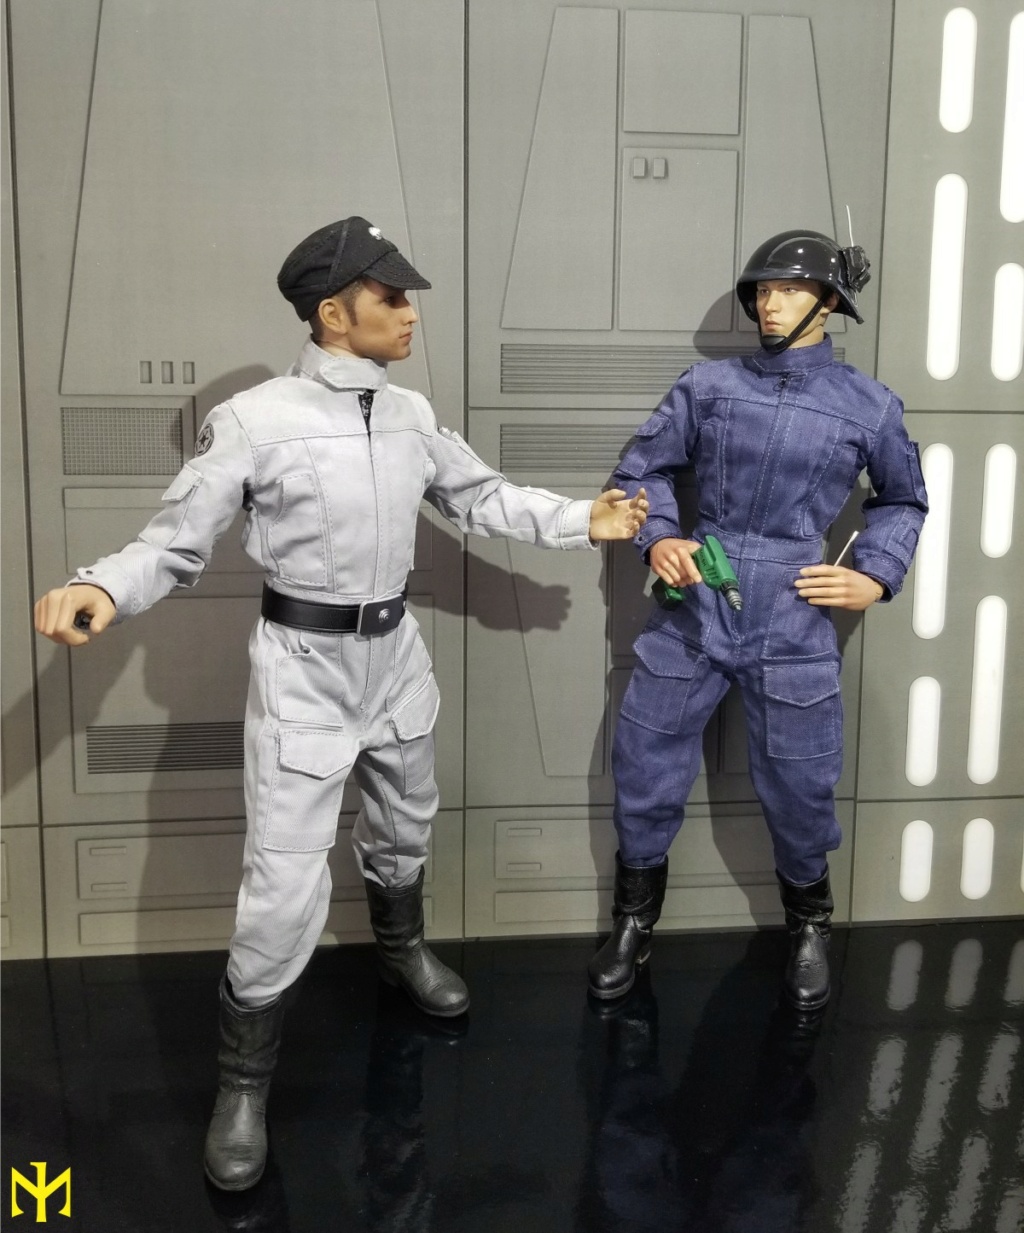
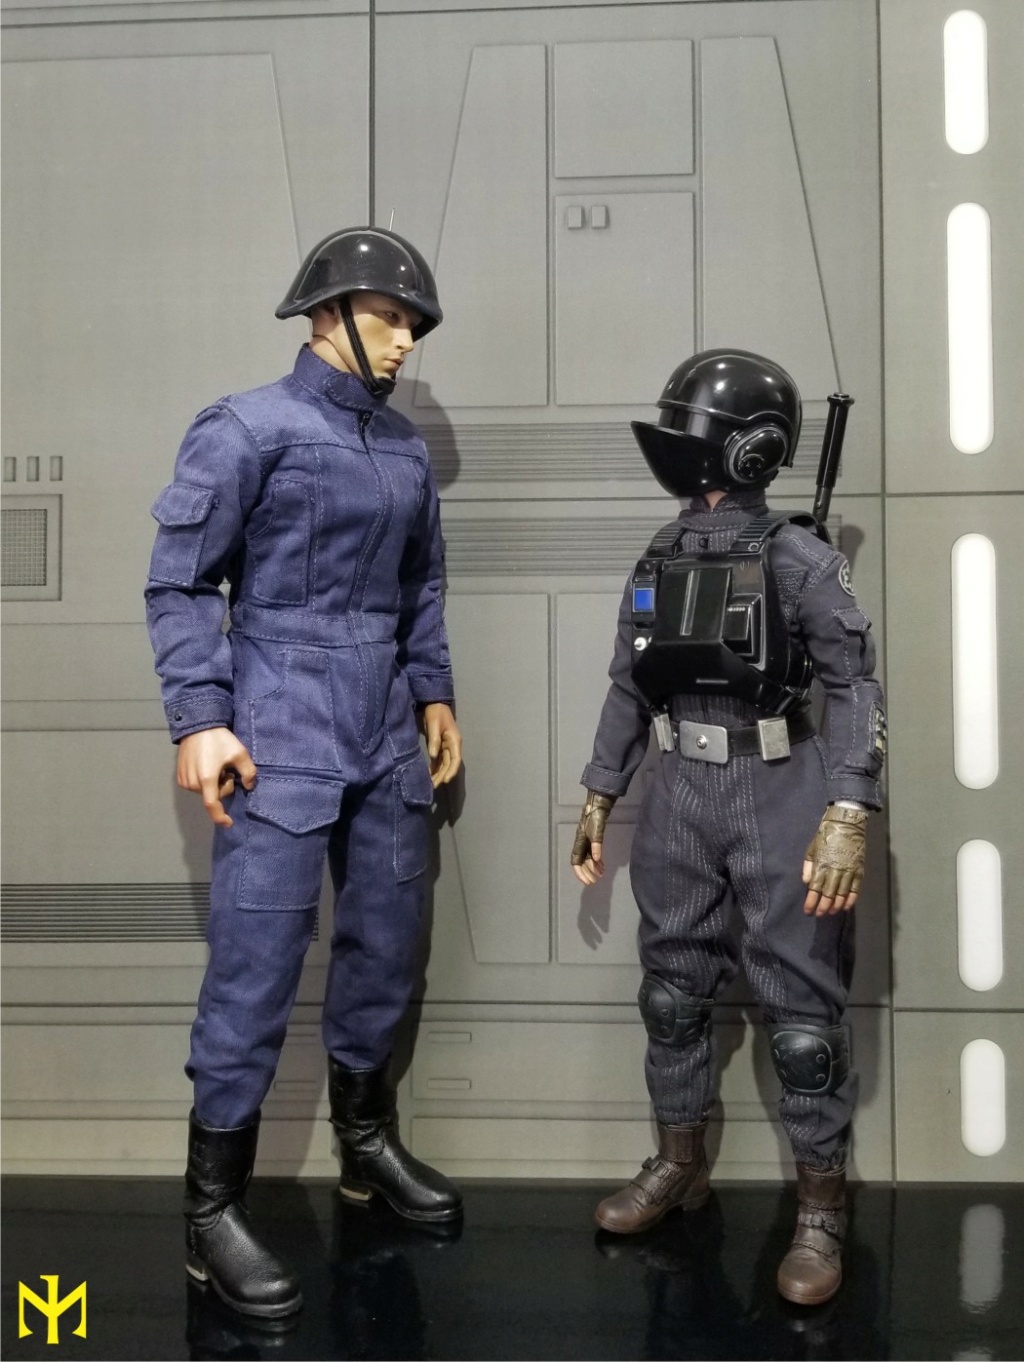
This provides clues for interpreting what we see of the corresponding Imperial mechanical crew costume. The helmet is the same, in fact the exact same, simply repainted glossy black (Alinger p. 23). The helmet’s chin strap is all black (like those of the “Death Star troopers” and “AT-ST drivers”), as opposed to the black strap with a white chin guard used by the Rebels. The jumpsuit is the Imperial variant of the same garment worn by the Rebel ground crew (the differences being chevron pocket flaps and only two leg pockets), but dyed navy blue. Since it is worn without a belt (certainly no belt buckle of any kind is visible), it can be assumed that the jumpsuit is tucked into the boots. These are difficult to make out in the out-of-focus images but would be consistent with the overall draping of the garment and with the rules for the Rebel ground crew costumes in the films (no belt = pant legs tucked into boots). Given this parallelism to the Rebel crewmen, you can see why I would have preferred to label the characters in question “Imperial ground crew,” although I suppose “Imperial mechanical crew” remains a viable choice.

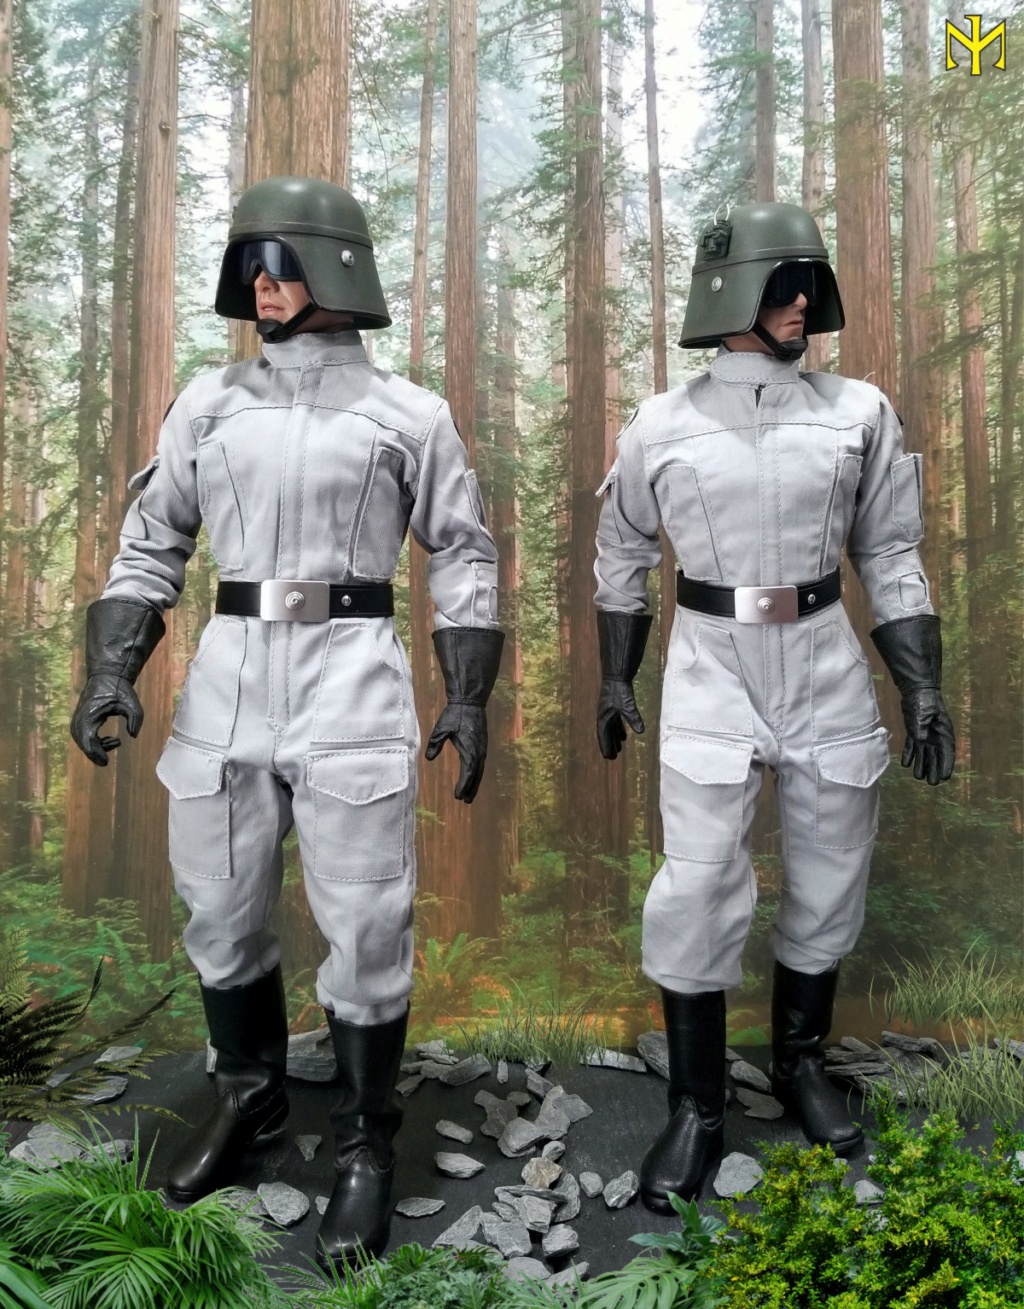
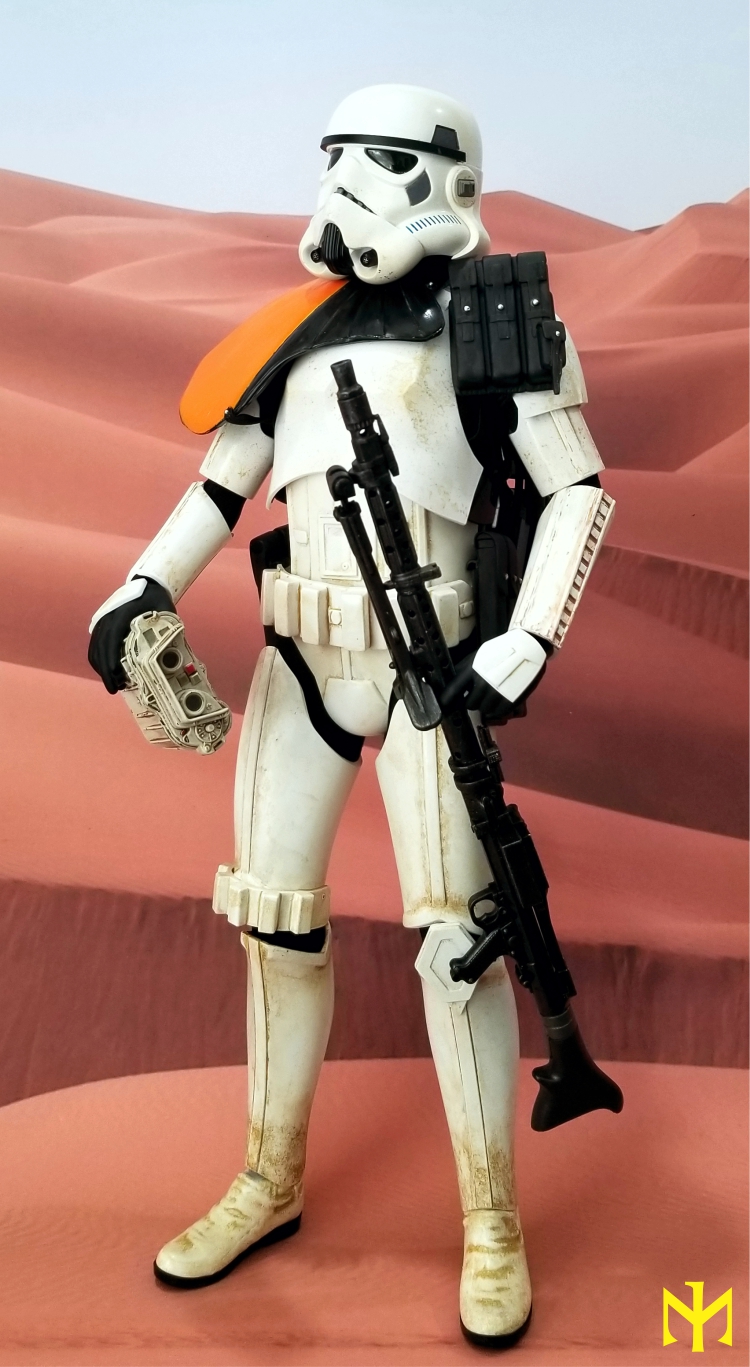
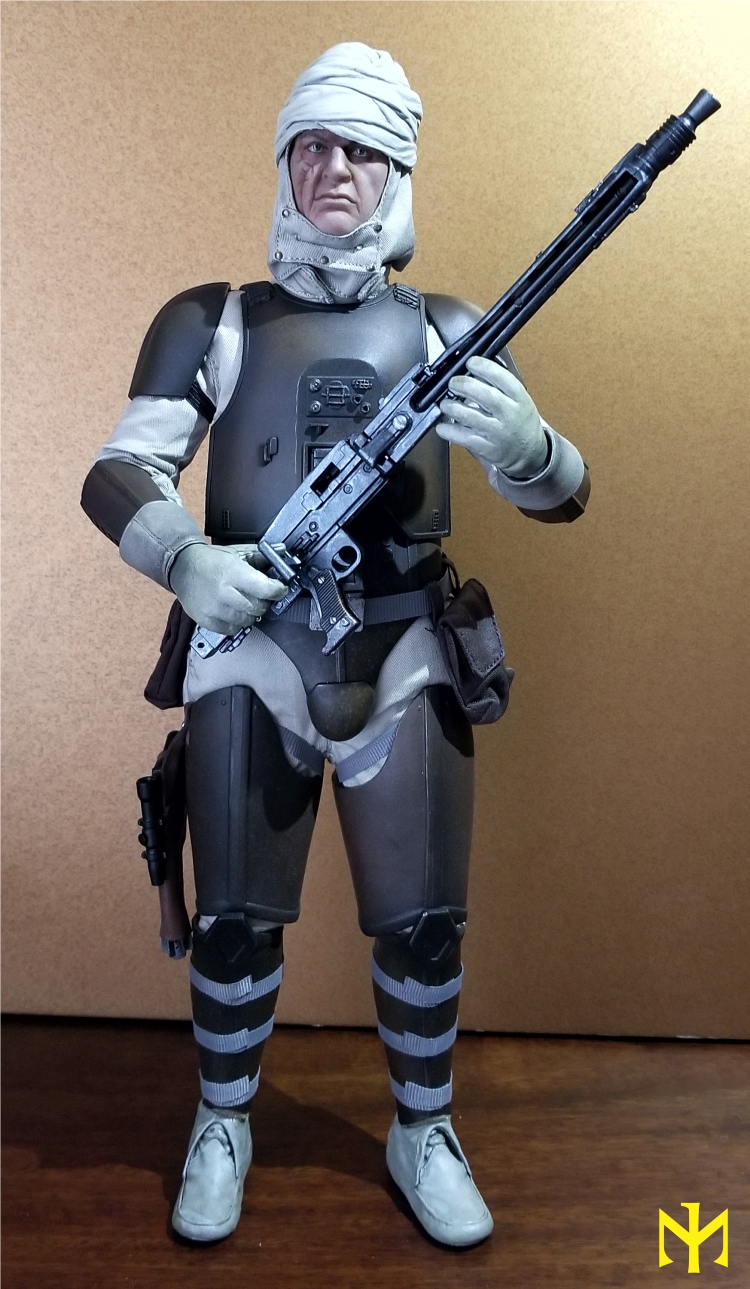
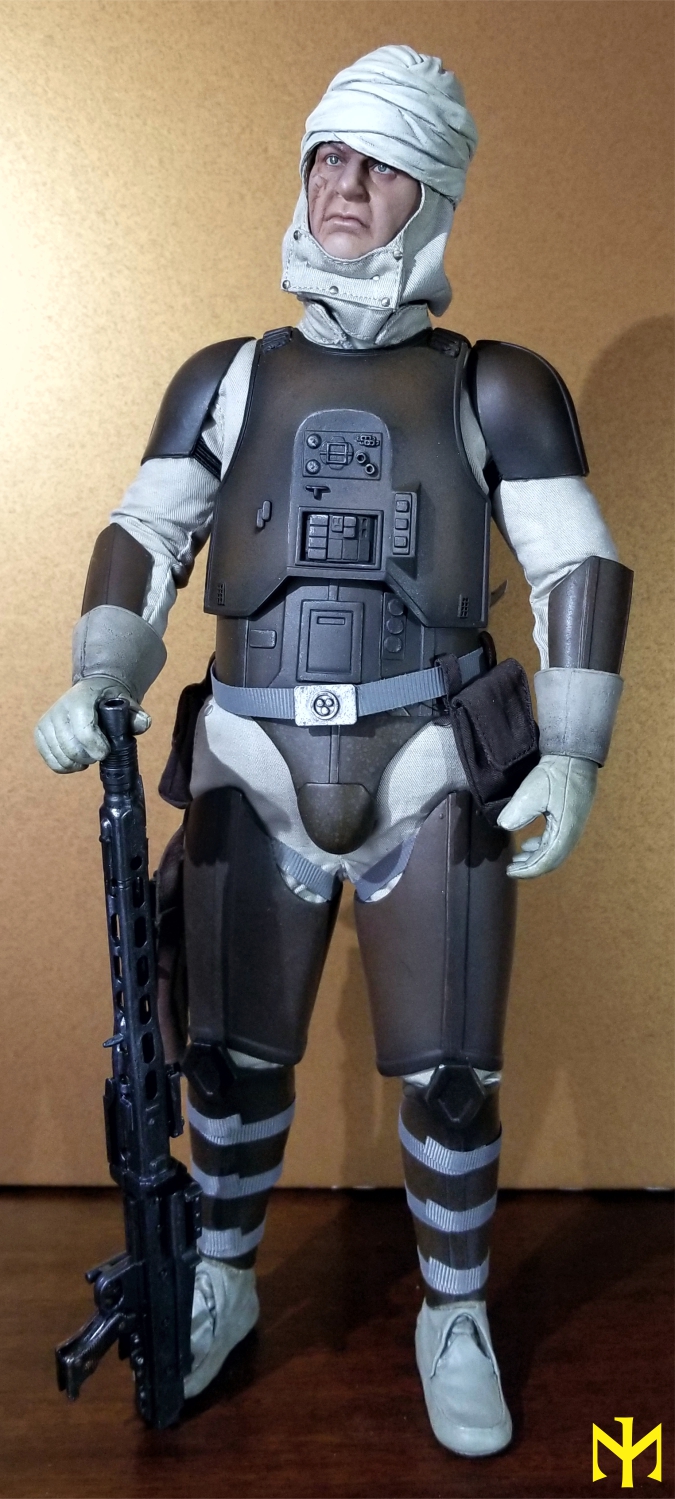
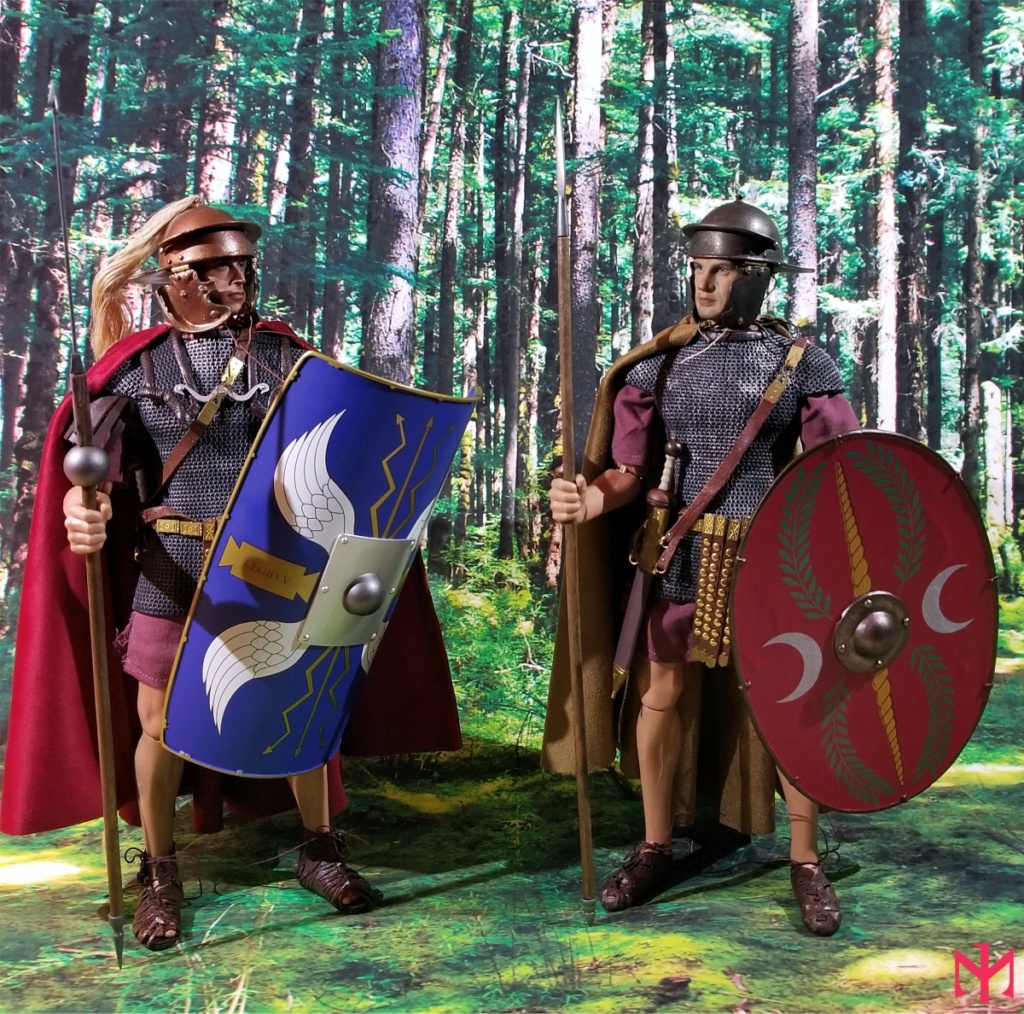
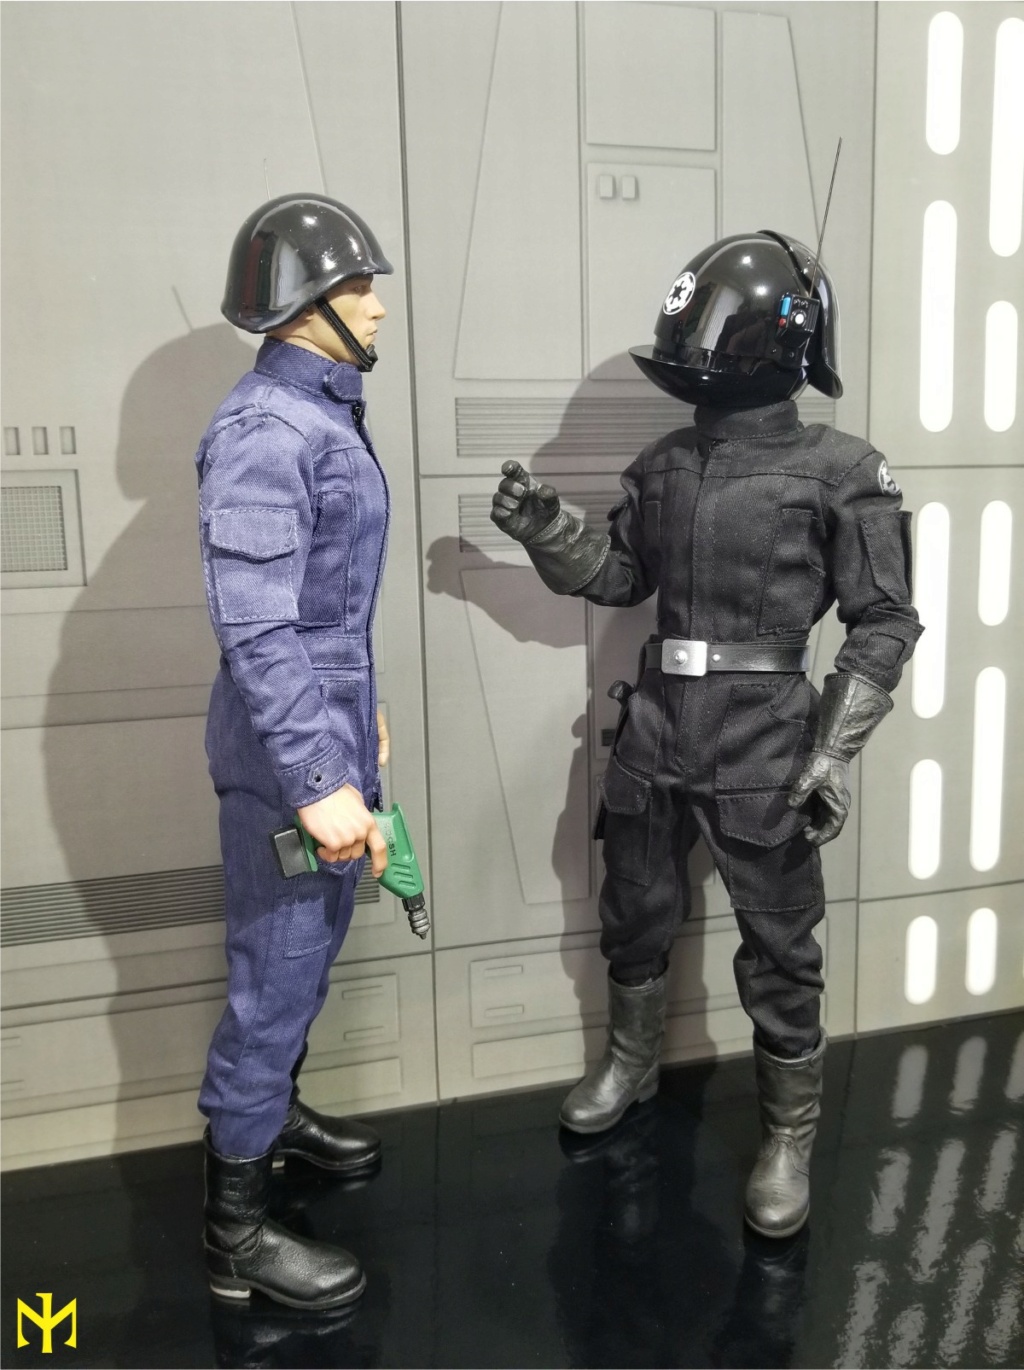
To sum up, the Imperial mechanical crew wears a glossy black “talker” helmet with a com box and antenna and black chin strap, a navy-blue jumpsuit, and black jackboots (probably the shorter jackboots seen with jumpsuits in Star Wars). This is a simple and not particularly striking outfit, although that is perhaps understandable for the type of character, especially in a film universe whose creator, George Lucas, said “I don’t want anyone to notice the costumes” (Alinger, p. 6, quoting John Mollo). There is certainly consistency in the parallelism with the corresponding Rebel type(s). Such continuity, even among secondary elements, is something that helps the film universe feel real. In fact, the continuity carries over, more subtly, to other trooper types, as the same “talker” helmet forms part of the more complex designs of the Rebel fleet trooper helmets, the “Death Star trooper” helmets, and the Imperial gunner helmets.
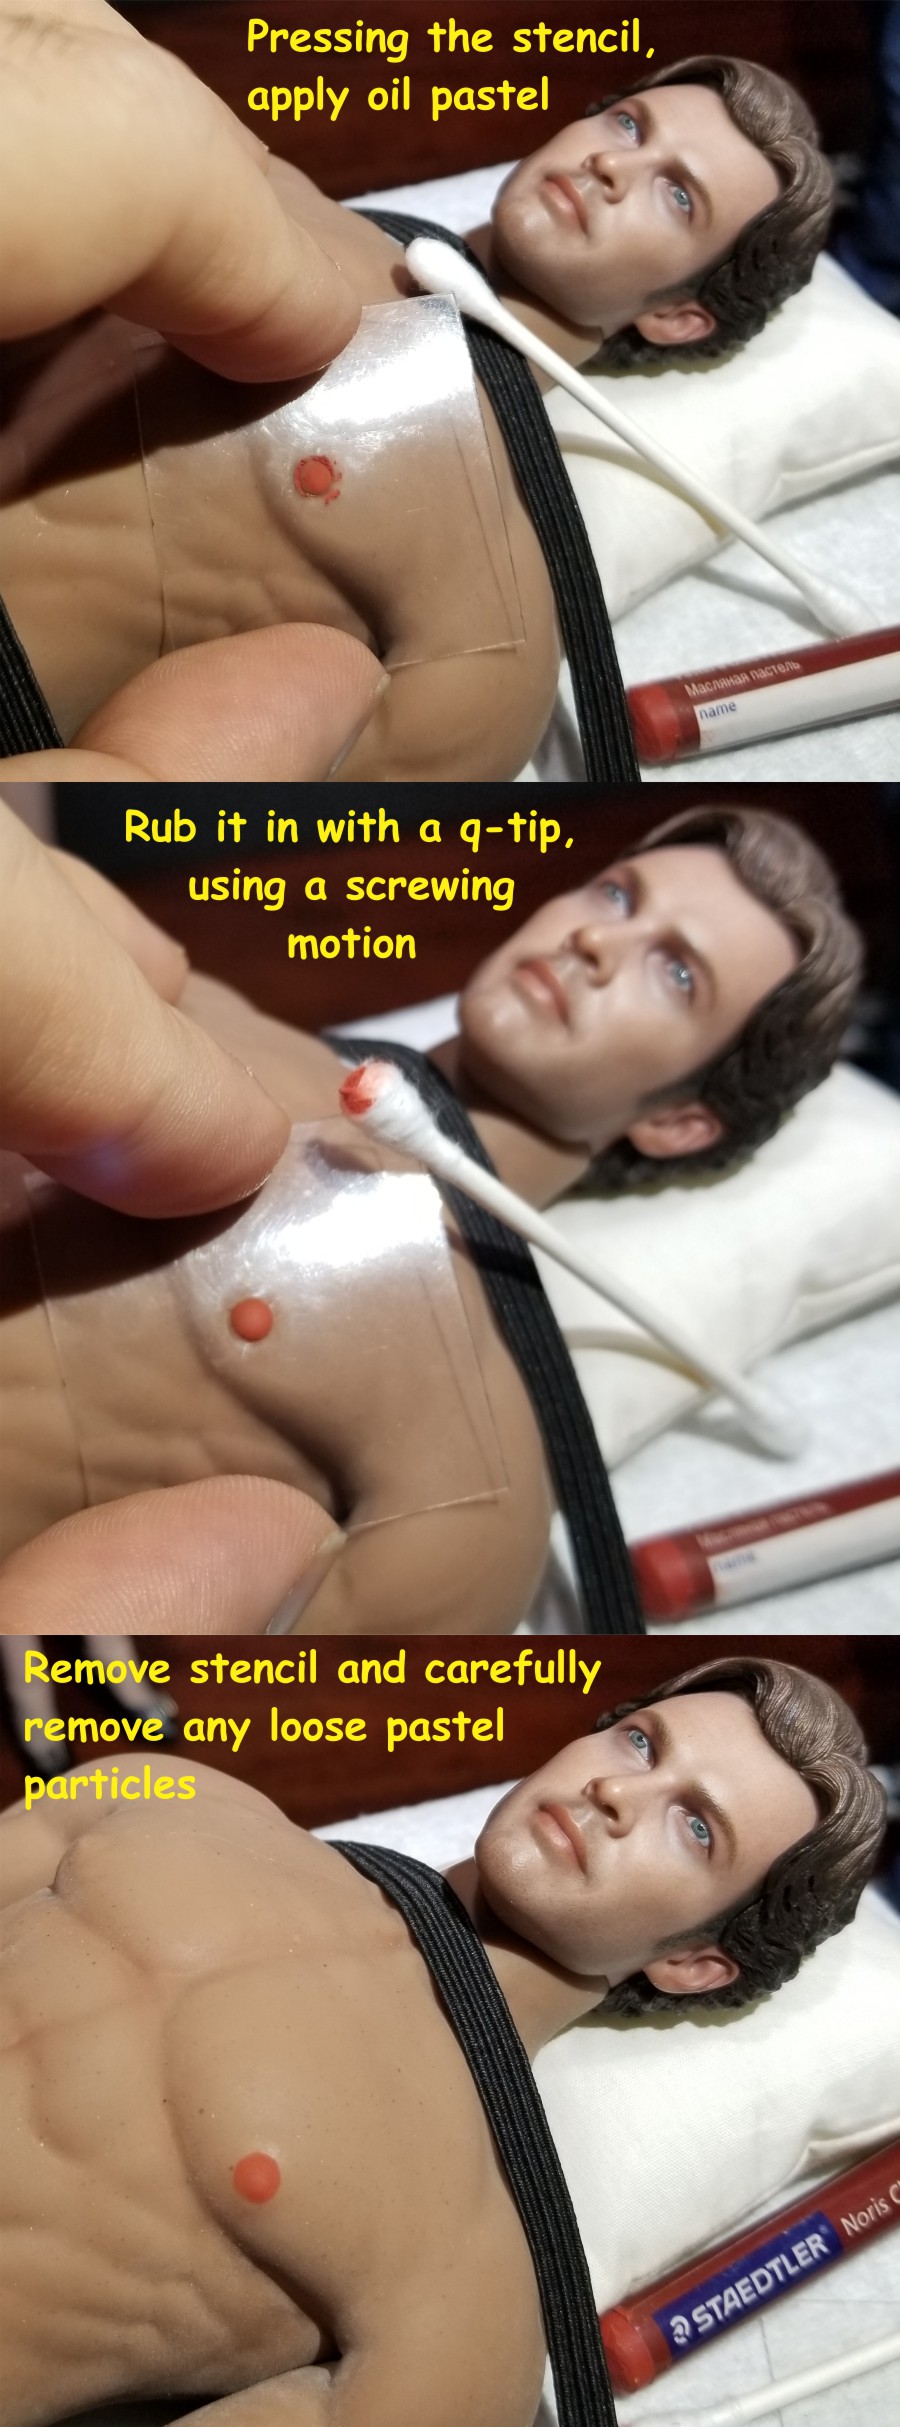
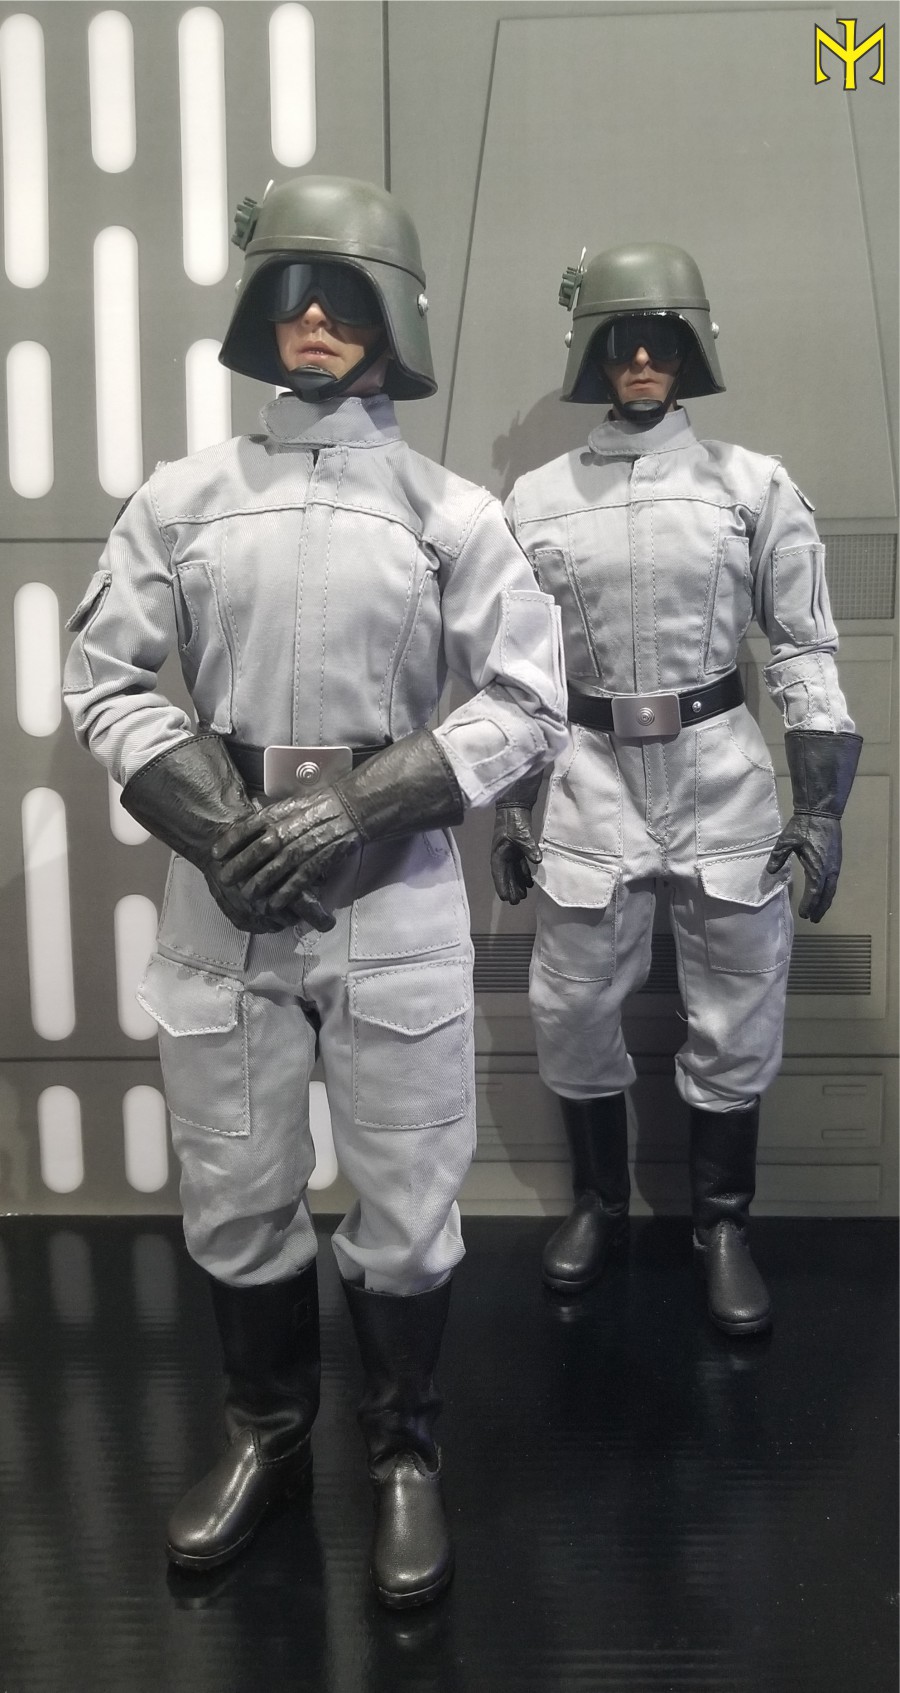
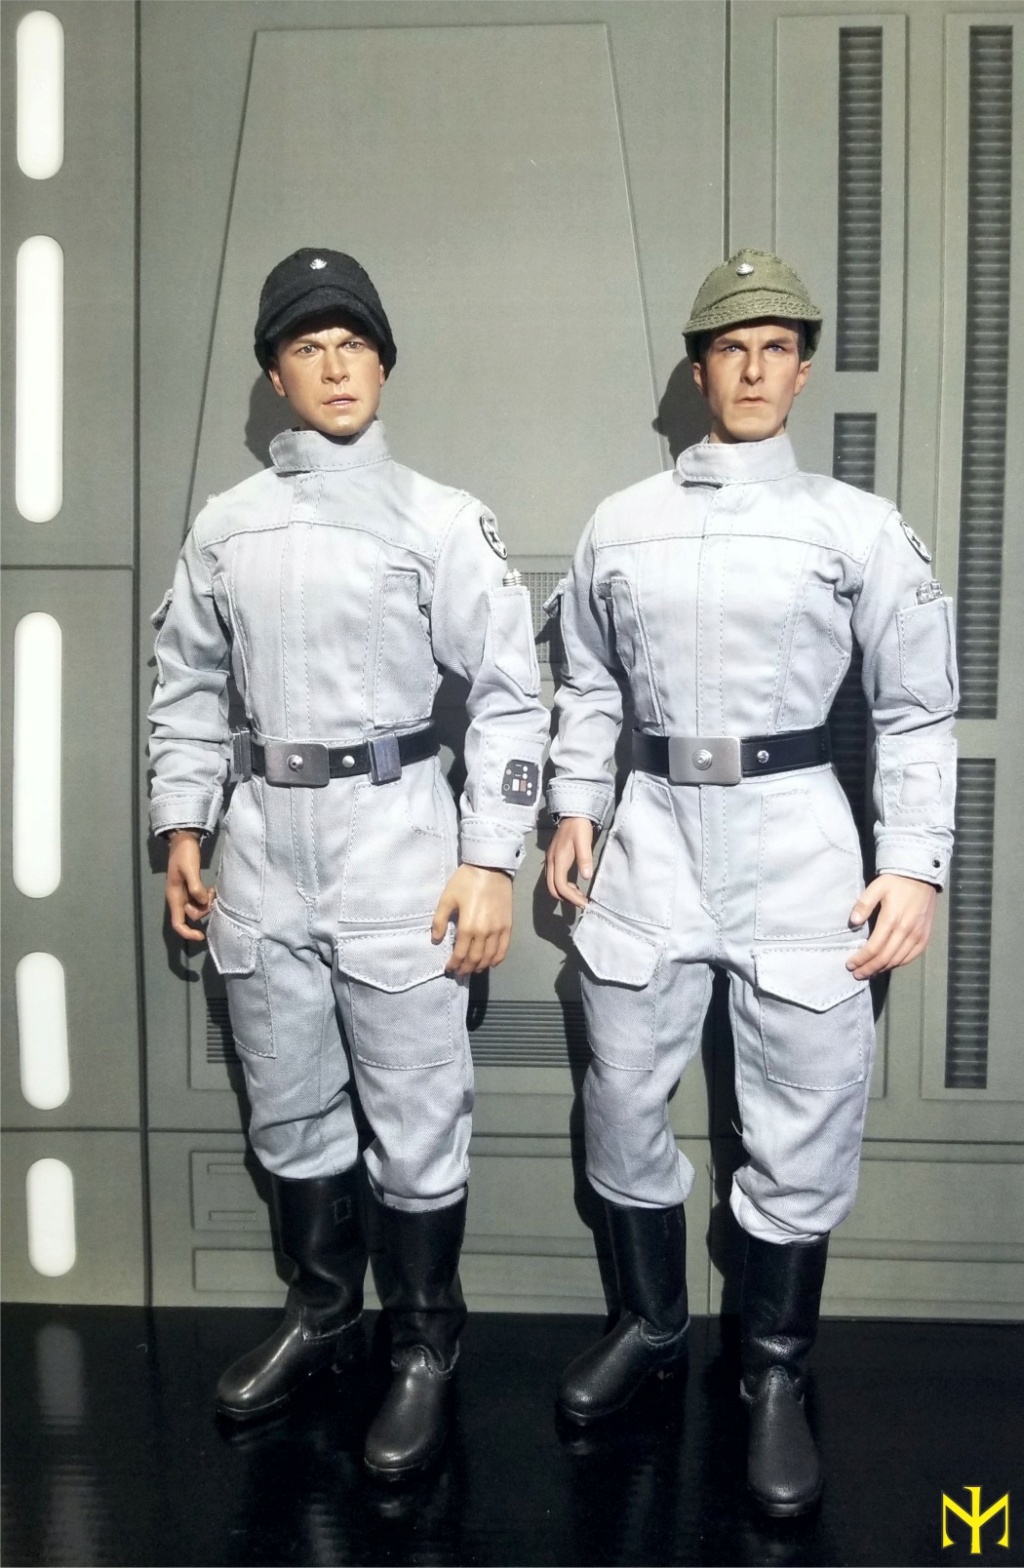
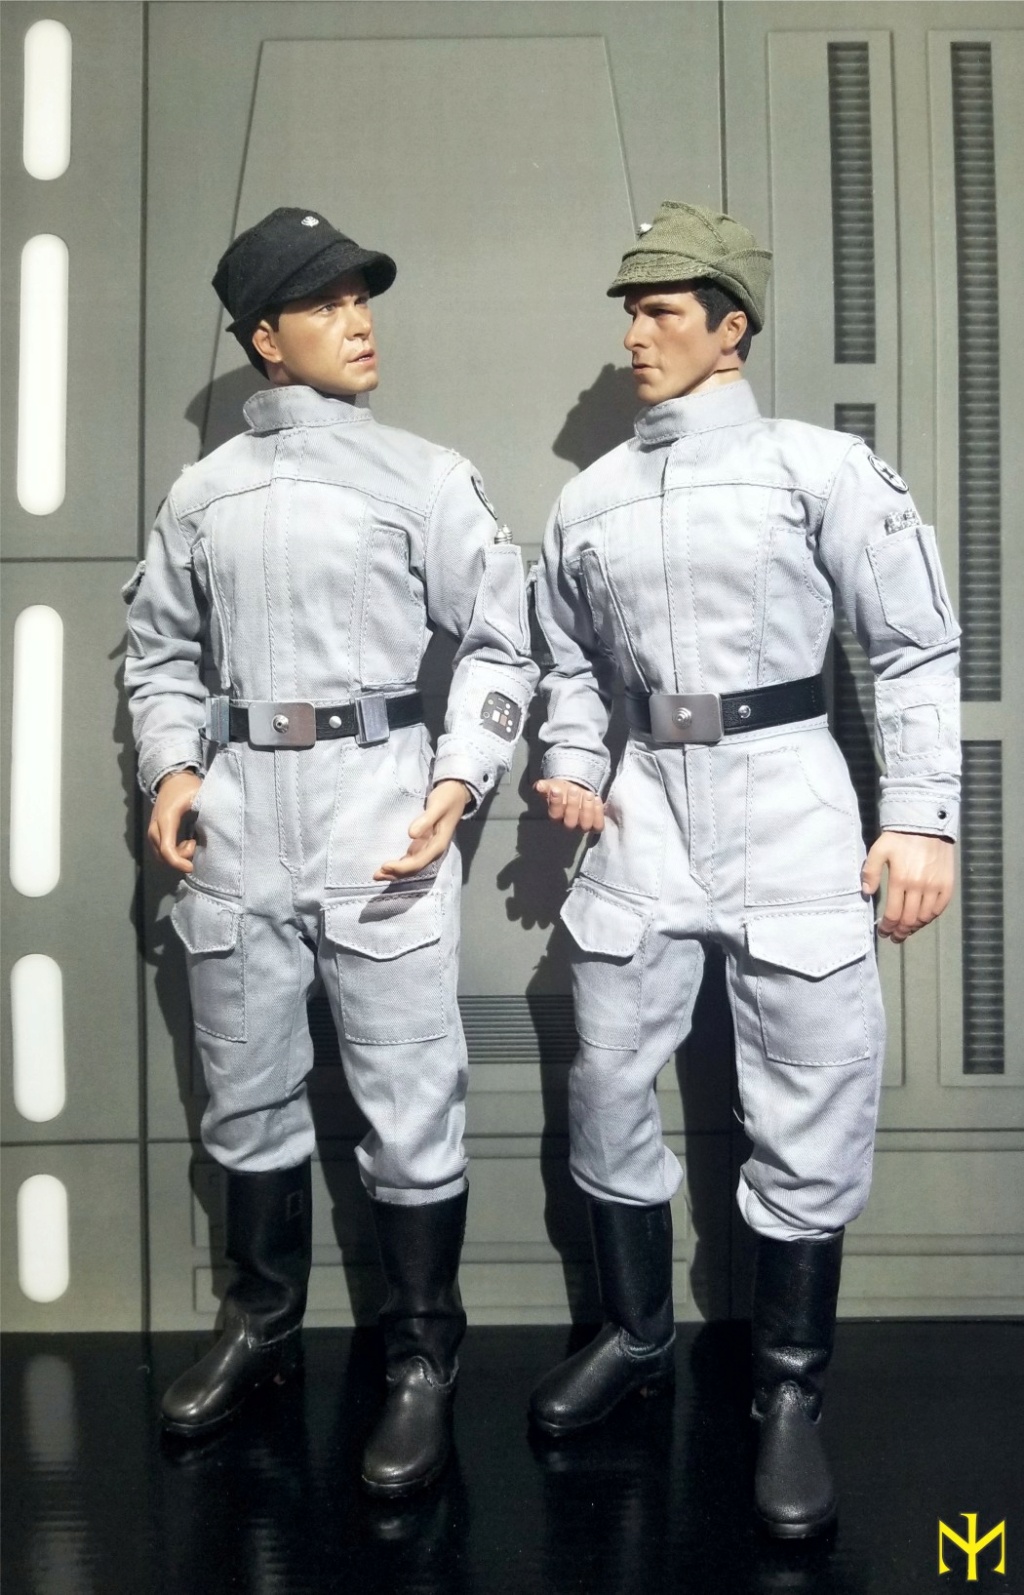
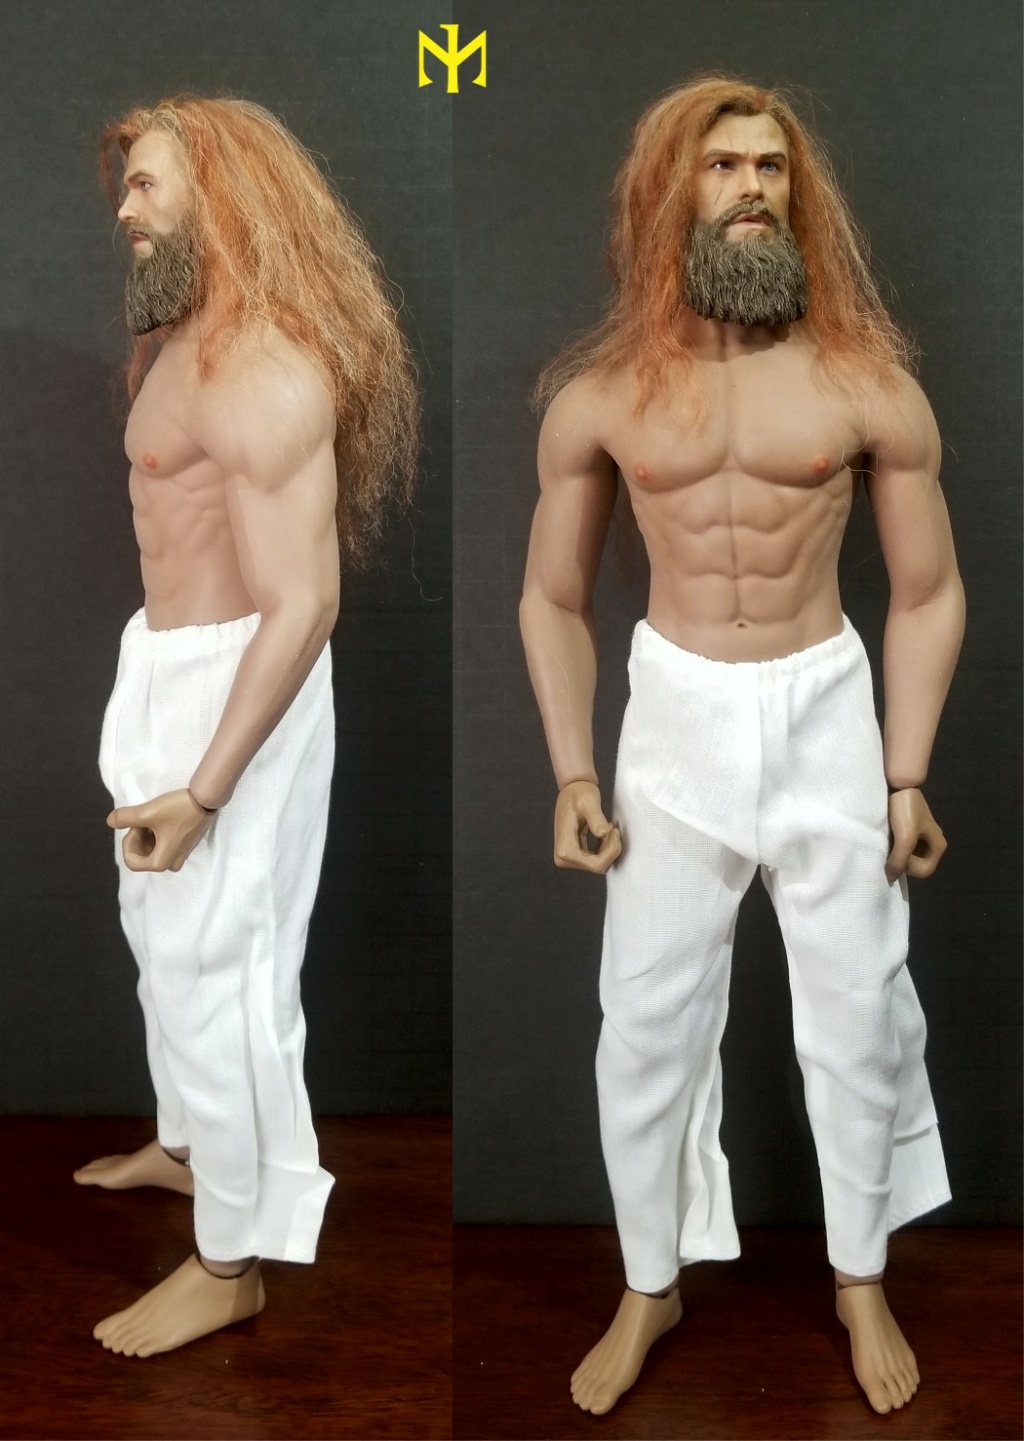
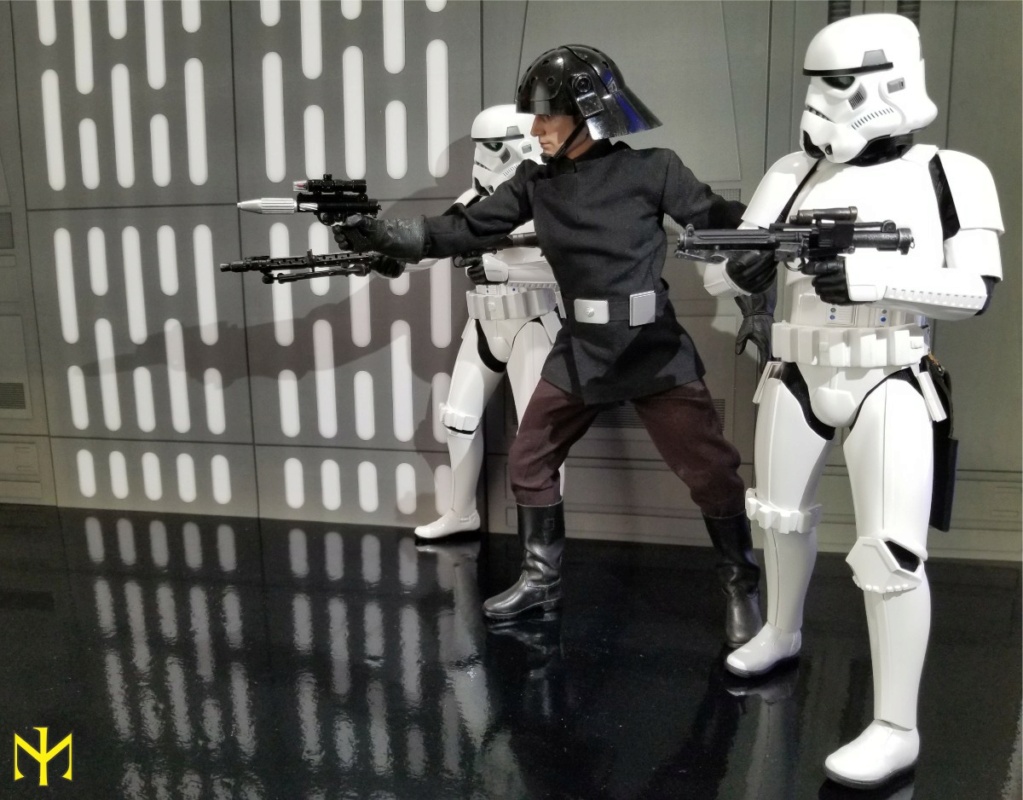
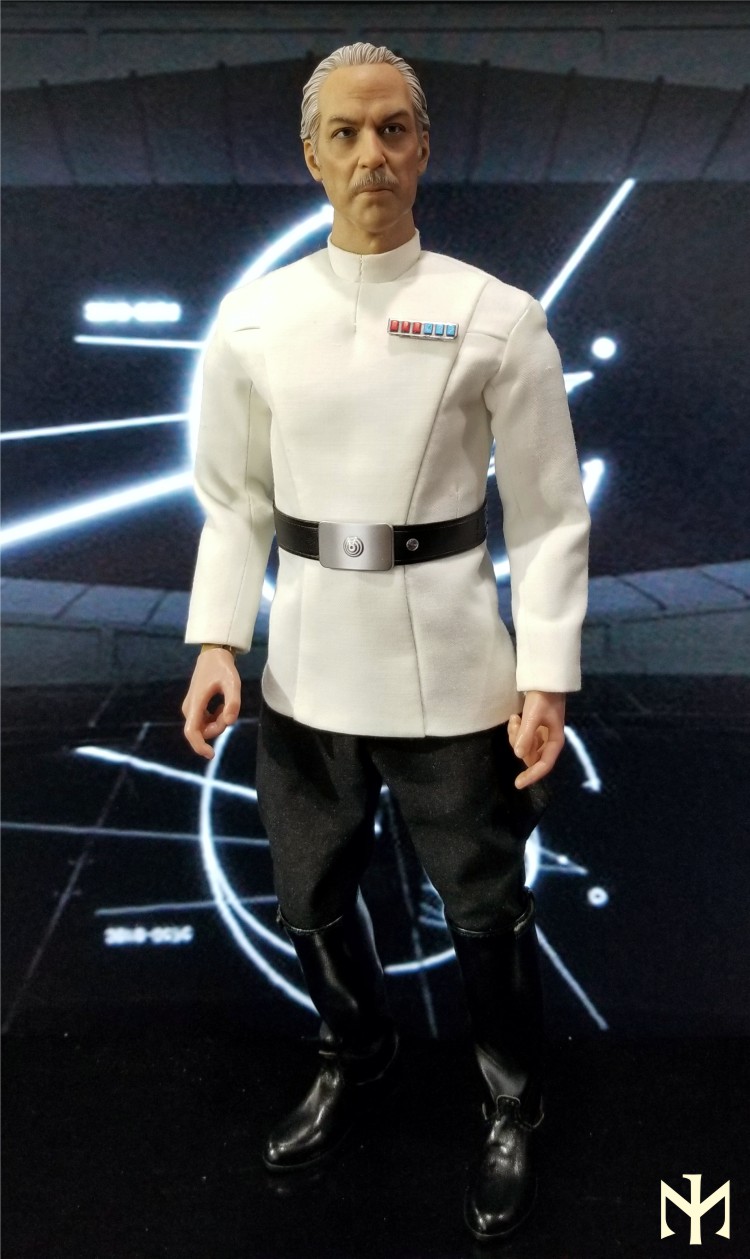
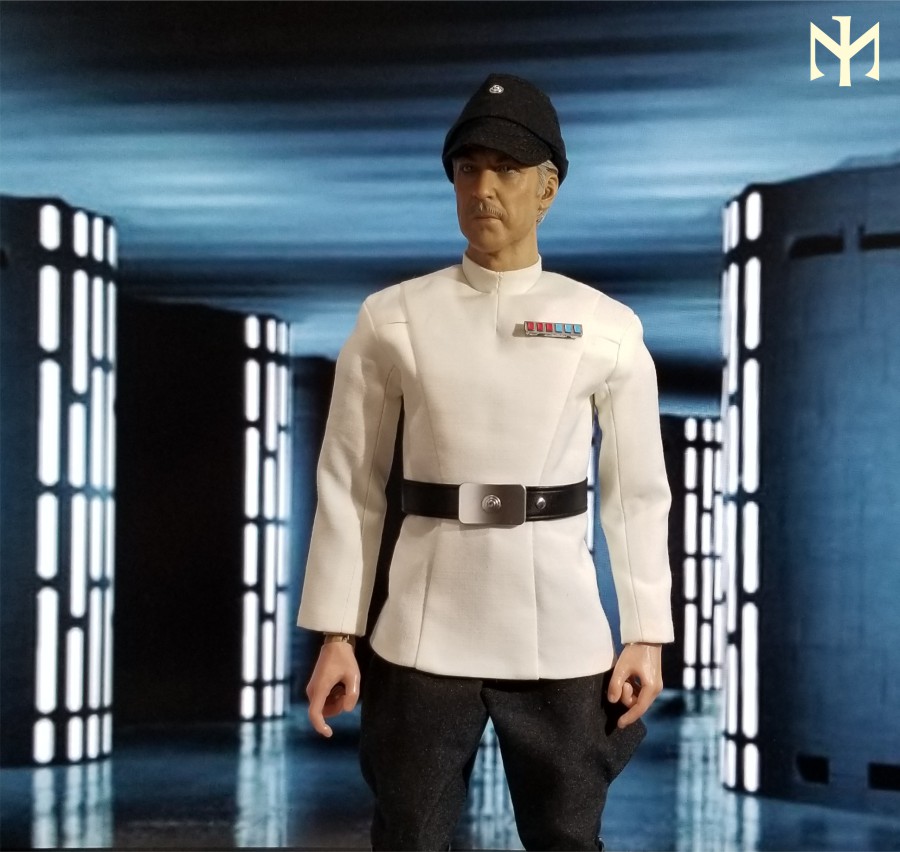
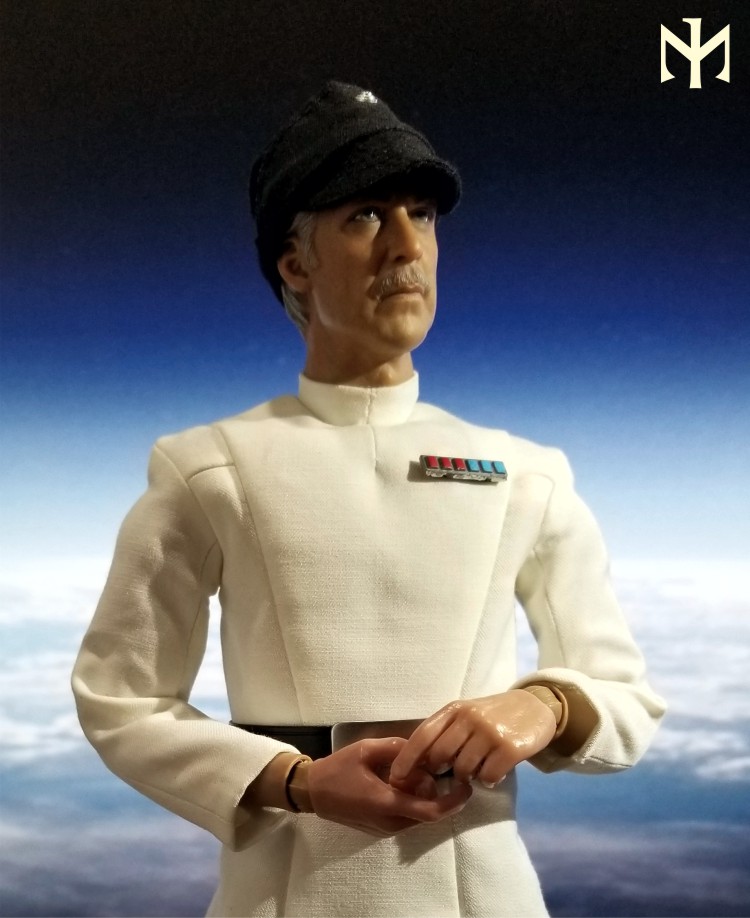
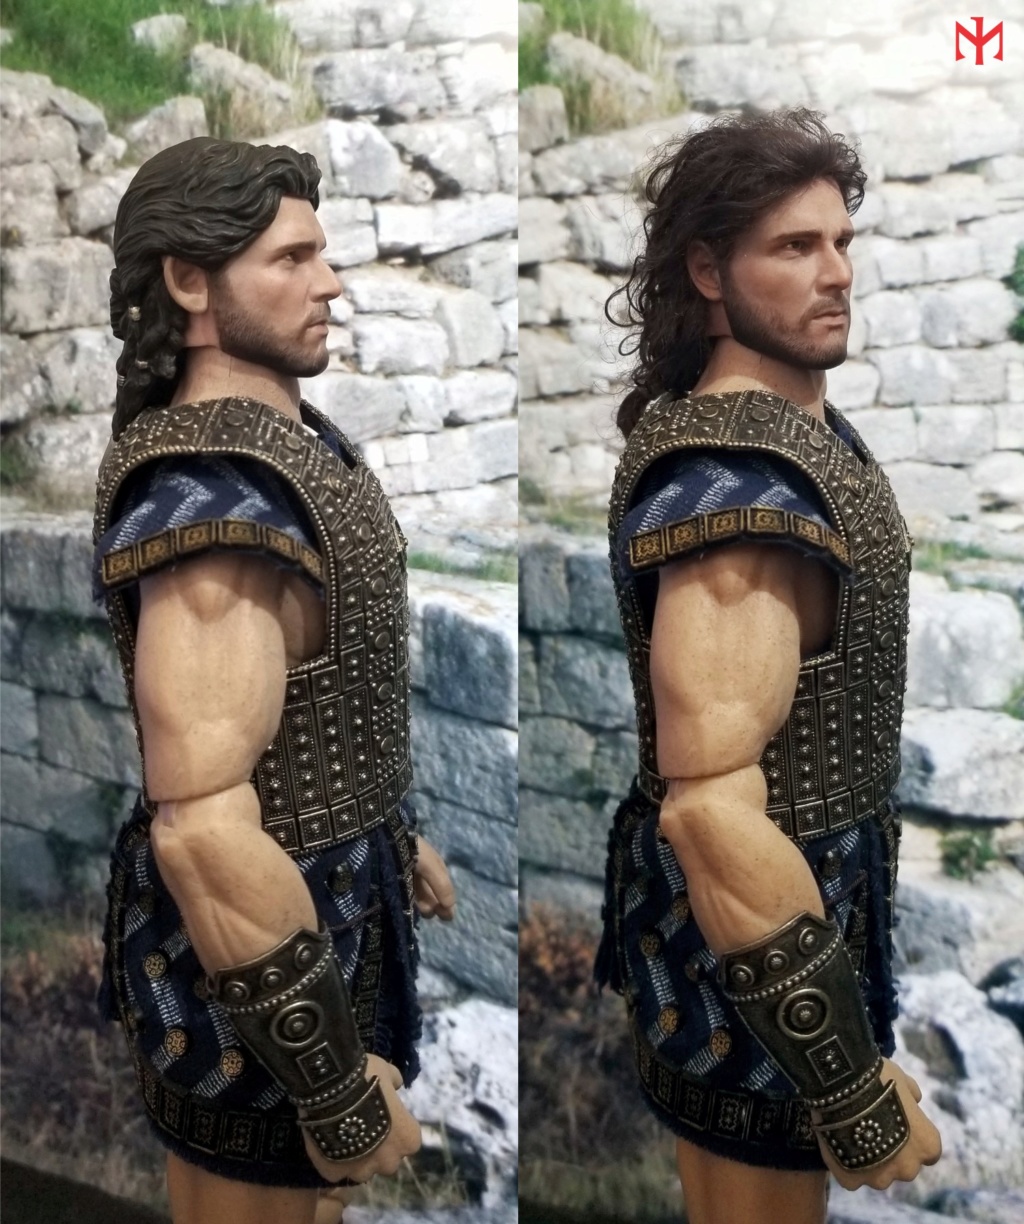
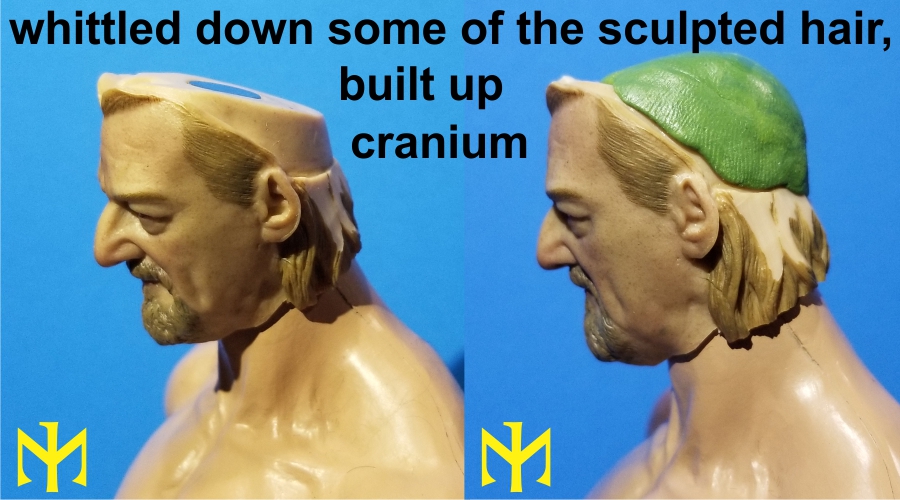
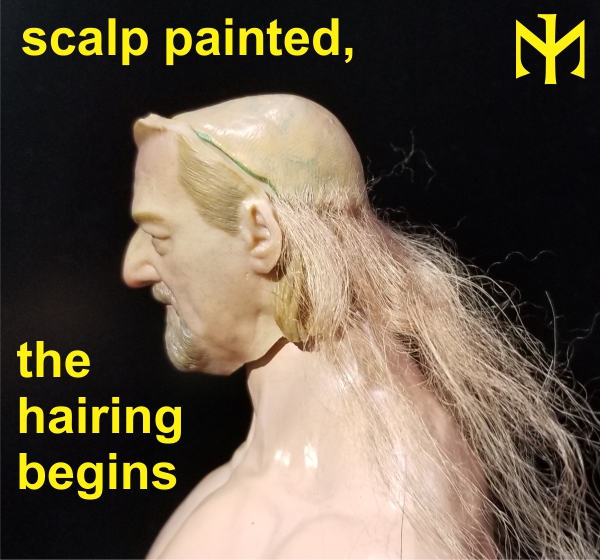
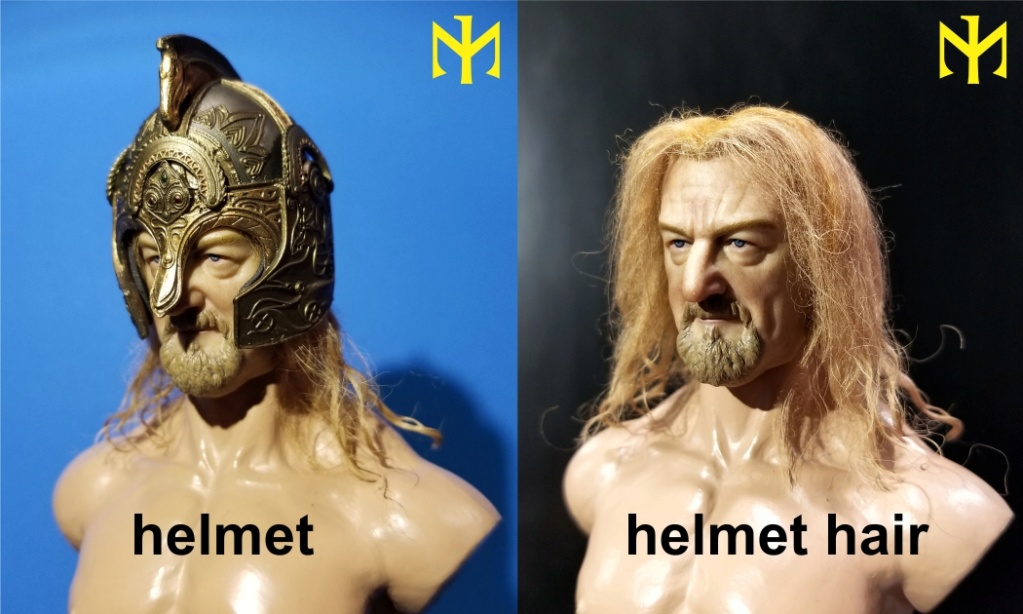
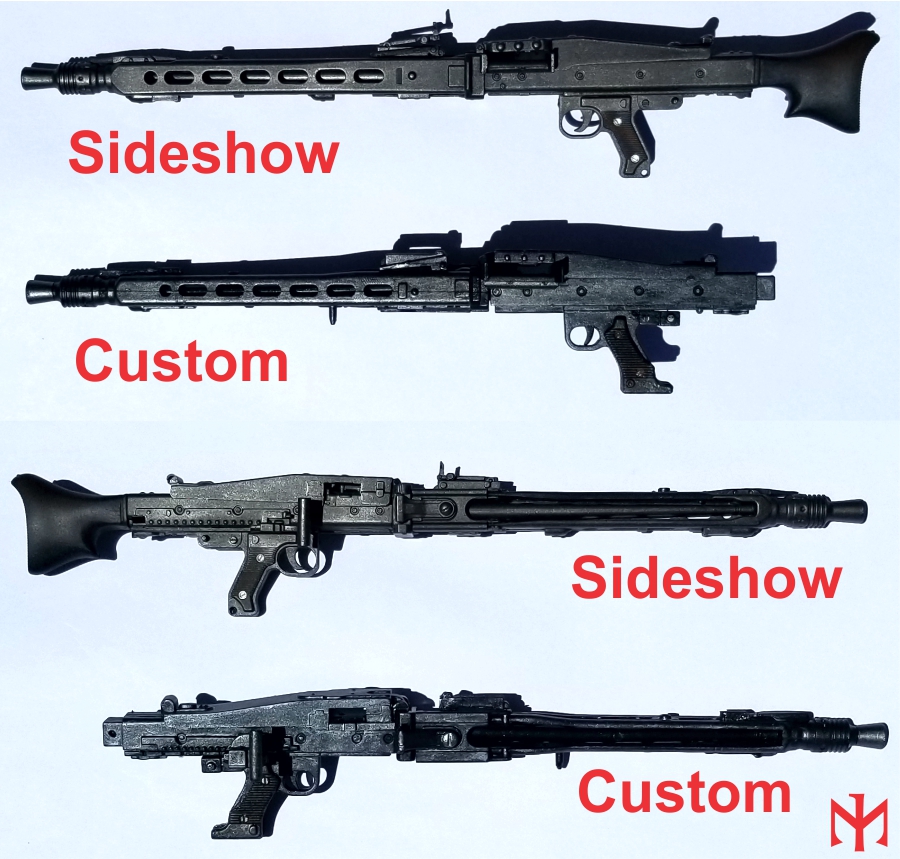
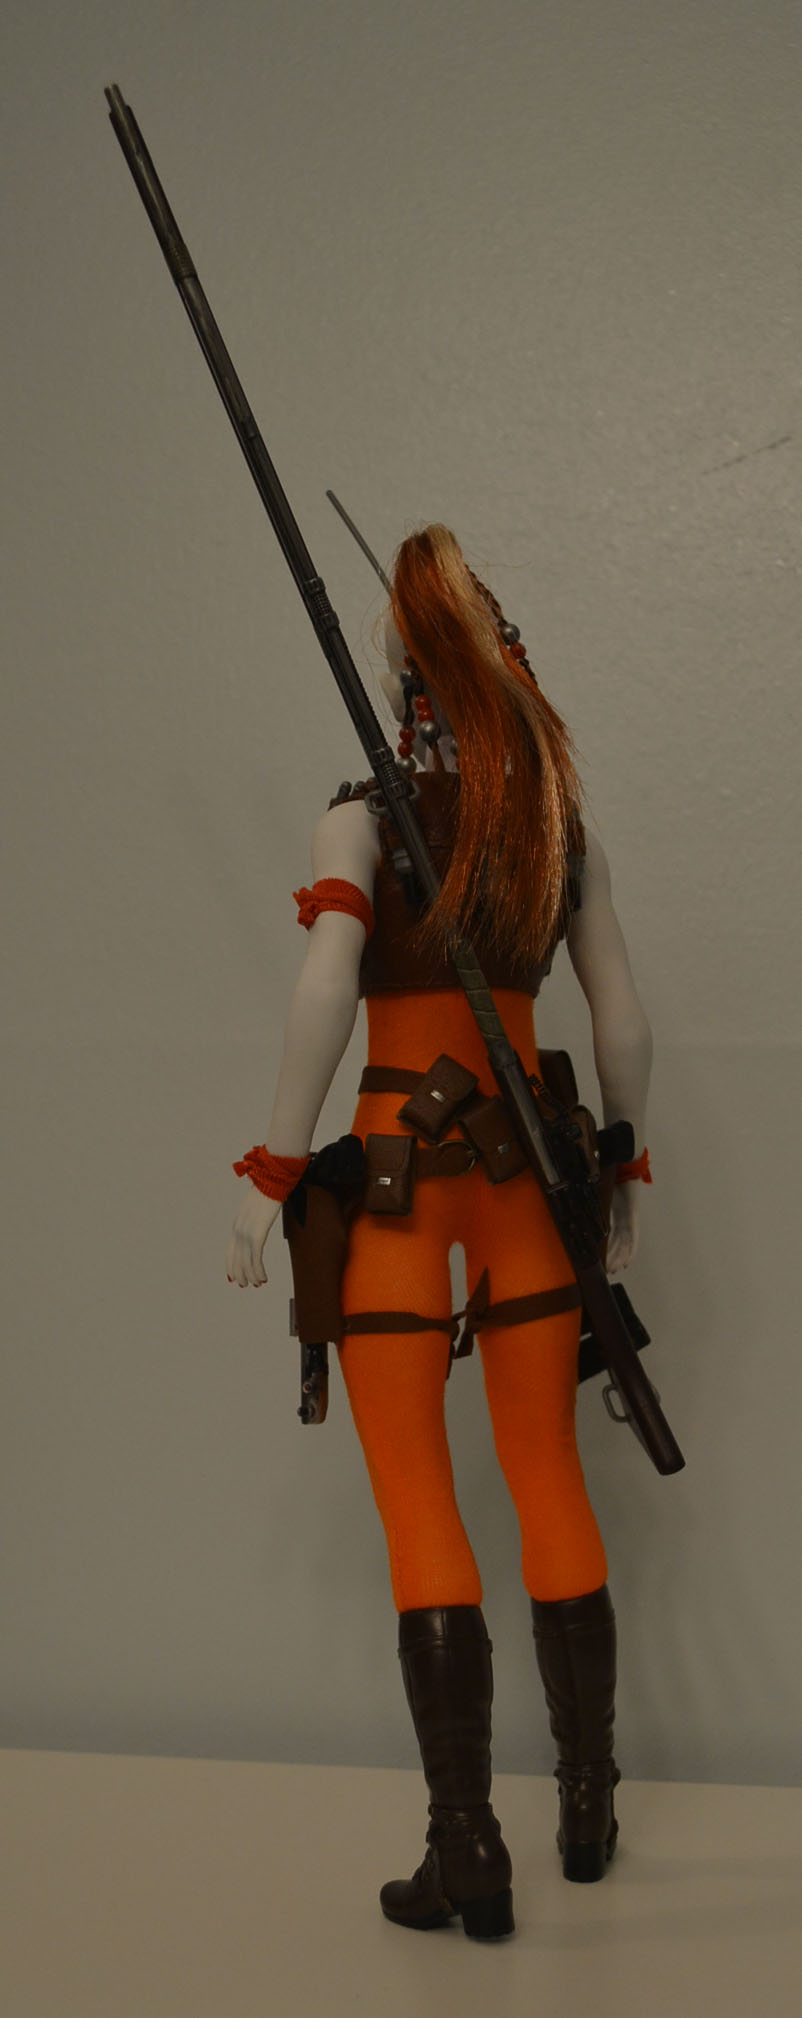
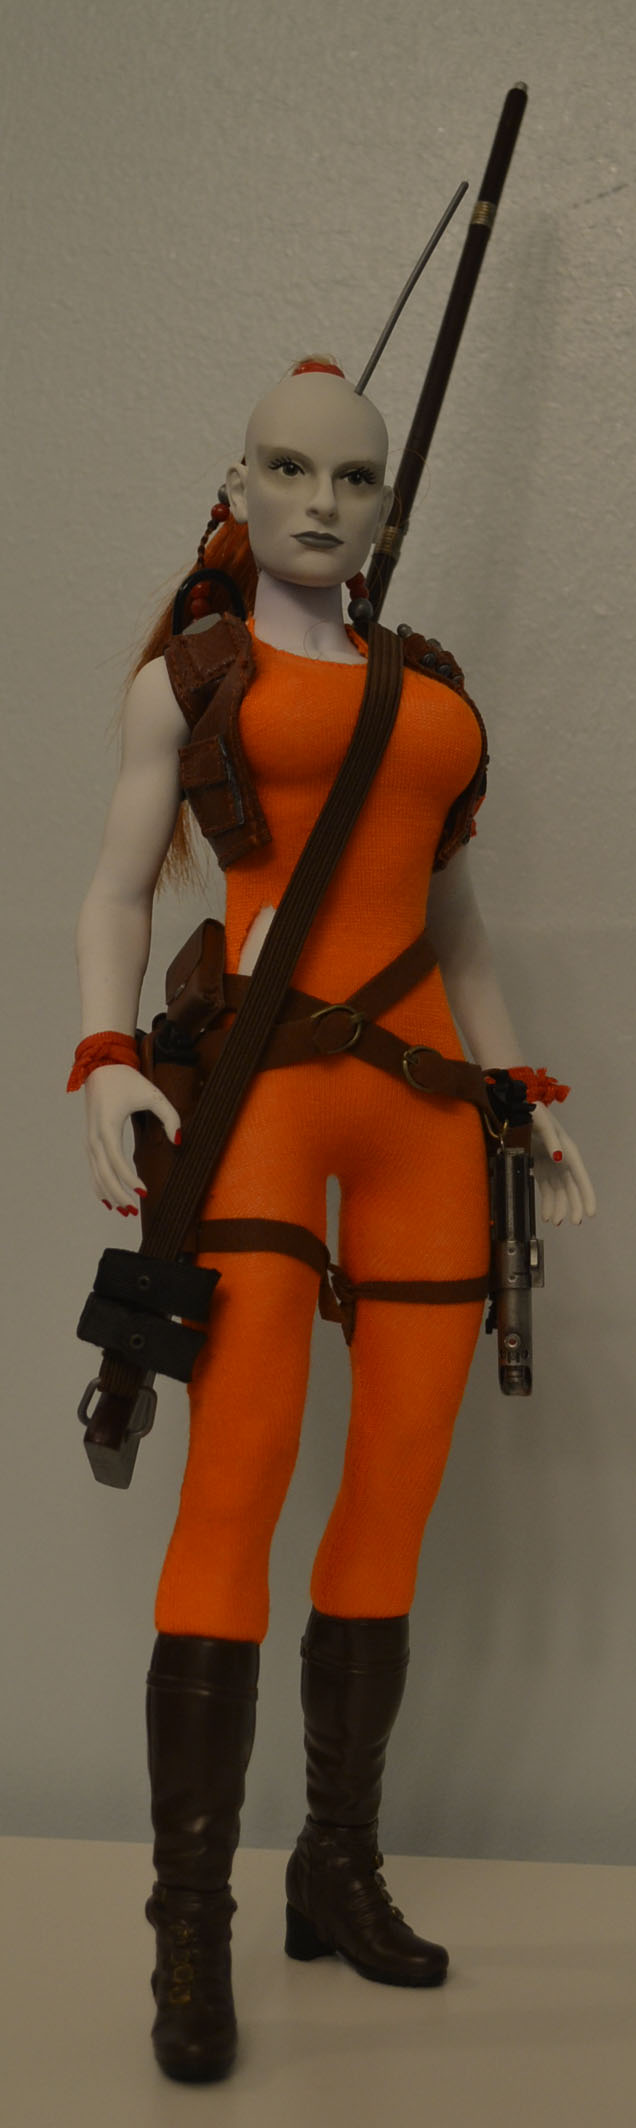
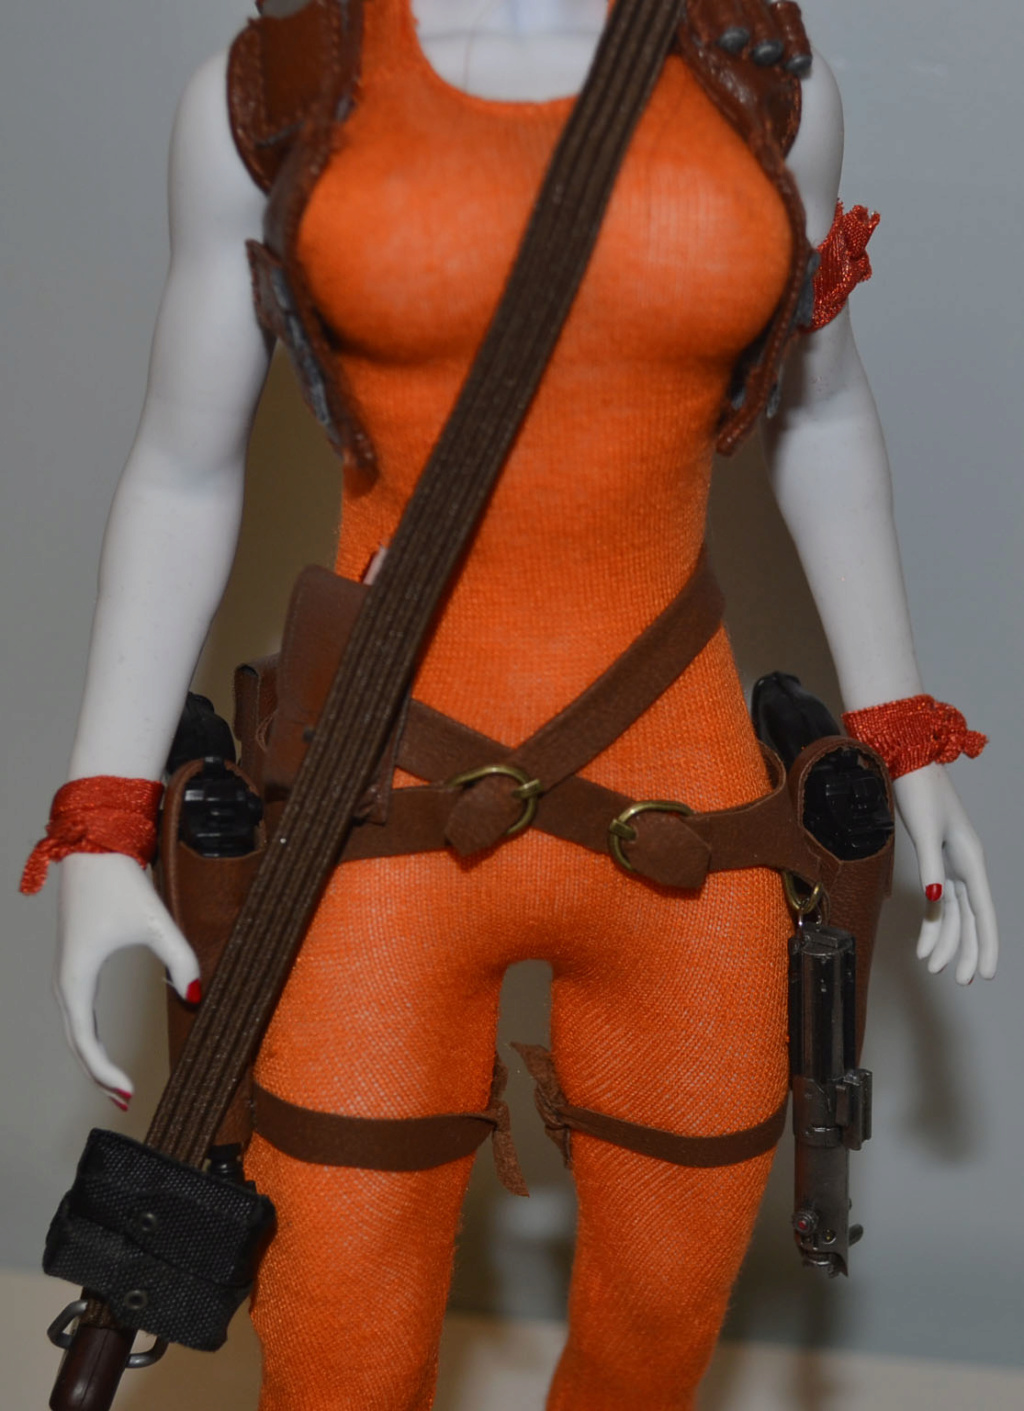
Recreation in Sixth-Scale
Such a simply-attired character ought to be easy to kitbash, right? Well, to a point. The boots were a relatively easy choice, between (among others) Sideshow molded Star Wars or DID leather German jackboots; both come in either shorter or taller varieties, but the shorter kind is more appropriate for Star Wars characters wearing jumpsuits. So I chose DID’s shorter leather jackboots, which are hard to find and (being fairly old) tend to be damaged or to be on the verge of falling apart. I might revisit this choice later. The jumpsuit is from a Sideshow AT-AT driver set (these garments are both rare and expensive these days, but for once I had exercised forethought, since they are useful for several different Imperial costumes); I re-painted it navy blue with a … Sharpie! (And left it to dry for days on end.)

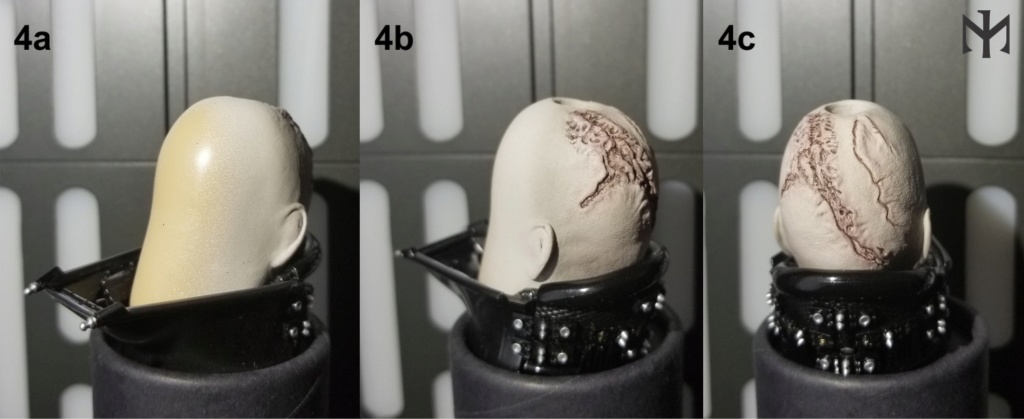
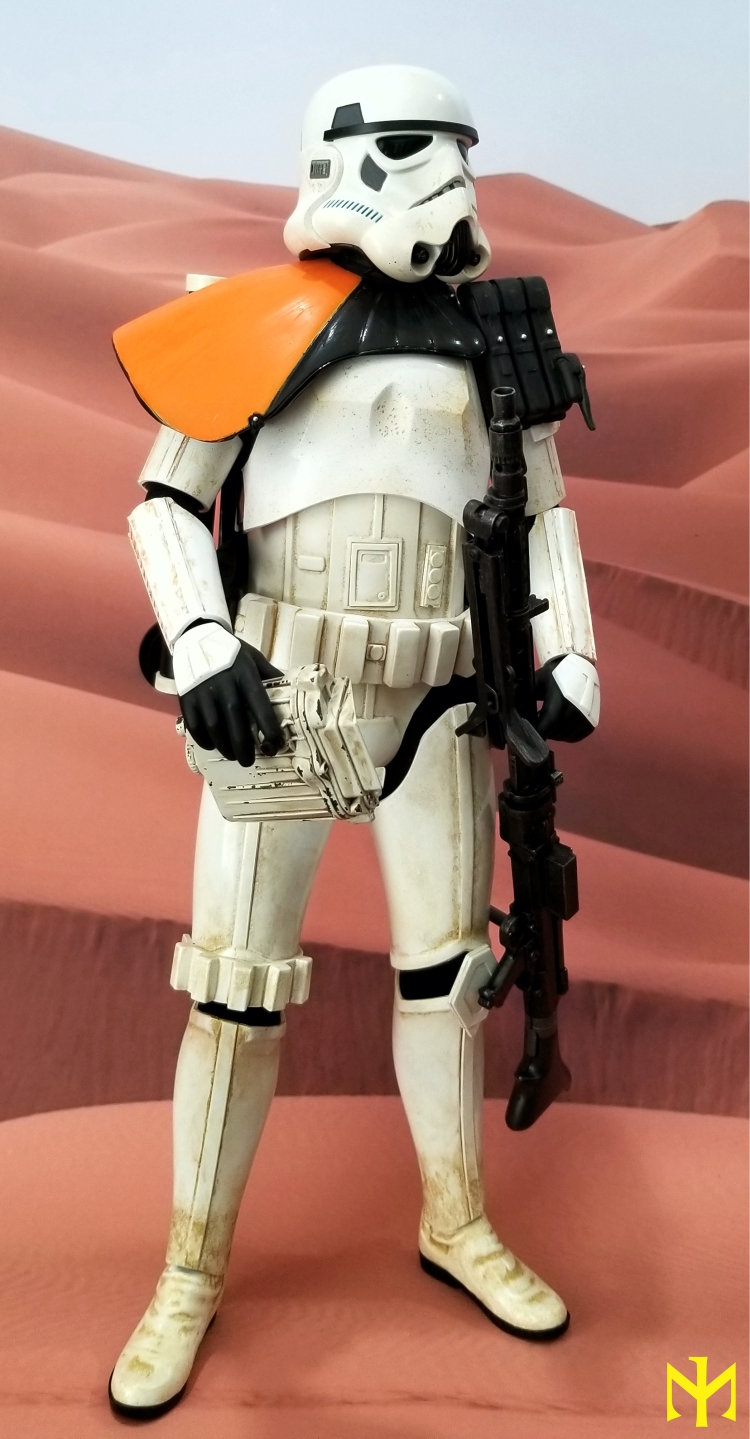
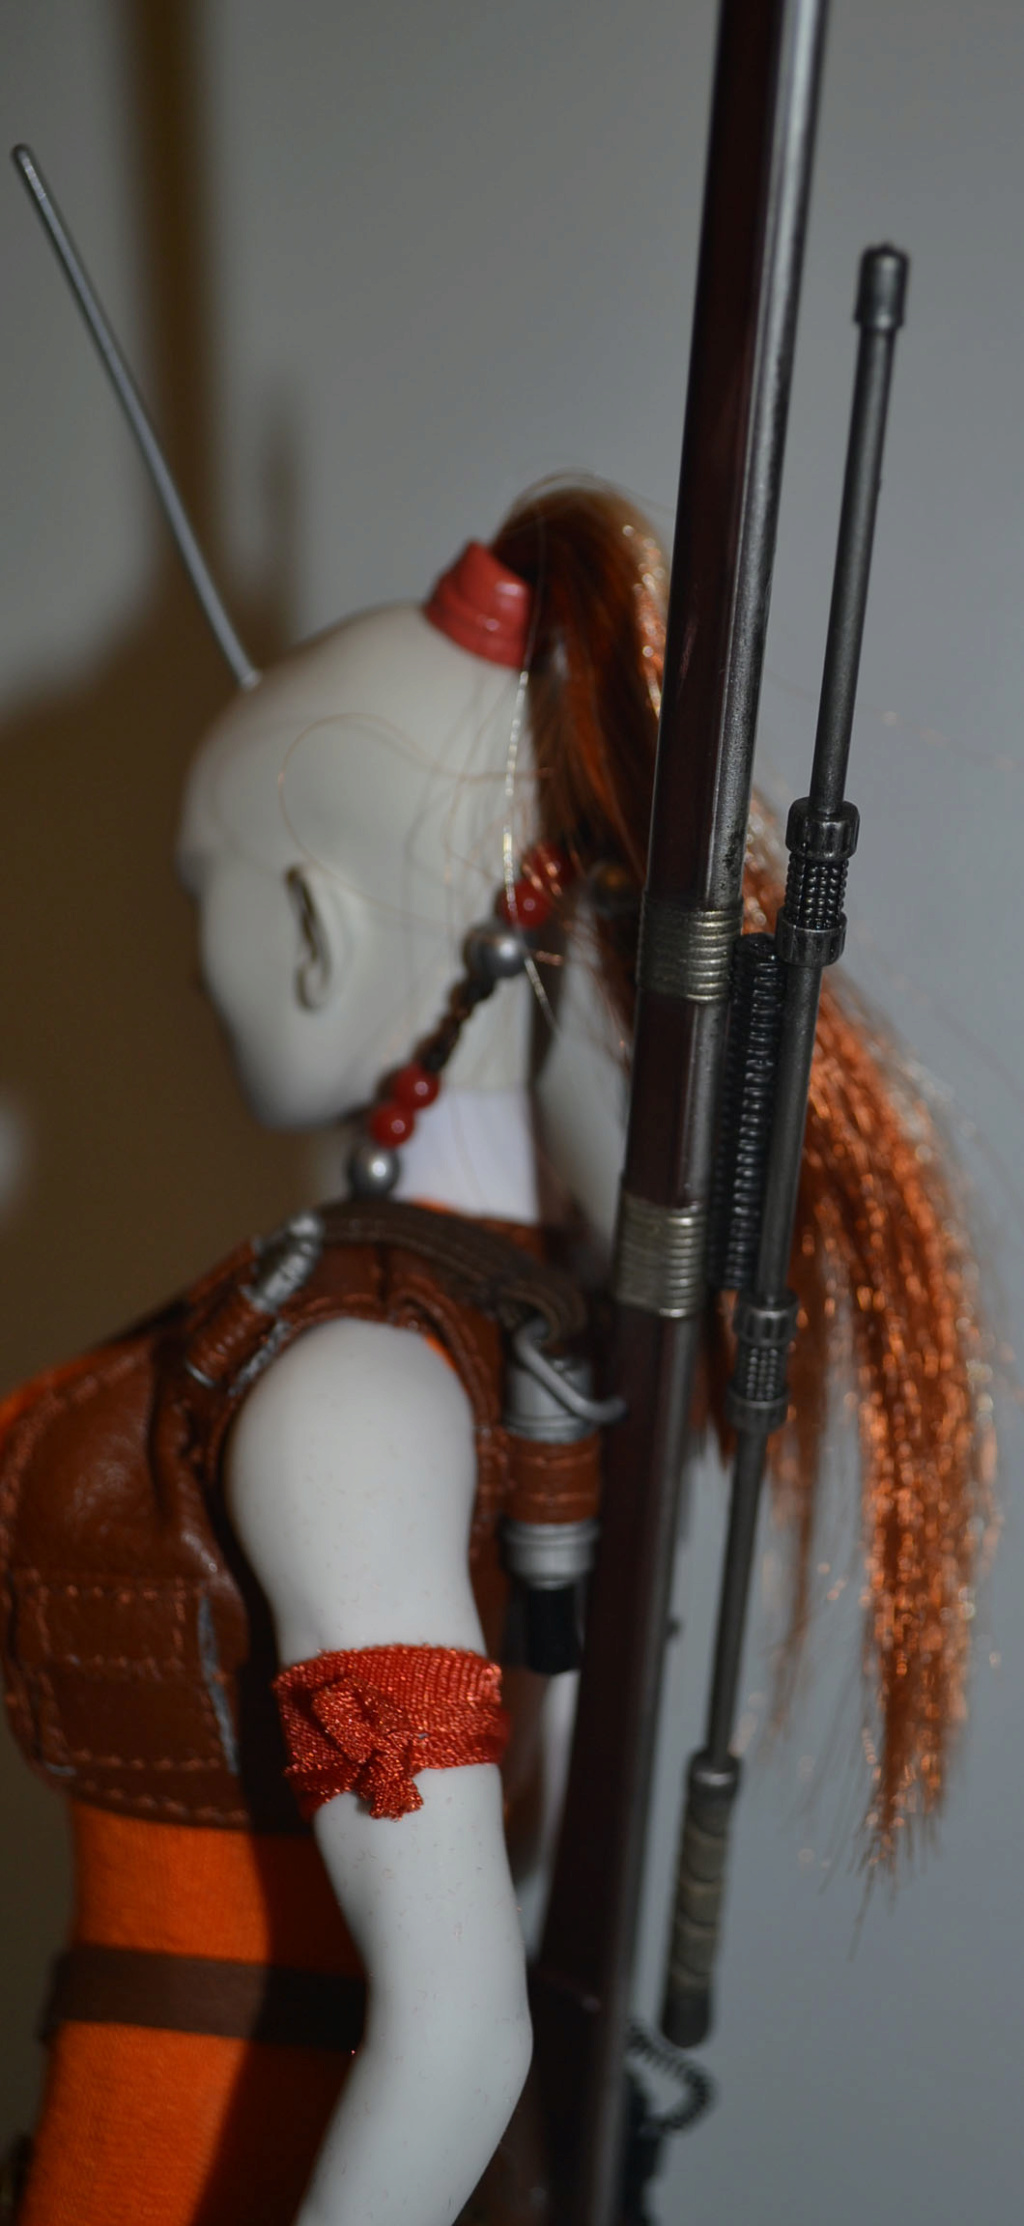
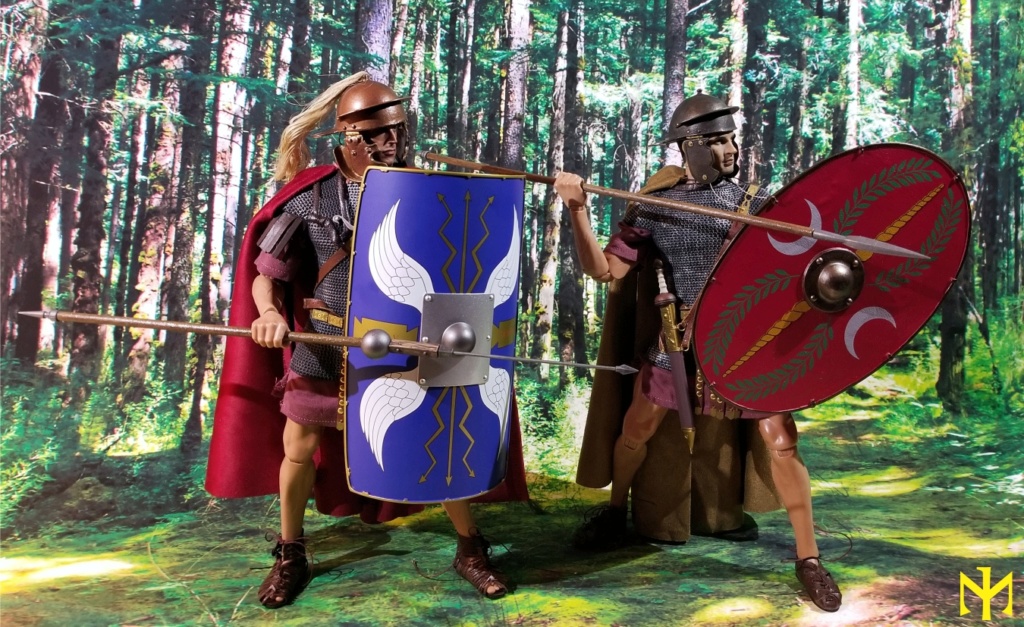
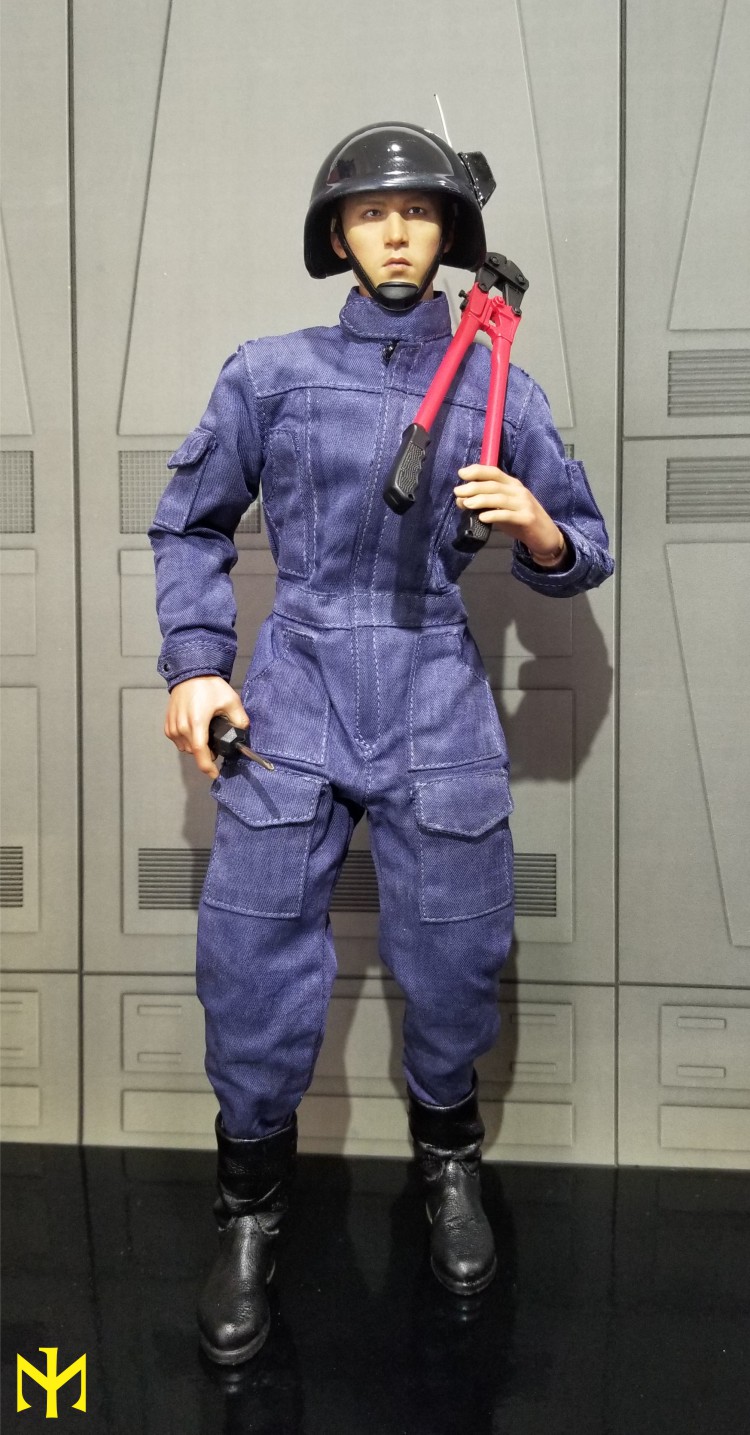
The helmet was surprisingly difficult to find; US World War II gunners with clean no-frills Mk II “talker” helmets must either not have been recreated in high-end sixth-scale, or else be exceedingly rare (I know little about modern military figures and may well have missed something obvious). In the end, I found a sixth-scale version of the helmet on Shapeways for a reasonable price and purchased a couple, selecting the smoother surface option. When they arrived, they were still striated enough to betray a rough surface and it was apparent that they would require not only painting, but also smoothing to achieve the desired glossy effect. Since I am pretty bad at sanding (patience not being one of my many virtues), that seemed like a daunting task. Until I discovered a way around it in XTC-3D, a mix and brush-on coating that fills in striations. Perhaps I have not tried enough products, but I was surprised at how well it worked, even with a single coat (to correct some minor oversights, I applied a second). The hardest part was waiting for it to arrive: I could swear they used a snail-drawn open sleigh and the snails kept freezing to the ground. The chin strap is borrowed and slightly repurposed (rearranged, really) from a Hot Toys Solo Mudtrooper, while I made a mold of the communication box on a Sideshow Rebel fleet trooper to recreate that part from Kneadatite (here is where I thank Ovy for encouraging me in that direction a long time ago); the antenna is, predictably enough, a length of wire.
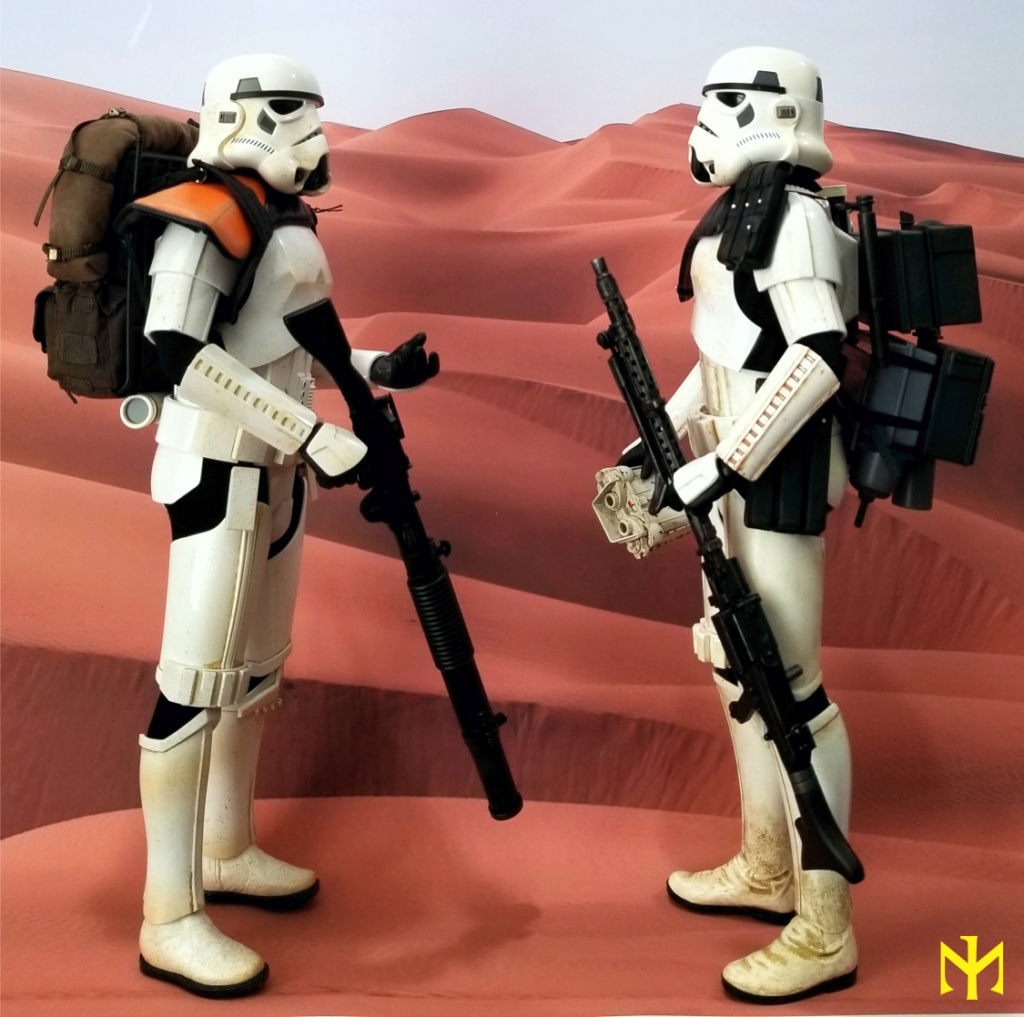
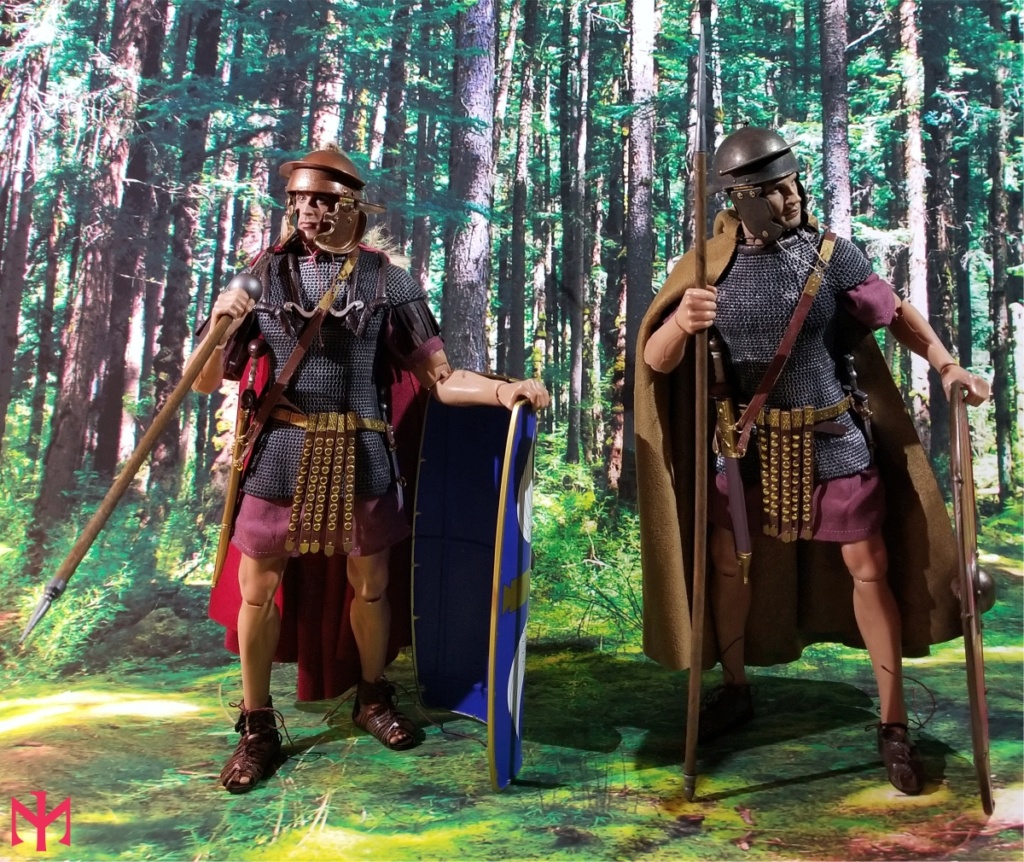
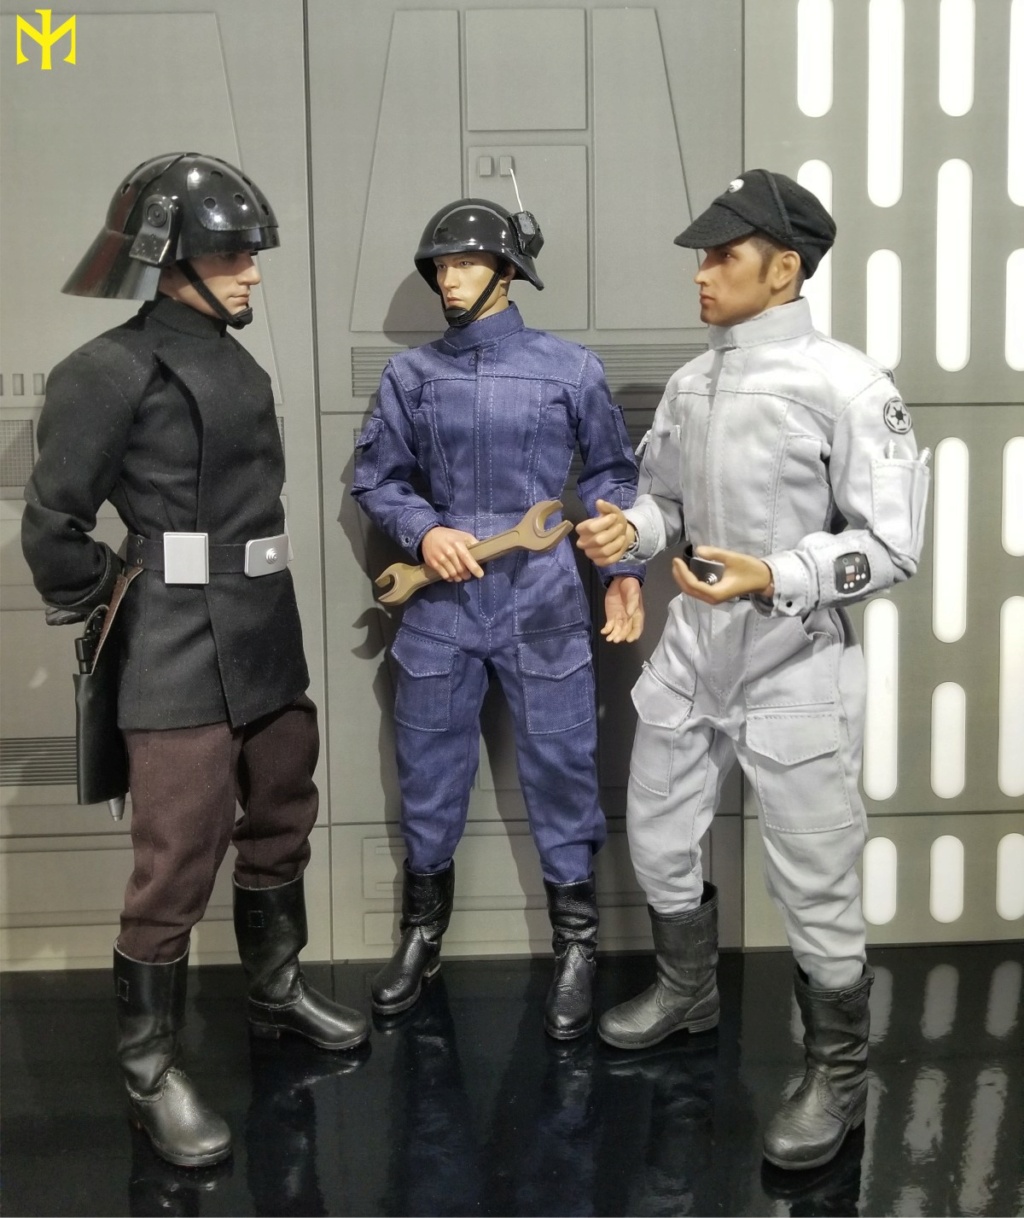
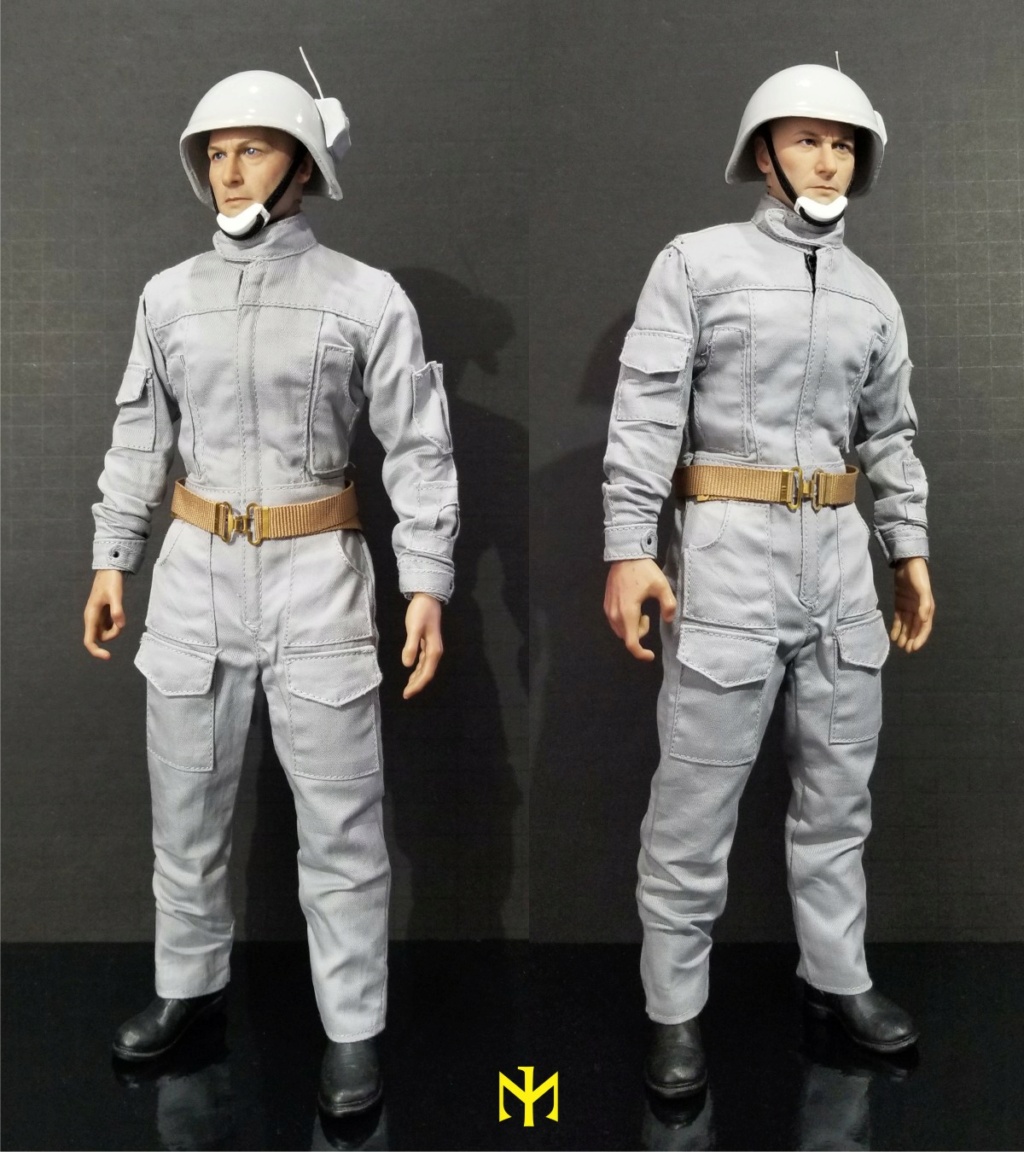
I also painted a second helmet (and provided it with a second communication box) in light grey to put together an approximation of a Rebel ground crewman (or “hangar technician”). I say an approximation, because in this instance I could not bring myself to alter the precious Sideshow AT-AT driver jumpsuit; besides, while making the pocket flaps rectangular might have been easy enough, how would I make two more leg pockets? I suppose knowing one’s limitations is philosophical. But I think it conveys enough of the right effect, especially for an approximation.
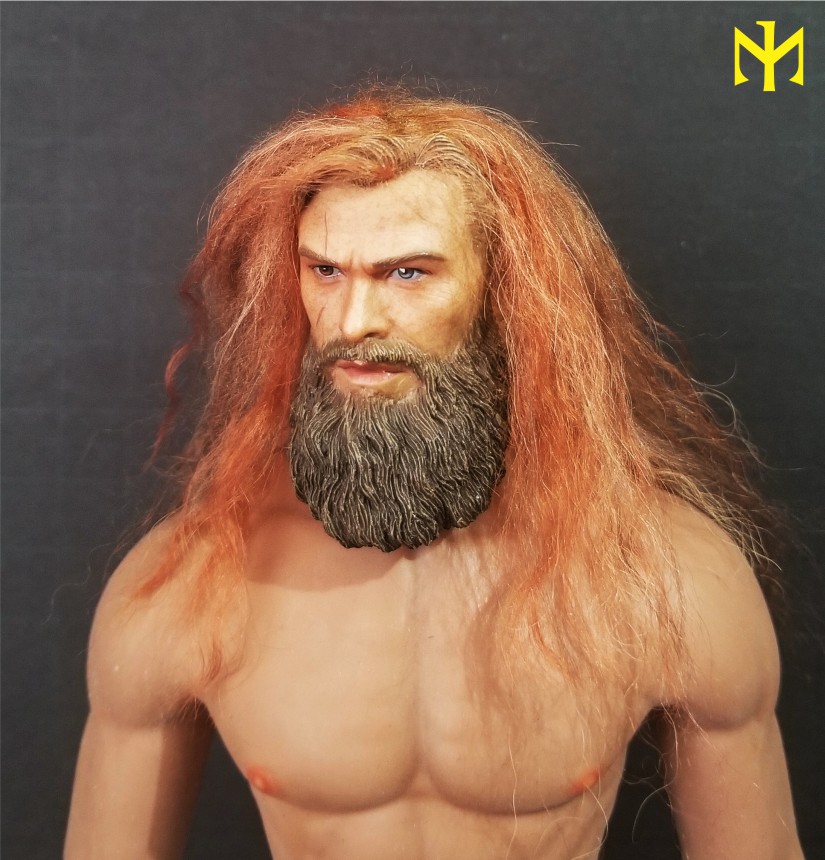
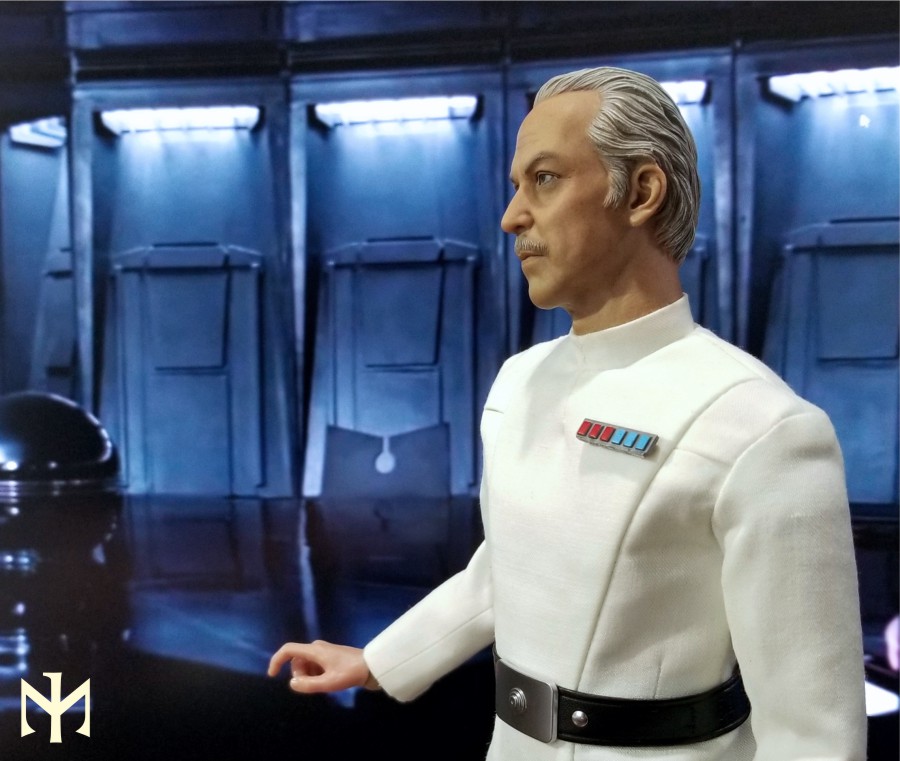
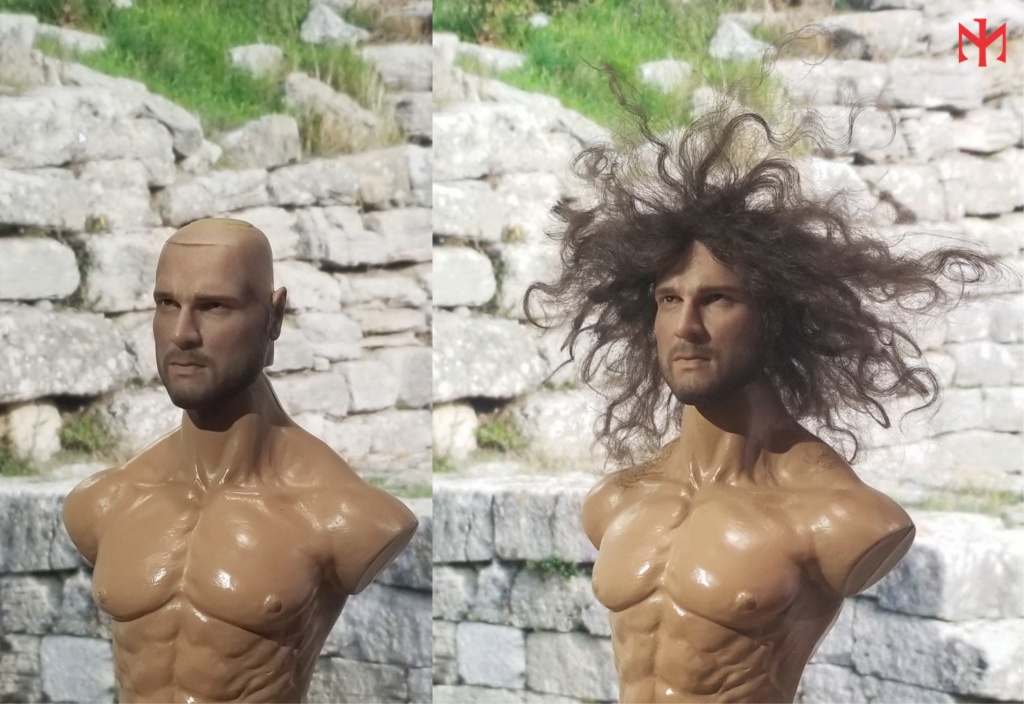
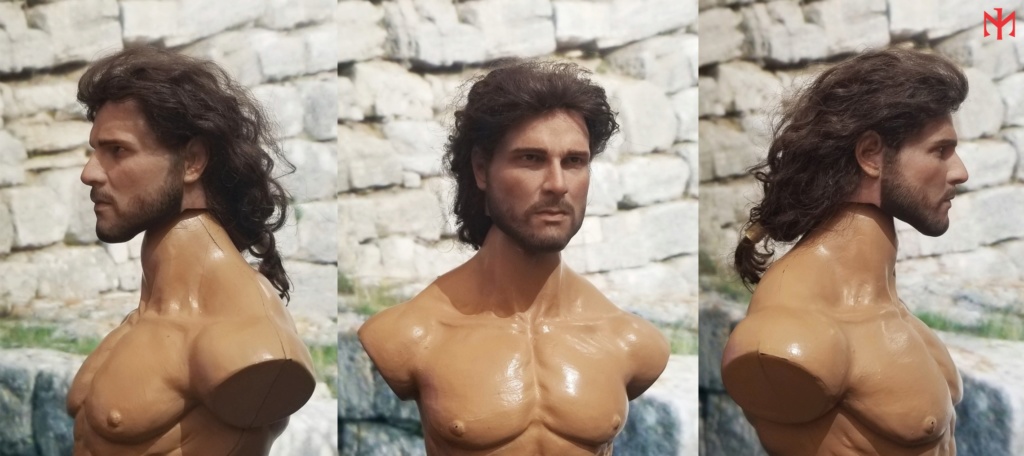
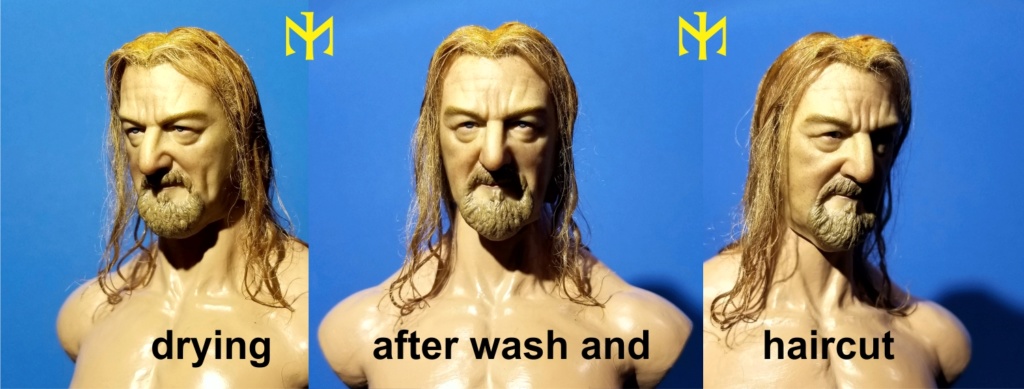
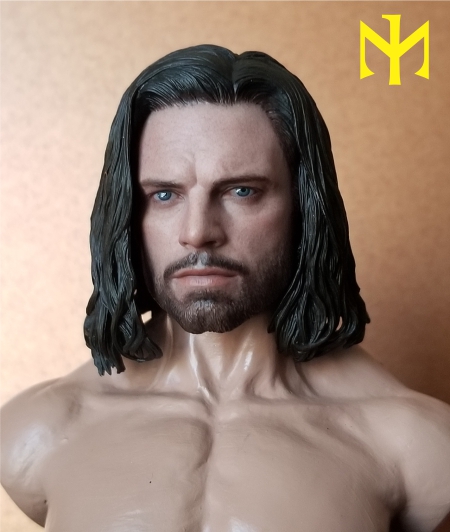
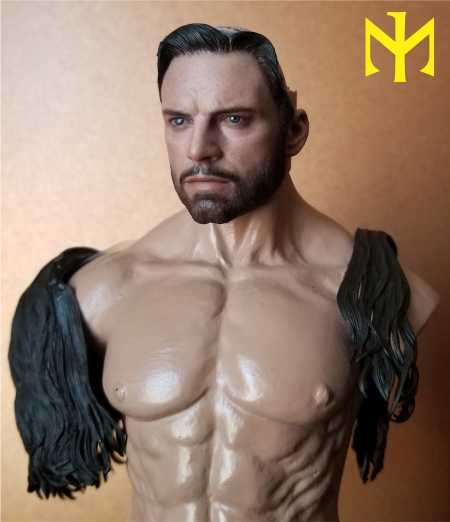
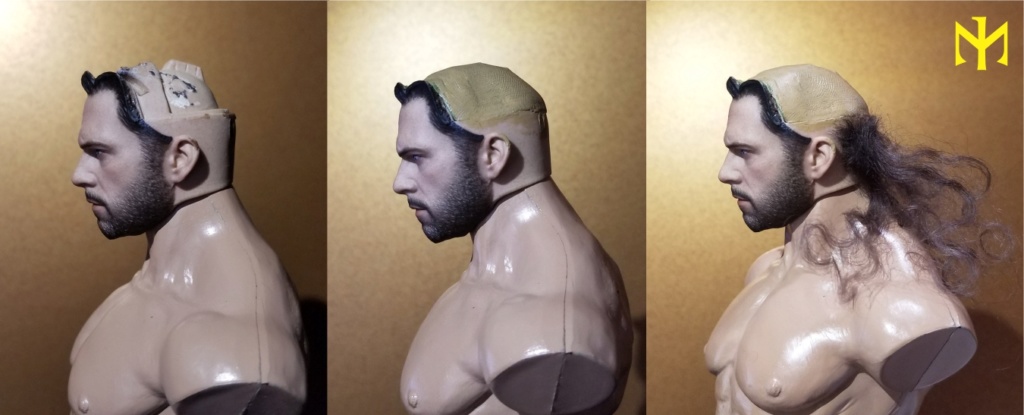
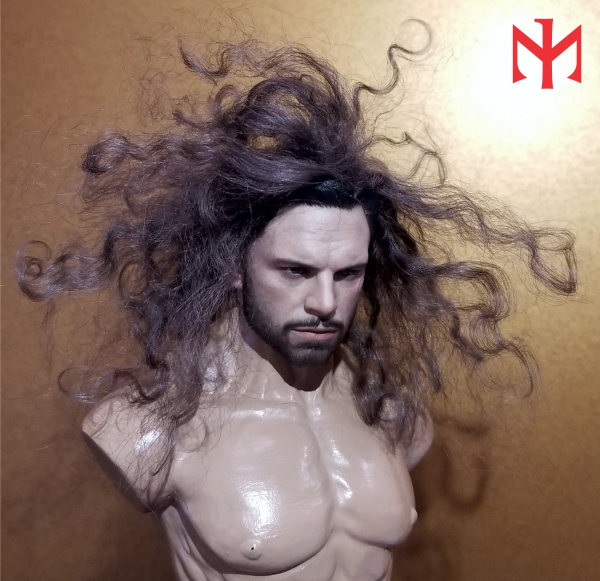
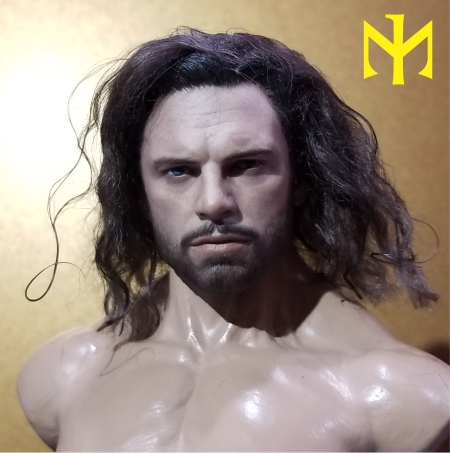
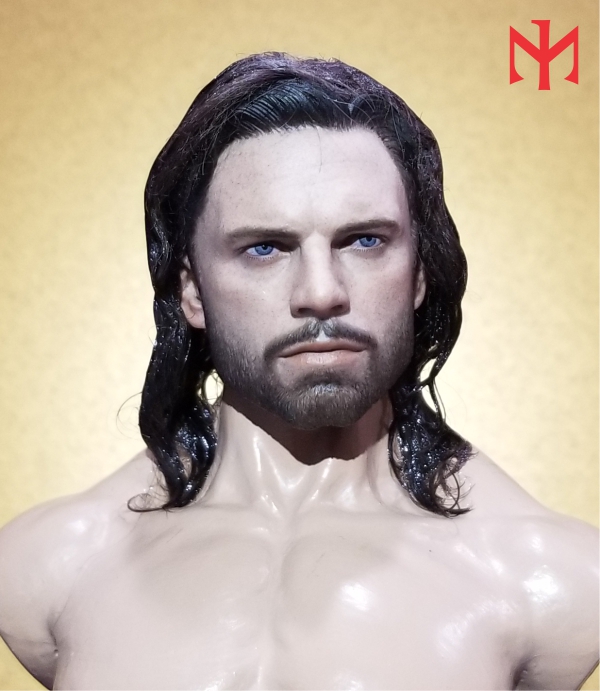
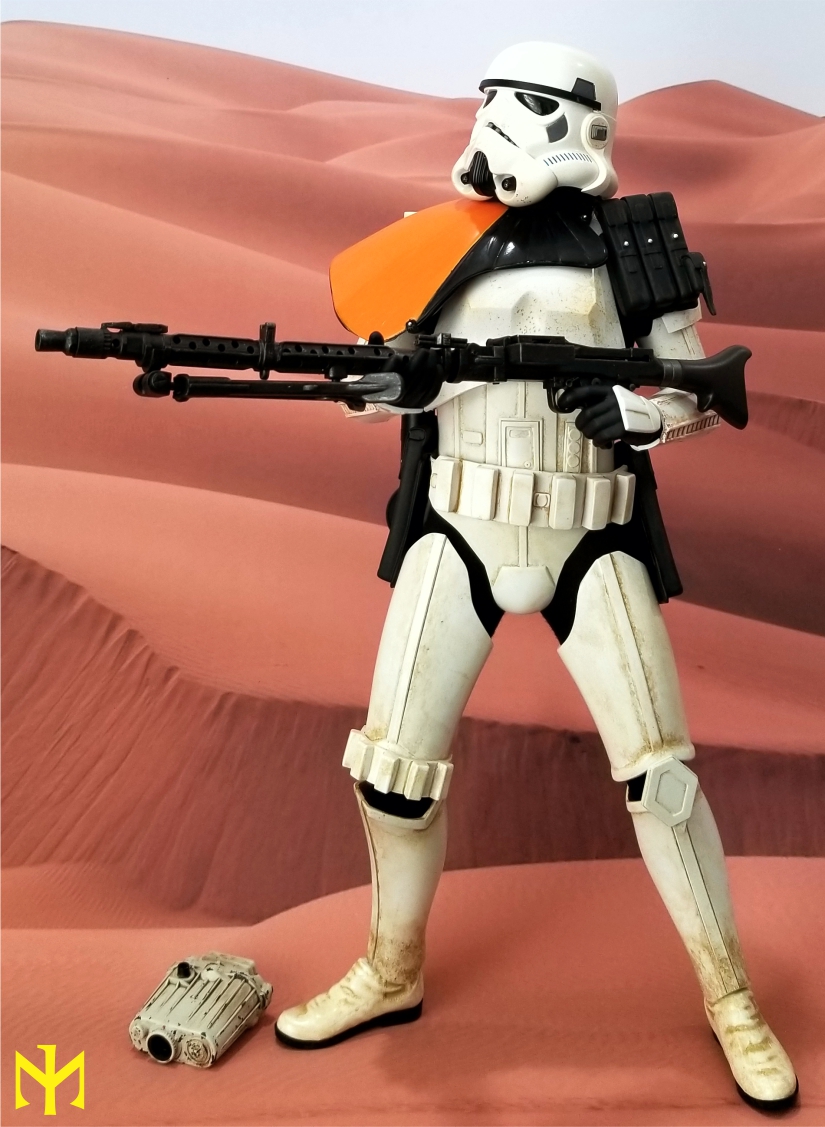
It seems to me that the all-important helmets are just a little bit on the small side, but part of that may be up to the head sculpt. The helmets do look better with smaller head sculpts, but unfortunately those usually do not work well with the DAM bodies I used. I selected medium- or medium-small-sized bald or very short-haired head sculpts as a compromise. All in all, I think this recreation of an admittedly bland and archetypically background character turned out pretty well.

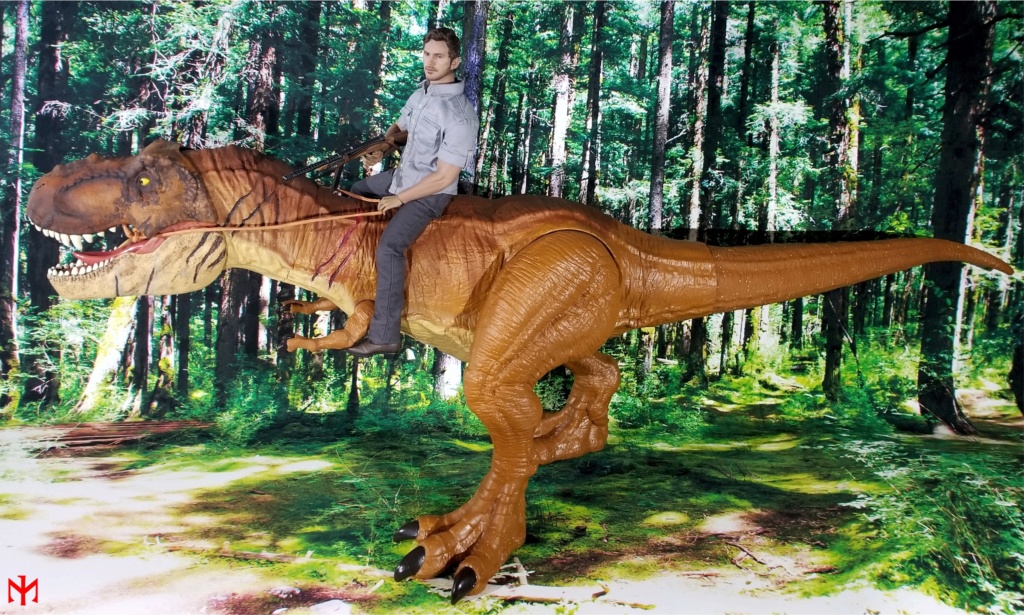
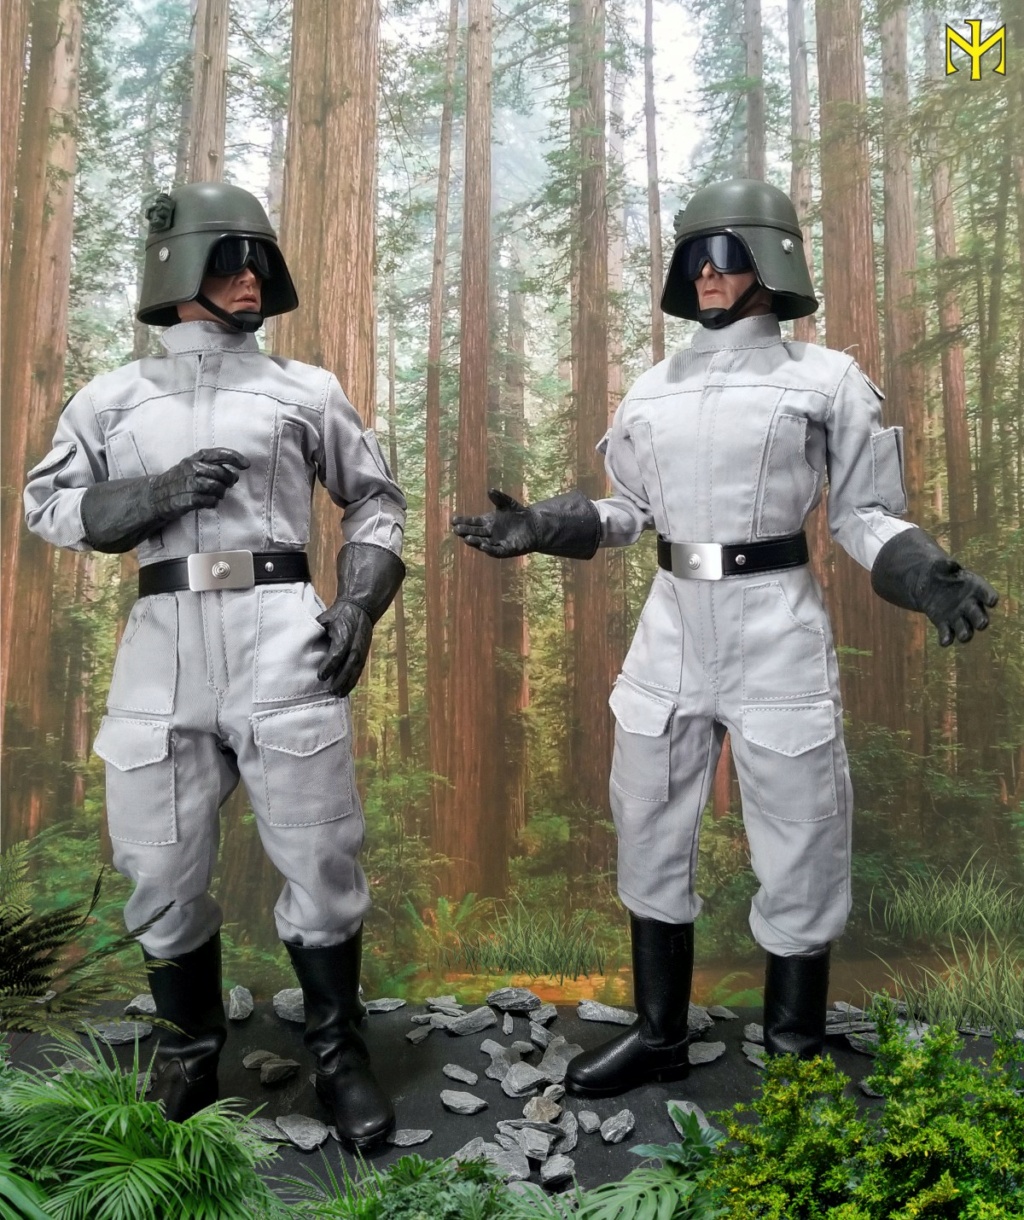
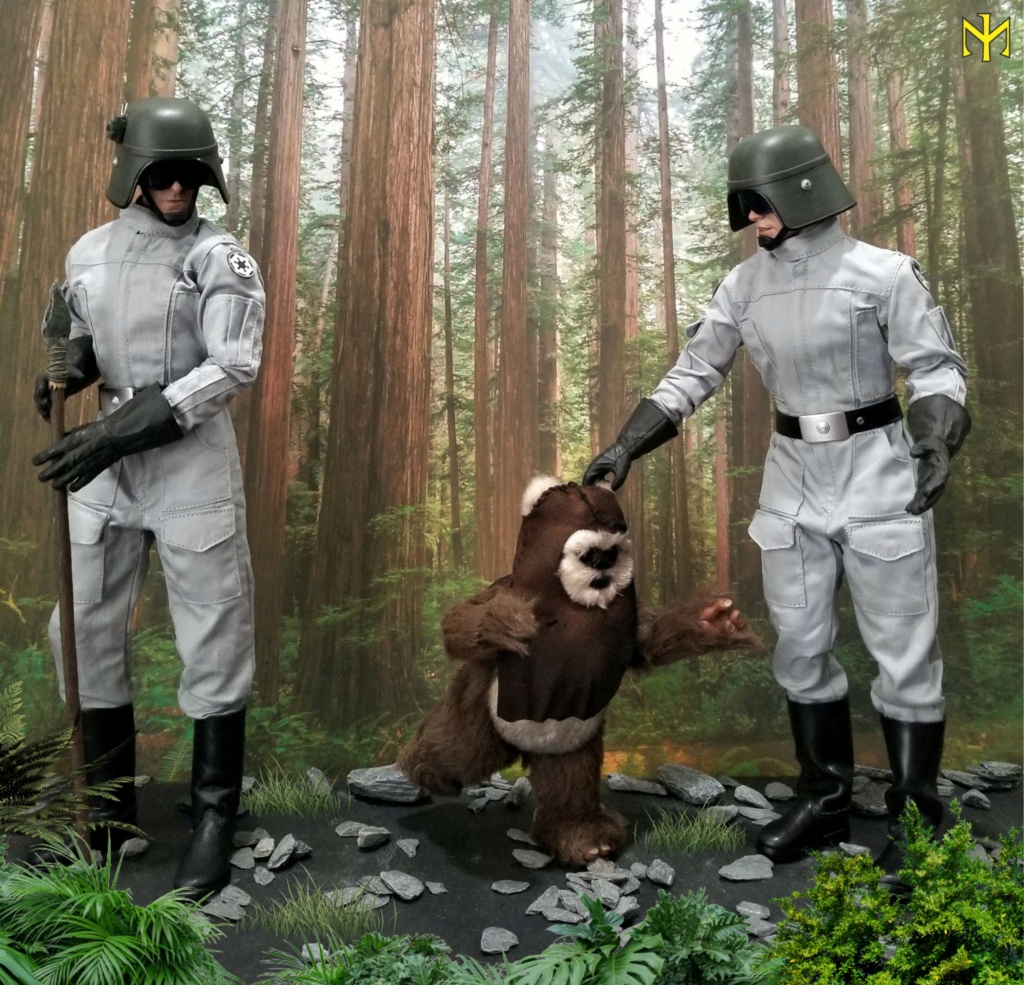
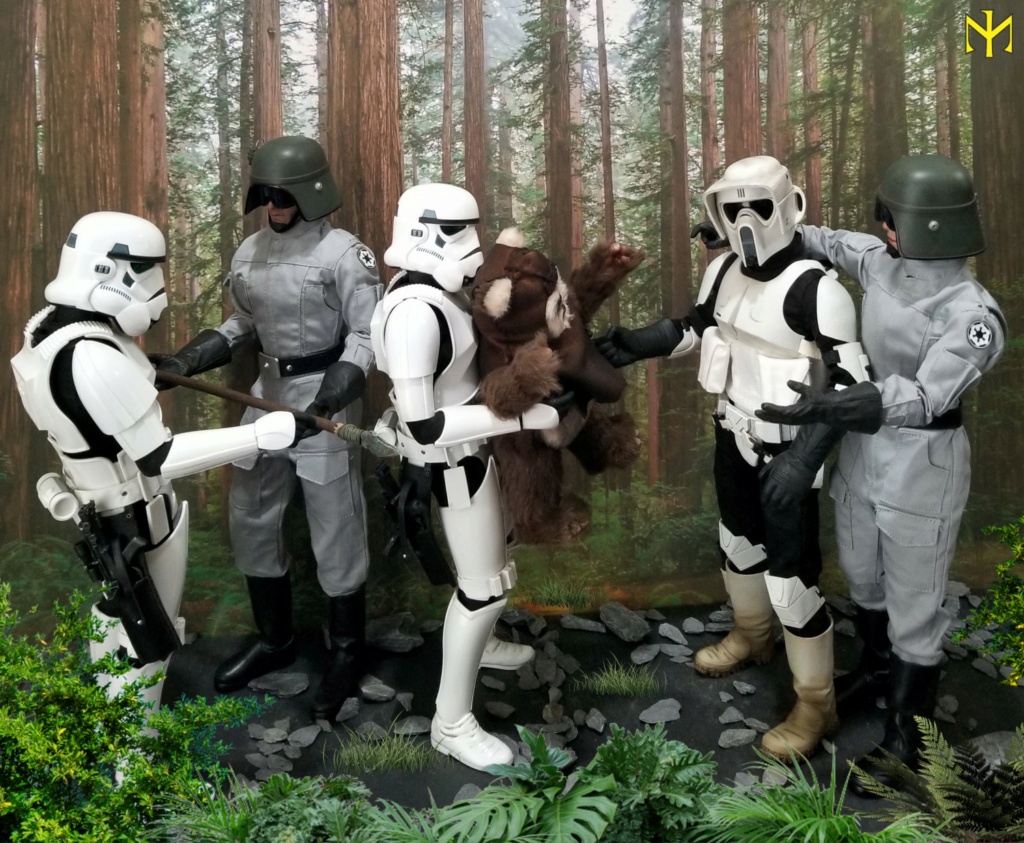
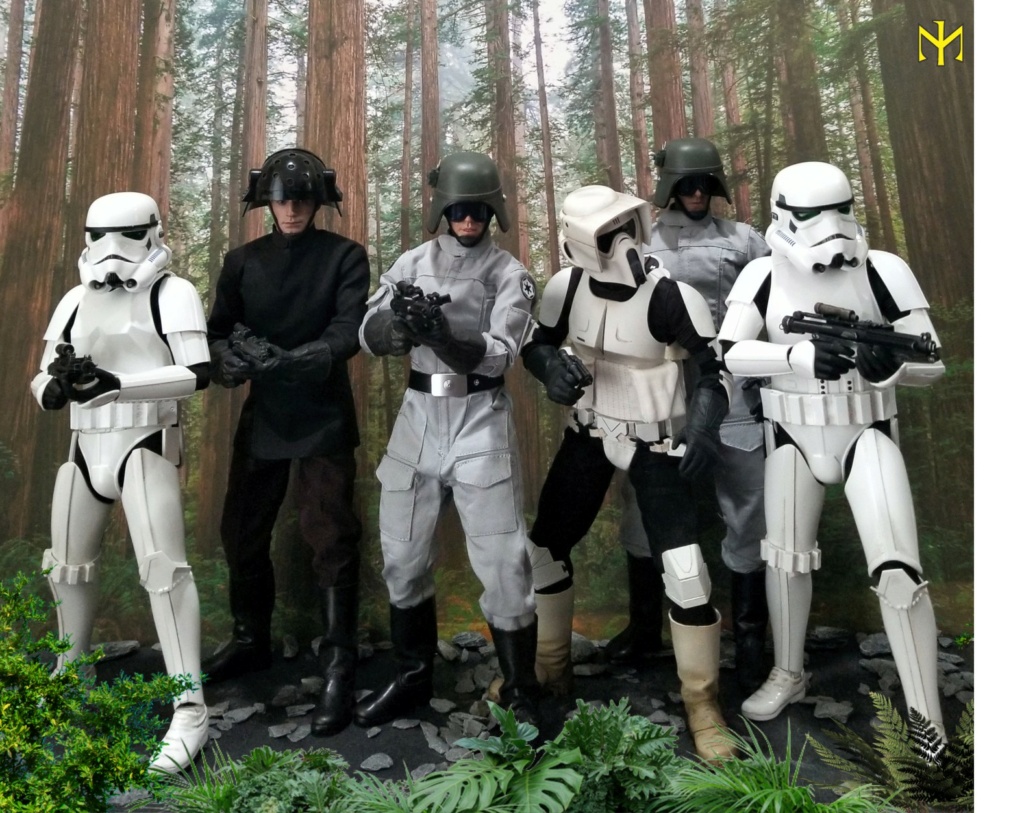
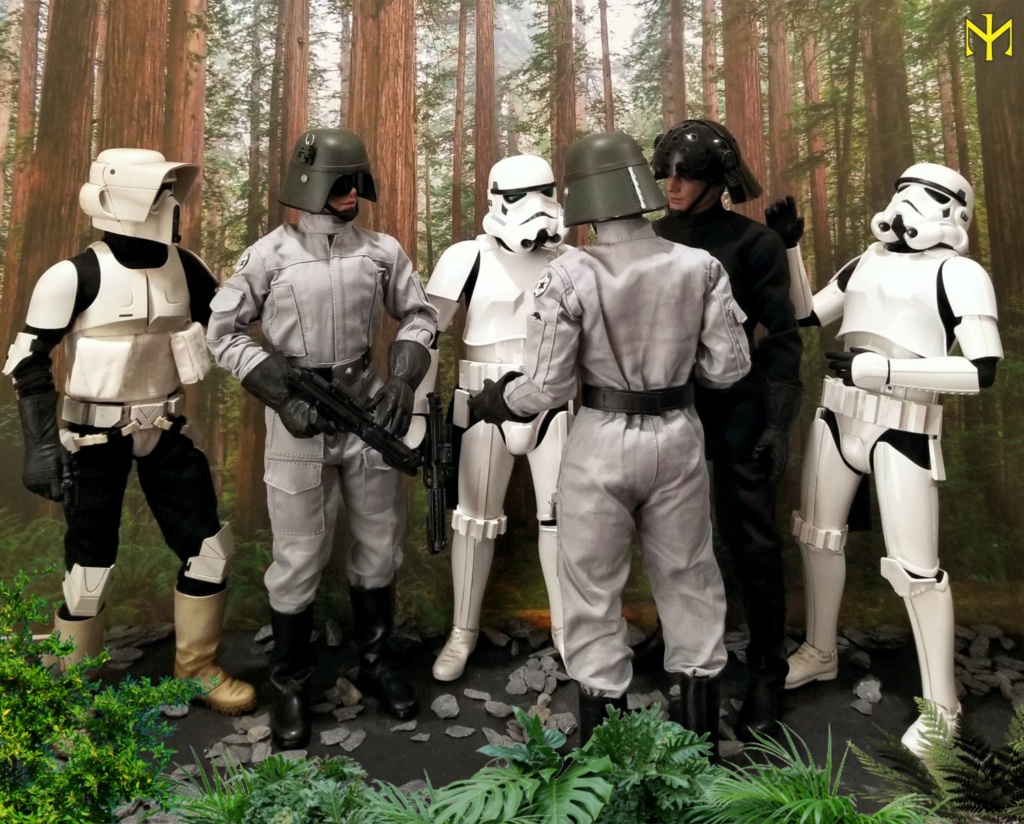
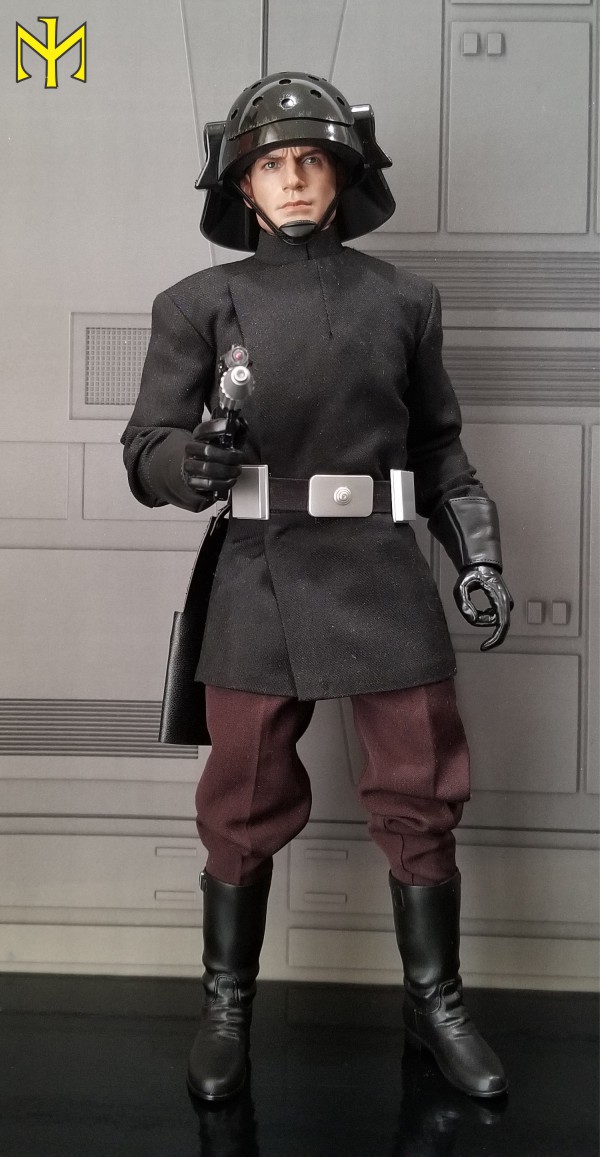
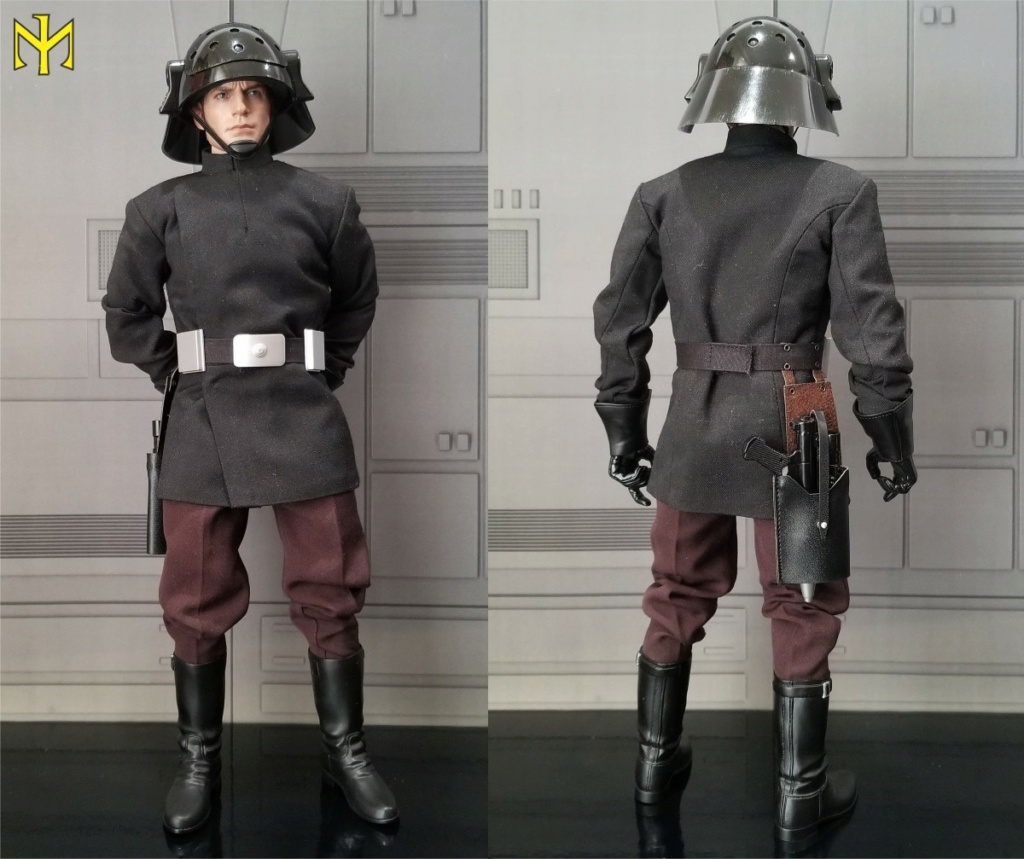
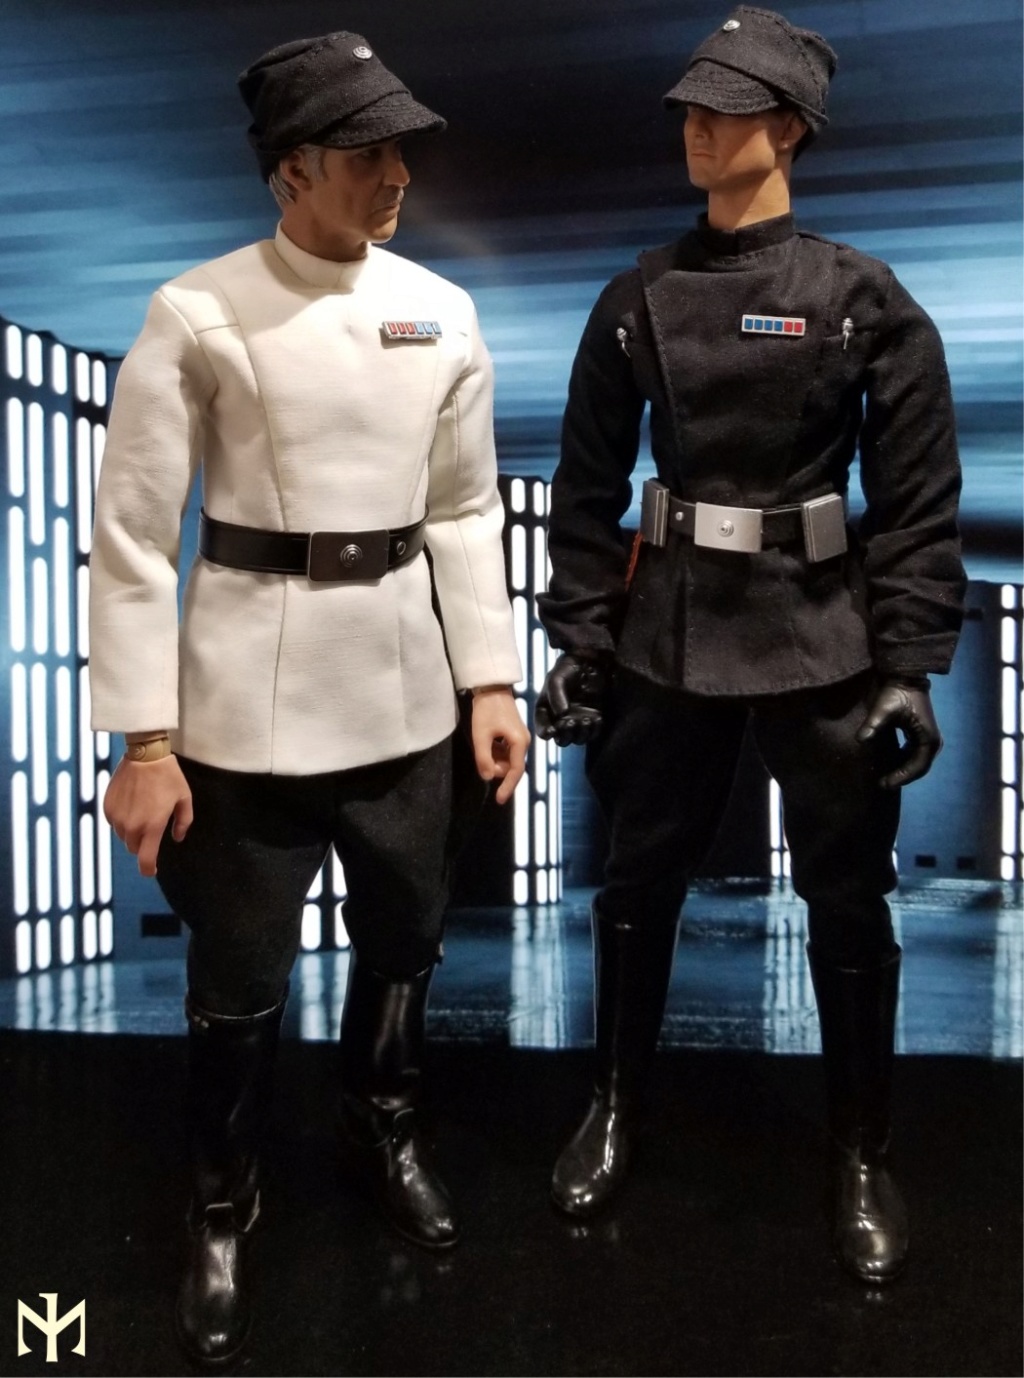
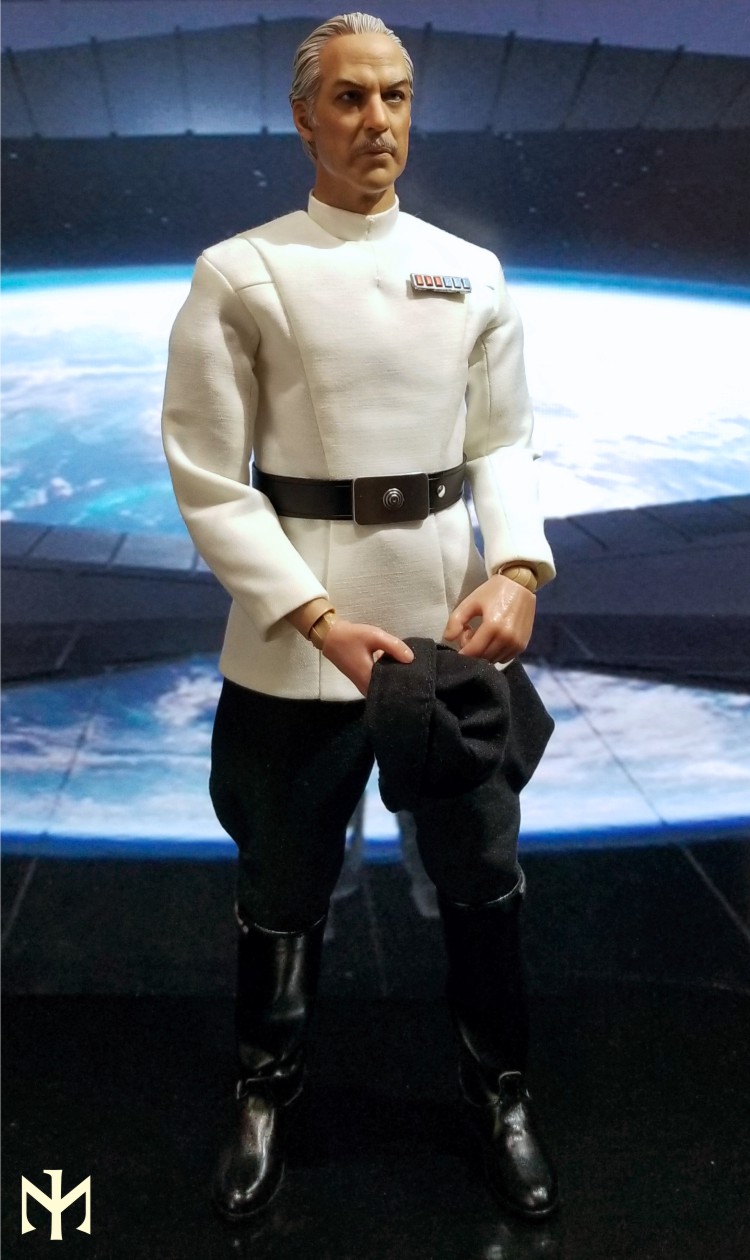
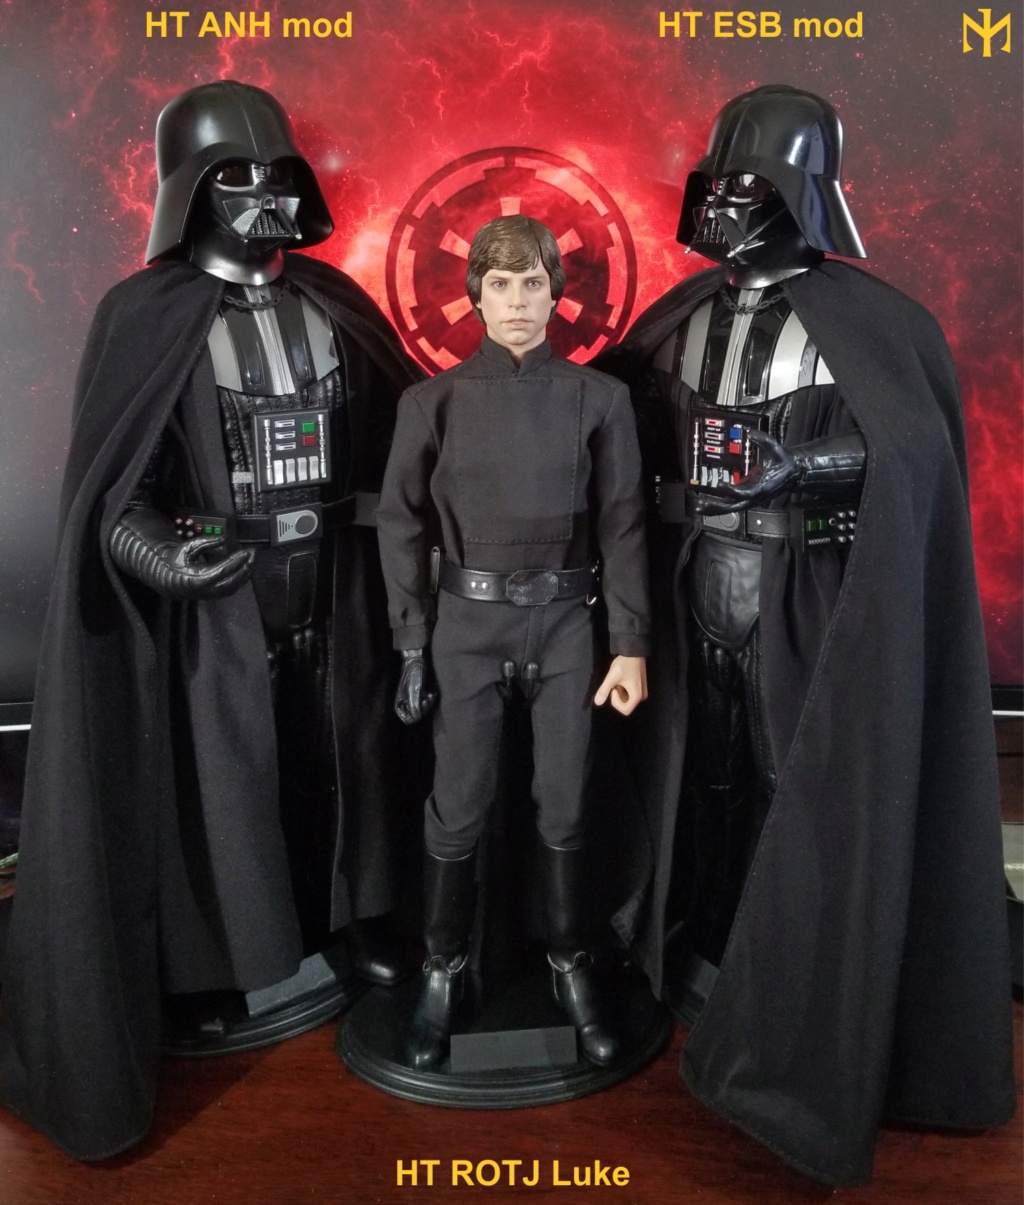
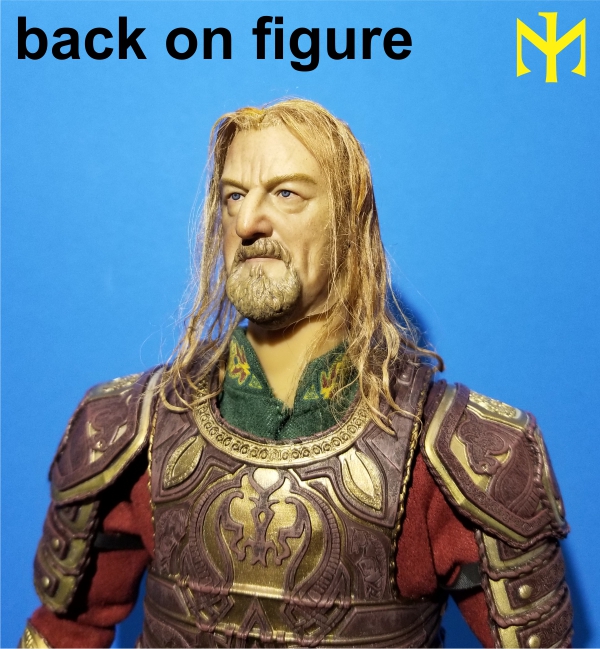
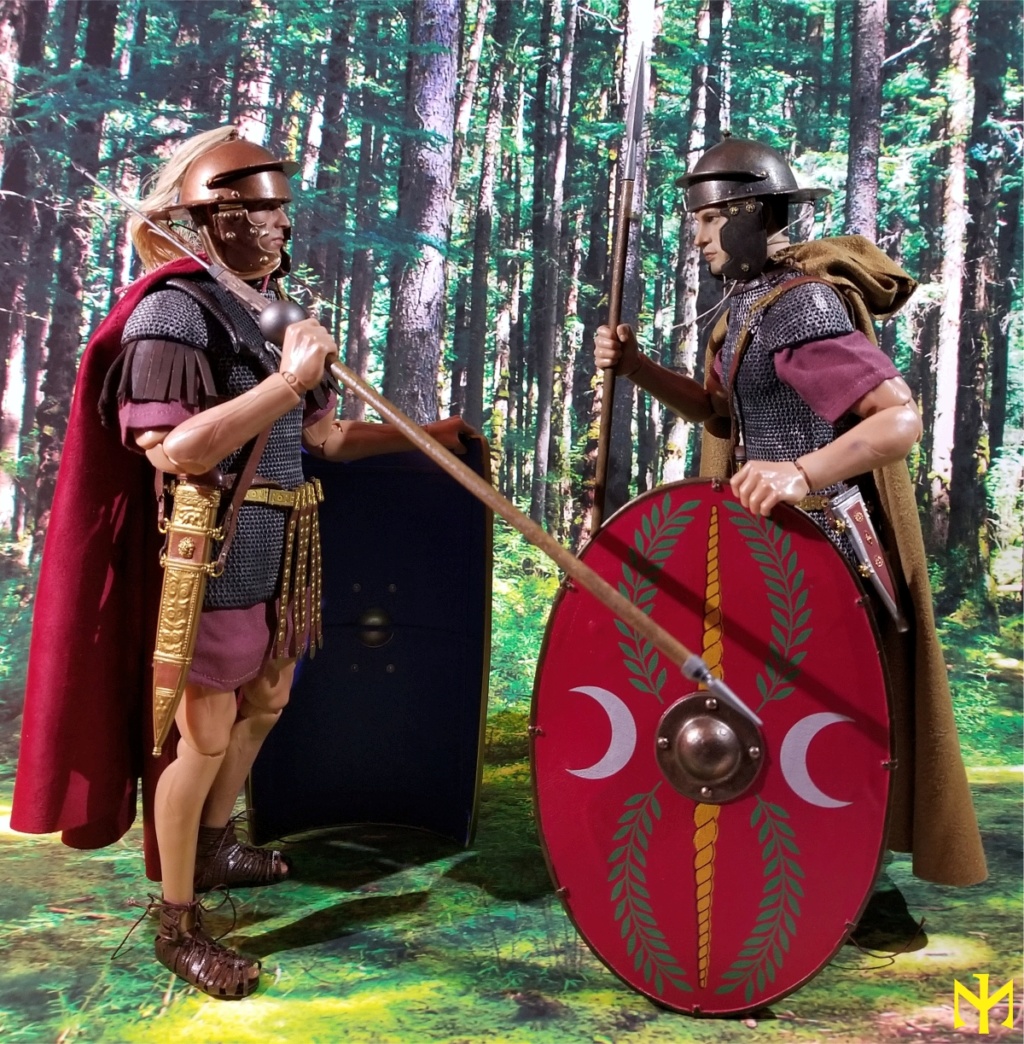
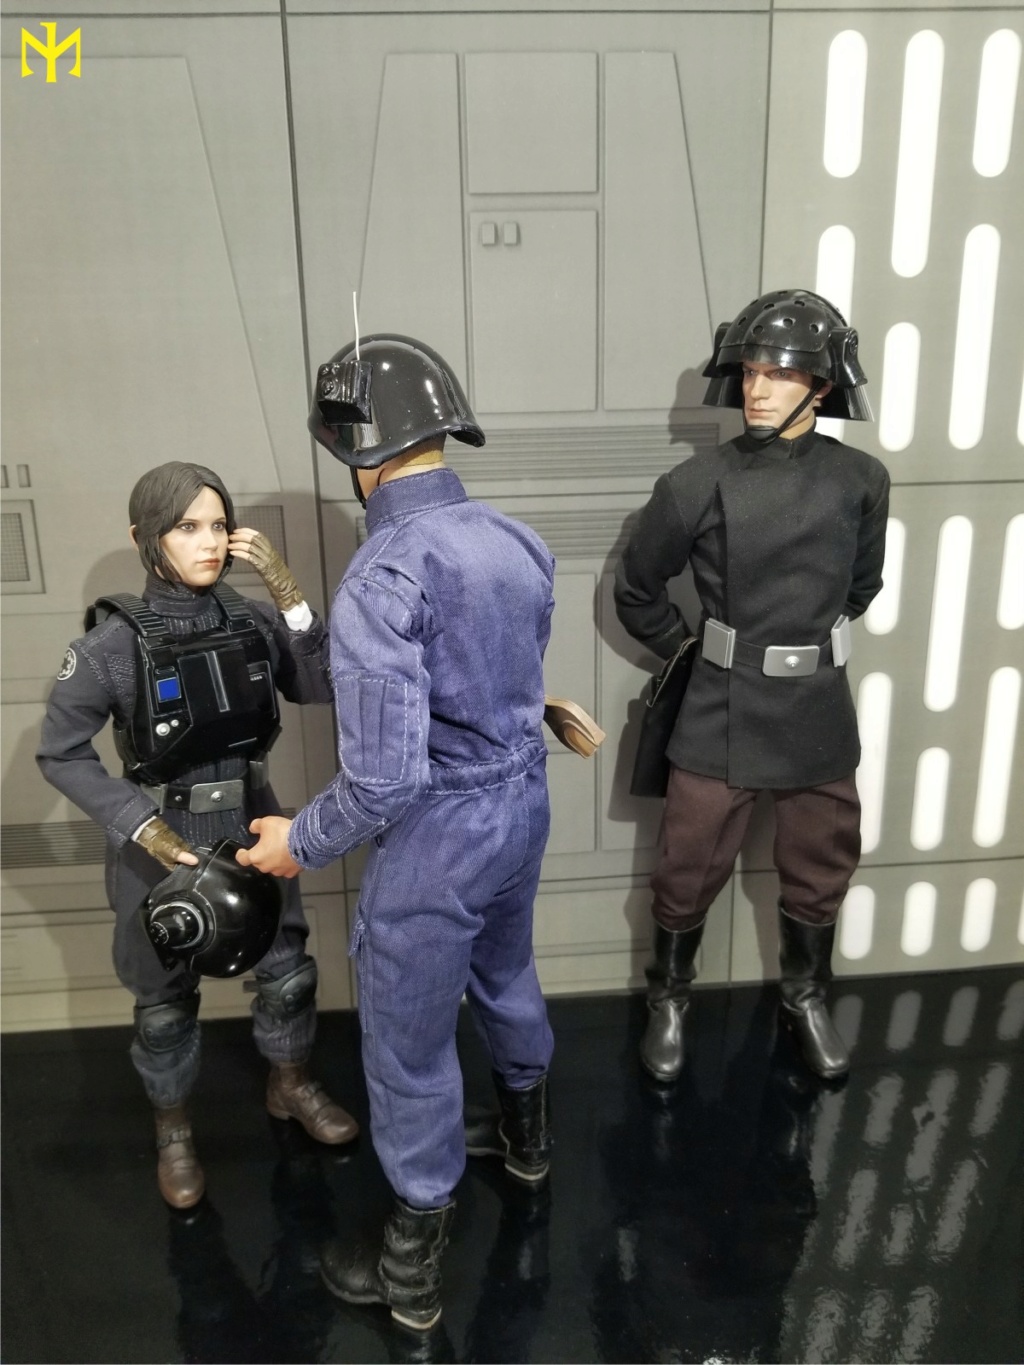
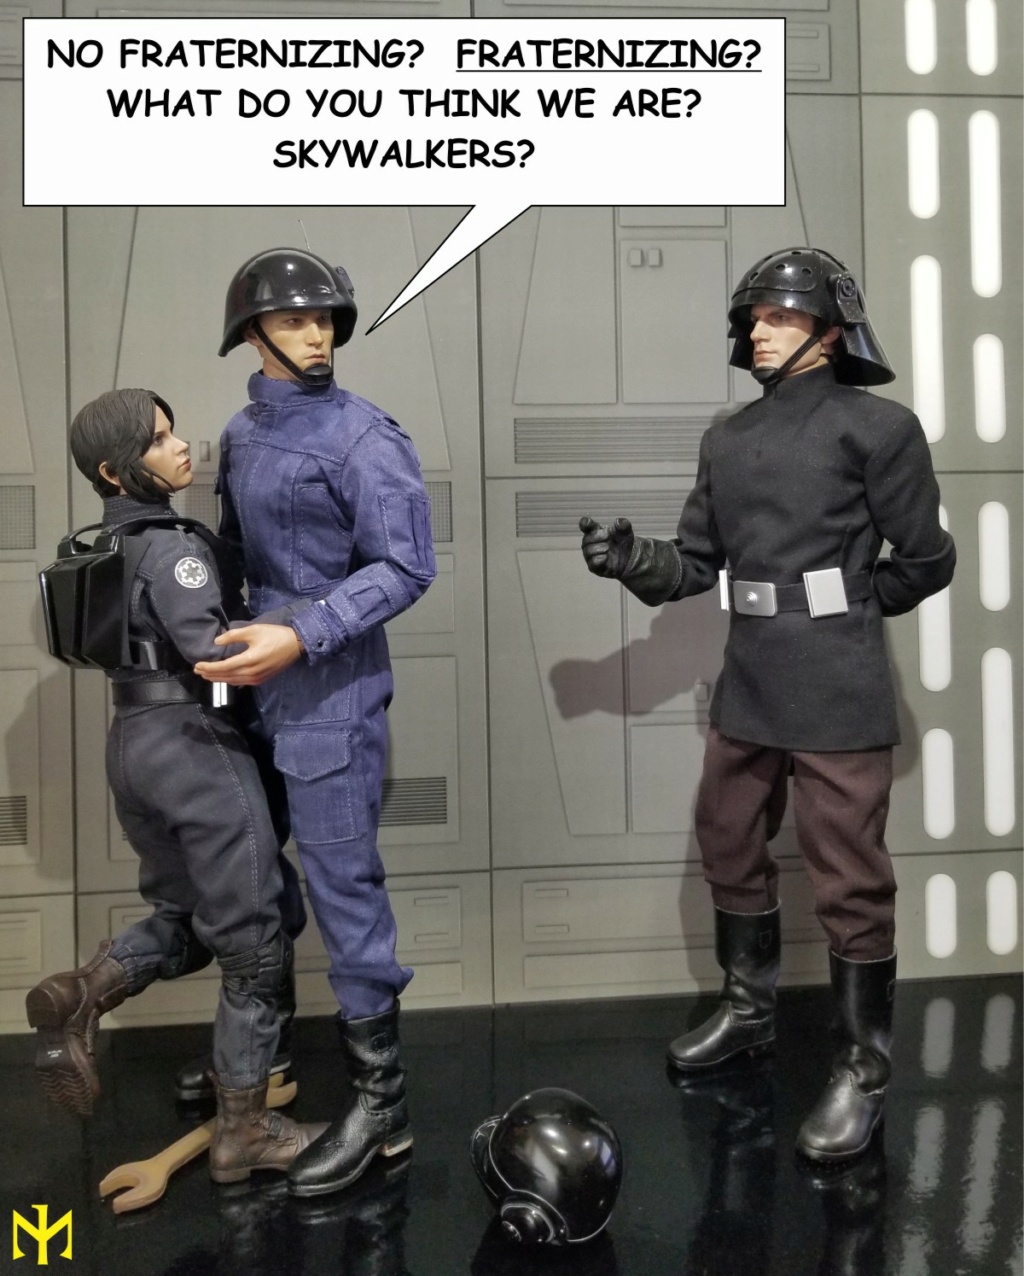
More than enough text, on to the photos of the figure (and friends)...

Topics tagged under custom on OneSixthFigures Swimc013

Topics tagged under custom on OneSixthFigures Swimc014

Topics tagged under custom on OneSixthFigures Swimc015

Topics tagged under custom on OneSixthFigures Swimc016

Topics tagged under custom on OneSixthFigures Swimc017

Topics tagged under custom on OneSixthFigures Swimc018

Topics tagged under custom on OneSixthFigures Swimc110

Topics tagged under custom on OneSixthFigures Swimc111

Topics tagged under custom on OneSixthFigures Swimc112

Topics tagged under custom on OneSixthFigures Swimc113

Topics tagged under custom on OneSixthFigures Swimc114

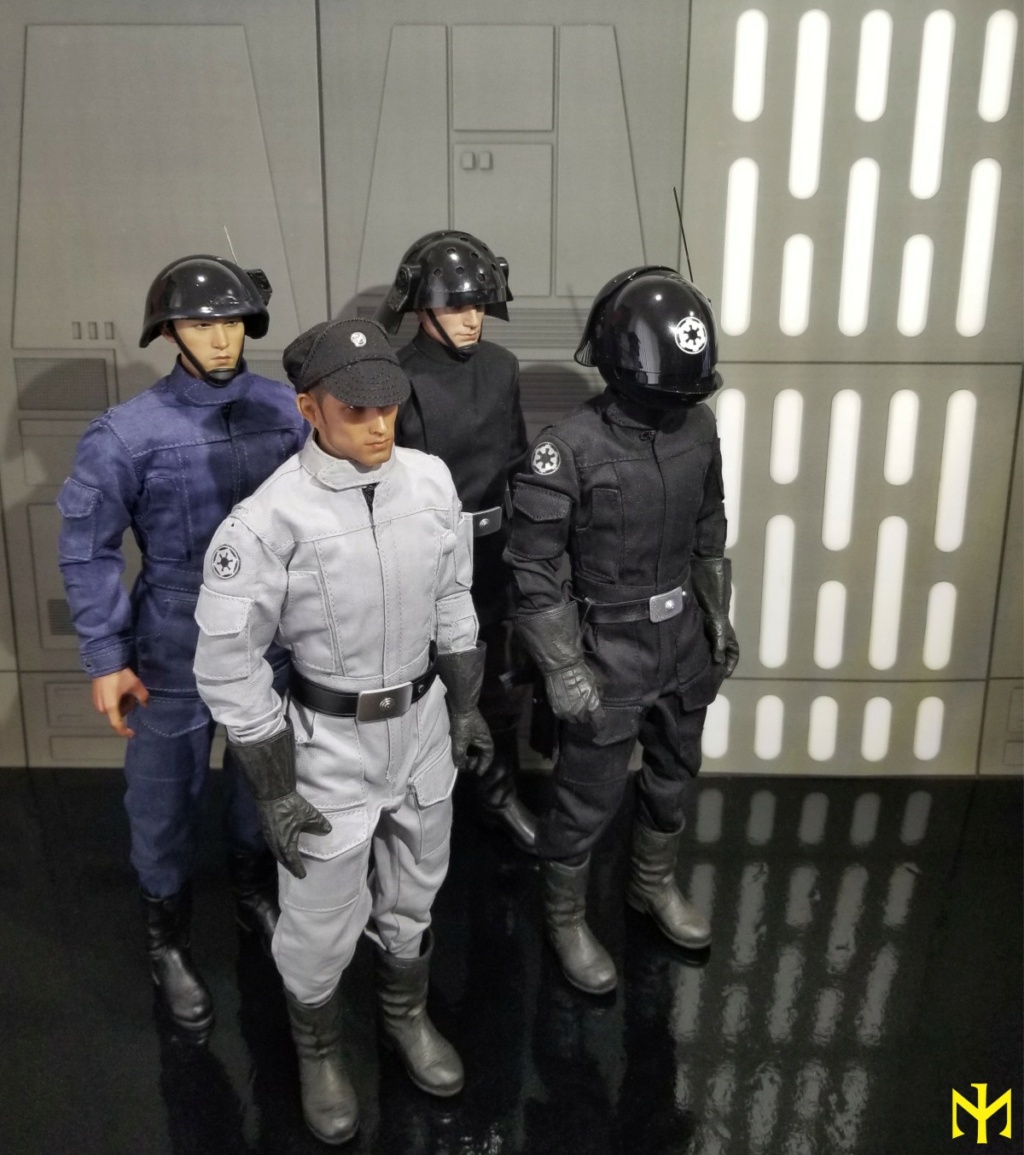
and the approximation of the Rebel ground crew/hangar technician:

Topics tagged under custom on OneSixthFigures Swimc115

As always, what do you think?

Part II in Post 18 below.

Spinoff Photo Story HERE.

#starwars #fiction #scifi #male #military #imperial #mechanical #crew #ground #kitbash #custom

Jurassic Pratt - Wed Nov 11, 2020 4:14 am

GubernatorFan wrote:In celebration of the new film, which I am hoping to see on Friday (so please no spoilers), and inspired by Michael Crawford and Bad Wolf, I picked up a couple of items for a Jurassic Park scene -- of sorts, since it also brings in other Chris Pratt material (I borrowed the title "Jurassic Pratt" from my friend Chris L). I used partly repainted Mattel Tyrannosaurus Rex figures (both the 23-inch and 43-inch ones) which are pretty nice, although they have various issues (I could go on) and the scale means they are playing the parts of growing dinos.

Topics tagged under custom on OneSixthFigures Jurass10

Topics tagged under custom on OneSixthFigures Jurass11

Topics tagged under custom on OneSixthFigures Jurass12

Topics tagged under custom on OneSixthFigures Jurass13

Topics tagged under custom on OneSixthFigures Jurass14

Topics tagged under custom on OneSixthFigures Jurass15

Topics tagged under custom on OneSixthFigures Jurass16

Topics tagged under custom on OneSixthFigures Jurass17

I hope you like them, goofy as they are.

#jurassicpark #jurassicworld #chrispratt #tyrannosaurus #hottoys #tbleague #mattel #custom #kitbash


Wow! that are awesome! I love that T-rex! bounce bounce bounce
Search in: GENERAL TALK  Topic: Jurassic Pratt  Replies: 42  Views: 3030
This was long in coming, and although much of it could have been ready for a while now, things kept coming up and keeping me from completing it. I know many people thought the Mudtrooper from Solo the hottest thing since sliced bread, but from the moment I first saw it, I thought there's our chance of getting a high-end AT-ST Driver, which was really an overly-specific task-related description of the regular imperial army troopers (as opposed to stormtroopers, scout troopers, and naval guards). The Mudtrooper would be the same thing, but in partly specialized gear... I have kitbashed these before, using much-customized helmet pieces from Hot Toys and Sideshow snowtroopers, but those required a thorough repainting, and my feeble skills are no match for the excellence of Hot Toys' paint job. Although more weathered (or rather distressed), the Mudtrooper helmets were already the right shape and color. So I couldn't resist another kitbash, even though it involved another indecently expensive purchase on eBay.

Topics tagged under custom on OneSixthFigures Swatst10

The helmets are modified to fit (getting rid of the magnet and framing specific to the Solo Mudtrooper heads), and to look right (with the addition of a couple of metal greeblies, repainting the disks on both sides, and painting black the molding around the edges); the chin-strap is modified to look right (as on my custom "Death Star Trooper"); the belt is modified too (it is from Krennic); the boots are DID jackboots; the jumpsuit is from Sideshow's AT-AT Driver, with added imperial cog emblems at the shoulders; the gloves are from Sideshow's TIE-Fighter Pilot.

Topics tagged under custom on OneSixthFigures Swatst11

While the helmet is very close in appearance to the Return of the Jedi original, it should be noted that as with other recent reprises of the Star Wars universe, it is not an exact replica. The molding, for example, is actually a new feature, whereas in the original the black coloring (tape?) simply overlay the rest of the helmet's sculpt. The Mudtrooper helmet also lacked two of the original's metal greeblies (the antenna? on the right side of the head and the bar on the back), and its communication? unit (on the right side of the head) is actually a little different in its details than the original.

Topics tagged under custom on OneSixthFigures Swatst12

The goggles took me a long time to find, as most were the wrong size or shape.

Topics tagged under custom on OneSixthFigures Swatst13

I painted them black with acrylics from the inside, allowing the exterior to remain nice and shiny, and the color to look even.

Topics tagged under custom on OneSixthFigures Swatst14

So back to Endor, where troopers Hank and Dean have made a frisky new friend.

Topics tagged under custom on OneSixthFigures Swatst15

Whom they promptly shared with the rest of the guys.

Topics tagged under custom on OneSixthFigures Swatst16

A sudden noise startled them all, allowing the creature to escape the friendly tickling, while everyone started yelling and aiming blindly into the forest.

Topics tagged under custom on OneSixthFigures Swatst17

It took them a few moments to realize that the culprit was just naval trooper Kavil, whose unexpected arrival had gone undetected. Rumor has it he has his hands full with a certain very exalted lady up in the Death Star. Ever the gentleman, he would not confirm it.

Topics tagged under custom on OneSixthFigures Swatst18

While we're at it, a simple change of headgear (using Sideshow officer caps), gloves, a belt, and the addition of some pocket cylinders and one screen-accurate communication pad, would transform our army troopers into a Death Star "scanning" crew technician (Left, with the black cap) and a Star Destroyer naval crew technician (Right, with the olive cap).

Topics tagged under custom on OneSixthFigures Swatst19

Looks like someone's still looking for the keys...

Topics tagged under custom on OneSixthFigures Swatst20

What do you think?

#starwars #custom #kitbash #atst #driver #fiction #scifi #male #military
More photos in Post 12.

I suppose it was inevitable. Give us a head with long molded hair and I feel compelled to replace it with "real" hair. For the "before" look, check out my Woo Toys set review HERE.

In Endgame, "fat" Thor sports a disheveled hair that seems to intentionally combine aspects of a bad dye job and a bad wig. To some extent this should have been possible to replicate with different clumps of different-colored hair strands, but in my desire to make the look more natural, I kept intermixing the three different colors, to the point where the overall look ended up looking more even, perhaps too natural. It also ended up looking more red, which is actually appropriate for the real Norse Thor. Especially for a re-hair that survived a fire evacuation and impromptu restyling (a clump was yanked out -- you can see the initial look HERE), I still think it worked out ok.

Topics tagged under custom on OneSixthFigures Thorh010

I also think it works quite well with a smaller body, like TBLeague's M33.

Topics tagged under custom on OneSixthFigures Thorh011

I think I should apply some more water and maybe product to make it less fluffy, but for the time being this is it.

Topics tagged under custom on OneSixthFigures Thorh012

What do you think?

More photos in Post 12.

#custom #kitbash #hair #chrishemsworth #thor #wootoys #avengers #endame #superhero #male #film #fiction
Additional photos in Post 15 and Post 16 below. Spin-off photo story: STAR WARS A Happy Endings Story.

One of the most recognizable imperial trooper type throughout the Original Trilogy and related Star Wars films was the Imperial Naval Guard or Trooper. Mislabeled "Death Squad Troopers" and "Death Star Troopers" by Kenner and Hasbro, these were clad in all black (tunic or jumpsuit, with gloves and boots) and sported large samurai-type "cheese grater" helmets. Although they were among the first dozen "classic"-scale (3.75-inch) Star Wars figures produced by Kenner, to the best of my knowledge they have never been given the higher-end sixth-scale treatment (Kenner, or was it Hasbro, produced a 12-inch version in 1998, but that does not qualify as high end; while it was not bad for its time, its somewhat odd proportions and oversized head and helmet detract from the realism potential).

Some years ago Hot Toys advertised an impending "Death Star Trooper" figure, for example at the San Diego Comic Con and other such venues (see HERE and HERE). Many people, including yours truly, were very excited... and contacted Hot Toys to correct the glaring mistake of placing the imperial "cog" emblem on the tunic (it only goes on jumpsuits). At that time, the project was still a go. Since then, any mention of it seems to have disappeared...

The ironic thing is that Hot Toys has now essentially created the "Death Star Trooper," but failed to actually put it together and release it. The most signature piece, the helmet, was provided as a makeshift drum for the evil Ewok in the recent Endor Leia and Wicket combo set. The helmet is sharply sculpted, weathered, and better-sized than the Kenner/Hasbro version from 1998, although its flared rim does not appear to flare out or as far as it did in A New Hope; but it seems to be more accurate to its appearance in the later films. Parted out, the helmet sold like crazy -- it was certainly the one thing I really wanted from that set, and apparently I wasn't alone. Luckily, in a moment of weakness, I had gotten some helmets from a seller in China on eBay, for prices that I am ashamed to mention -- but were lower than the ones you would find on eBay today. With that, I was well on my way to reconstituting what would (or could) have been Hot Toys' "Death Star Trooper." And in fact one could build him using all Hot Toys parts. While the helmet was not instantly wearable, a modicum of rigging made it so. The chin strap was borrowed and slightly repurposed from the even more recent Mudtrooper set (detailed review HERE). The two-part gloves, the boots, and the belt with holster and laser pistol were borrowed from the Death Star Gunner set (detailed review HERE). The tunic and pants came from the Count Dooku set. The body is a True Type TTM14 (the one that came with the Taylor Kitsch/Gambit head). The head is from the Hot Toys Justice League Superman set. That makes a fully armed and operational Hot Toys "Death Star Trooper" action figure.

Topics tagged under custom on OneSixthFigures Hting010

Topics tagged under custom on OneSixthFigures Hting011

Pleased as I was with "my" achievement, I actually preferred some parts from other companies -- like the DID jackboots, the Sideshow gloves (less articulation but more matte, like worn leather), and the TBLeague body (the unsightly M30 works great in clothing). That is what you see in the photos below.

Topics tagged under custom on OneSixthFigures Hting012

Topics tagged under custom on OneSixthFigures Hting013

Topics tagged under custom on OneSixthFigures Hting014

Topics tagged under custom on OneSixthFigures Hting015

Topics tagged under custom on OneSixthFigures Hting016

Topics tagged under custom on OneSixthFigures Hting017

Topics tagged under custom on OneSixthFigures Hting018

Topics tagged under custom on OneSixthFigures Hting110

Topics tagged under custom on OneSixthFigures Hting111

Topics tagged under custom on OneSixthFigures Hting112

Topics tagged under custom on OneSixthFigures Hting113

Topics tagged under custom on OneSixthFigures Hting114

Topics tagged under custom on OneSixthFigures Hting115

Overall, I am pretty pleased with the way he turned out. Yes, the tunic could have had slits on the front near the shoulders for code cylinders (not used by this trooper type in A New Hope or Empire Strikes Back, but one is seen in Return of the Jedi). Yes, the detail on the "ear caps" could have been more accurate (seven indentations rather than the four bumps -- here the Kenner or Hasbro version was actually better -- although it is conceivable there was some variation among the helmets used while shooting the films), but on the whole he makes for a realistic, well-proportioned, and sharp figure.

What do you think?

Topics tagged under custom on OneSixthFigures Hting116

Additional photos in Post 15 and Post 16 below. Spin-off photo story: STAR WARS A Happy Endings Story.

#starwars #deathstartroopers #navalguards #male #scifi #hottoys #sideshow #did #phicen #tbleague #kitbash #custom
A conversation with Ovy got me to try out a pair of sixth-scale Adidas-like track pants from an eBay seller in China (from the TYM031 sports clothing set). You may have seen them among the "goofing" photos in the Silver Linings photo story thread. I used the same body to answer a question about head and body skin tone matching by ReverendSpooky, and stumbled across a minor discovery. While I had tested the pants on a hard-plastic open-jointed body and determined they will not stain, as I suspected the stretchy fabric caused plenty of fiber transfer. But before automatically going to wash it off (or reaching for the lint brush), it occurred to me that the tiny fibers were a way to achieve a relatively subtle body hair effect. So I massaged the offending garment onto the silicone surface in sensible places for a quick test, and I think the result confirmed my theory. I didn't even think to remove the protective powder before I applied the effect, which might have enhanced it. We have looked at other ways of adding an extra touch of realism through either attaching body hair, or spreading it on with a paint brush, or painting it with the finest pens that would cure on the surface, but in most instances the result is not subtle enough. This seems to overcome that problem, although it might be a tad too subtle. At any rate, here are some photos.

Topics tagged under custom on OneSixthFigures Hbt0110

Topics tagged under custom on OneSixthFigures Hbt0210

Topics tagged under custom on OneSixthFigures Hbt0310

Topics tagged under custom on OneSixthFigures Hbt0410

The result is semi-permanent in this sense: you cannot easily remove the effect by handling or even wiping the surface. But you can use a lint brush to lift the fibers or you can wash the surface with soap and water. Either way, remember to re-apply protective powder.

What do you think?

#tbleague #phicen #m33 #silicone #body #hair #modification #custom #kitbash
Search in: GENERAL TALK  Topic: Accidental Discovery: Subtle Body Hair effect  Replies: 8  Views: 1406
It should come as no surprise considering what many of us already did with the Disney Store version, but Hot Toys' new Krennic set is a very good place to start to recreate Colonel Yularen, an officer of the Imperial Security Bureau, from A New Hope. Or, for that matter any other Security Bureau officer (there were a total of at least three seen on screen -- Yularen with and without a black officer cap, a younger slim officer that appears twice by the elevators -- the second time alongside Yularen, and a younger rotund officer roaming the halls). It is a relatively simple kitbash.

Topics tagged under custom on OneSixthFigures Yulare10


Topics tagged under custom on OneSixthFigures Yulare11


Topics tagged under custom on OneSixthFigures Yulare12


Topics tagged under custom on OneSixthFigures Yulare13


Topics tagged under custom on OneSixthFigures Yulare14


Topics tagged under custom on OneSixthFigures Yulare15

Tunic, pants, boots from Hot Toys Krennic.

Belt from Hot Toys Krennic but modified and reversed for accuracy.

Officer badge modified (and mounted with magnets) from older Hasbro or Sideshow or Hot Toys set (I forget).

Officer cap from Sideshow Commander Praji.

Body and hands from World Box AT025.

Head from Damtoys Dam 78031 Sr-71 ”Black Bird” Flight Test Engineer (Donald Sutherland from Space Cowboys). The head is, of course, a remote likeness to Yularen, simply being the most similar head sculpt I know to be available; since I might want to use it for Donal Sutherland elsewhere, I have not attempted to modify it further.

What do you think?

#custom #kitbash #starwars #anewhope #anh #yularen #empire #scifi #fiction #film #male
Search in: GENERAL TALK  Topic: STAR WARS Custom Colonel Yularen from A New Hope  Replies: 12  Views: 1904
Note: More on reconstituted and modified Vader figures in THIS thread.
Update: More photos in Post 16 and Post 23 below.

Since I know some of you are picking up the second release of the HT ESB Vader (which may or may not be changed in some detail or other from the first release), I thought I'd share some information on some easy and recent mods.

I have not been willing to take a plunge and pay for a full Hot Toys Vader set after getting my Sideshow "second" Vader quite a few years ago. But I have bought many loose parts and reconstituted largely HT-based ANH/RO and ESB Vaders. With their tendency to lose balance and fall flat on their faces, damaging the tiny tusks (and some of the latter becoming irretrievably lost), I ended up with more than one head, and so have felt even more comfortable to make modifications to these expensive pieces.

Something I did to both the ANH/RO and ESB heads is line the inside of the lenses with bare metal foil, so that you can catch a little glimmer of red in the "eyes" (HT made them translucent, but it doesn't really show on the figure). The other thing I did is to alter the position of the helmet over the masked head -- the very first ANH release and at least the first ESB release have it wrong. In both instances, it sat too high, and in the second (ESB) instance, it was also meeting the face at a wrong angle (essentially, it was sitting too low and too far back to be screen accurate). Just remember that if you try to emulate this, proceed carefully and at your own risk!

Anyway, without further ado:

1a-c. The Hot Toys ESB Vader head has a good sculpt, but especially when looked at from the front can look off and outright disturbing. The problem is that the helmet proper sits too far back and too far up, meeting the "face" at the wrong angle and exposing the "eyebrows" over the lenses far too much. The front rim of the helmet should hang lower and farther forward over the "nose."

Topics tagged under custom on OneSixthFigures Htdves10

2a-c. The helmet proper is designed to be removable, as it snaps onto the top portion of the mask assembly.

Topics tagged under custom on OneSixthFigures Htdves11

3a-c. The top part of the mask assembly is glued only at its front, and with a little bit of pressure can be made to snap off. After this you can basically snap it in and out of place as you see fit.

Topics tagged under custom on OneSixthFigures Htdves12

4a-c. The front part of the mask, fitting over the face, is also a separate piece, which is glued to the bottom only at the lower edge. With some gentle pressure you can carefully make it snap off without breaking it (I didn't know this the first time I was modifying this head a couple of years ago and went another way, but this is a much better approach).

Topics tagged under custom on OneSixthFigures Htdves13

5a-c. The partial head sculpt is also removable, although that is not something you have to do to modify the lenses. I only show this here for completeness.

Topics tagged under custom on OneSixthFigures Htdves14

6a-c. Getting back to the facial part of the mask. The lenses are delightfully translucent, but you can only appreciate that if you handle the piece separately and look through them at a light source -- here I used a flash light to illustrate (6a). Then I cut a small rectangular piece of Bare-Metal chrome foil, enough to cover the inside of the lenses (6b). You apply the adhesive side to the inside of the lenses, then rub over it with a q-tip. This ensures perfect adhesion and removes any tiny folds or creases. With the foil lining the inside of the lenses, you can see a glimmer of red looking at them from the outside, provided they are hit by sufficient light (6c).

Topics tagged under custom on OneSixthFigures Htdves15

7a-d. Compare the before and after look, without (7a-b) and with (7c-d) the helmet. Note that without direct light on the lenses, they would look just black.

Topics tagged under custom on OneSixthFigures Htdves16

8a-d. I've been saving empty Oscillococcinum containers from whenever I've been sick, intending to use them for 1:6 kitbashing. While I imagined them serving as termuses or other types of vessels, the caps prove a good fit into the pre-existing hole at the very top of the head (8a). I lined the exposed part of the head around the cap with some plastic from a ziplock bag (8b). I began to construct a makeshift structure out of Kneadatite (the blue and yellow green stuff) by winding "snakes" round the cap and atop the plastic cover (8c). The plastic cover is so that the "structure" would not stick to the head itself and would remain removable. All told, I needed the "structure" to lift the helmet up at the back while keeping low in the front, and to push it towards the front. I also provided a makeshift protrusion to fit into the hole of the helmet (8d). Yes, I know what it looks like, and if you comment on that, it would be bad karma (so don't). Smile

Topics tagged under custom on OneSixthFigures Htdves17

9a-c. With the structure still soft and malleable, I experimented with the helmeted look, adding material until satisfied with the way it sat. Then I let it cure. Here is the before (9a and 9c) and after (9b and 9d) comparison. Perhaps the difference looks cosmetic to most, but here's a Vader look I can appreciate without misgivings.

Topics tagged under custom on OneSixthFigures Htdves18

10a-b. Checking out the overall effect of the modified head on the body.

Topics tagged under custom on OneSixthFigures Htdves19

11a-c. Note that you can still see the "eyebrows," but only (and correctly) when lit from a lower angle (11c).

Topics tagged under custom on OneSixthFigures Htdves25

12a-b. Comparison of the before and after versions with a screenshot from The Empire Strikes Back. I think the helmet works much more accurately; I was not able to reproduce the lighting precisely -- otherwise you would be able to see the "eyebrows" (as above).

Topics tagged under custom on OneSixthFigures Htdves21

13. Just a comparison of my ANH/RO and ESB/ROTJ modified Vaders.

Topics tagged under custom on OneSixthFigures Htdves22

14. Another of the same.

Topics tagged under custom on OneSixthFigures Htdves23

15. Another of the same with a reconstituted HT ROTJ Luke.

Topics tagged under custom on OneSixthFigures Htdves24

Even if these modifications weren't particularly difficult, one should probably not have to go through so much trouble to improve sets as expensive as this. But the good news is that one can improve the slight imperfections.

I hope this has been useful. What do you think?

Note: More on reconstituted and modified Vader figures in THIS thread.
Update: More photos in Post 16 and Post 23 below.

#starwars #hottoys #darthvader #custom #mod #kitbash #scifi #male
Search in: GENERAL TALK  Topic: STAR WARS New customizing Hot Toys ESB Vader head  Replies: 31  Views: 4545
As someone with a modicum of understanding films and with a decent grasp on the relevant history and literature, I did not enjoy the movie Troy. And that is an understatement. Despite all the acting talent and detailed costuming, etc., there is so only so much you are going to get out of not only butchering Homer in the first place, but also failing to deliver anything decent in the end. But enough about that. Pangaea produced two very nicely detailed sets based on this film, Greek General (Achilles) and Trojan General (Hector) -- I reviewed the latter HERE. The head sculpts are not quite at the apex of sixth-scale detail (of course they are from a few years ago), and the hair in particular suffers from thick stranding and bland coloring. But they are still pretty good and that made me think of possible improvements. In the case of Hector (Eric Bana), the head sculpt was designed with a removable hair piece so that it would fit well inside the tight helmet. The hair piece was made from fairly hard plastic, included the pair of rather stuck-out ears, and did not fit very well over the armor. This head was a natural for conversion to actual hair.

First I covered the magnet atop the head with a thin layer of Kneadatite that I painted in a flesh-like color. When this cured/dried, I followed my usual Morezmore-based technique of gluing on tufts of hair around the head starting from the bottom by the neckline (you can see the method in more detail HERE). I picked a relatively curly/wavy dark brown to match the on-screen appearance. After finishing and leaving it overnight, I removed any loose strands, gave it a rinse and then applied a solution of water and shampoo+conditioner to get something like the desired style; the hair tie in the back is a bent piece of flat wire (I might add a few of the other optional hair bling pieces down the road). I also did a little bit of grooming and some touch ups on the paint job with acrylics and color pencils to improve the likeness a little more. I think it turned out ok.

Topics tagged under custom on OneSixthFigures Ebht0110

Topics tagged under custom on OneSixthFigures Ebht0210

Topics tagged under custom on OneSixthFigures Ebht0310
original set (left); modified set (right)

What do you think?

Other head conversions:
https://onesixthfigures.forumotion.com/t2006-converting-jason-momoa-ht-aquaman-head

https://onesixthfigures.forumotion.com/t2126-converting-arnold-schwarzenegger-kp-conan-head

https://onesixthfigures.forumotion.com/t2335-converting-sebastian-stan-ht-bucky-barnes-head

https://onesixthfigures.forumotion.com/t2471-converting-bernard-hill-asmus-king-theoden-head

#custom #kitbash #hair #ericbana #hector #troy #pangaea #trojangeneral #male #film #ancient
Search in: GENERAL TALK  Topic: Converting Eric Bana Hector Head from Pangaea  Replies: 21  Views: 2552
For Part II (NSFW?), see Post 12 below.
For Part III, see Post 35 below.

The experimentation continues...

For the custom figure itself, see here:
https://onesixthfigures.forumotion.com/t2773-star-wars-darth-maul-custom-updated-with-part-iii-photo-heavy

For the painting part, see here, post 205:
https://onesixthfigures.forumotion.com/t260p164-painting-seamless-bodies-updated-april-2020#36579

Part I: Encounters in the Desert I

In recent news from Hollywood, a small set of previously unknown Star Wars scenes and corresponding portions of scripts have been leaked. The first of these appears to take place on an unidentified desert planet where Obi-Wan Kenobi has retired for a life of peaceful contemplation, until his serenity was rudely interrupted by the appearance of Darth Maul...

Topics tagged under custom on OneSixthFigures Swdmt211


Topics tagged under custom on OneSixthFigures Swdmt212


Topics tagged under custom on OneSixthFigures Swdmt213


Topics tagged under custom on OneSixthFigures Swdmt214


Topics tagged under custom on OneSixthFigures Swdmt215

For Part II (NSFW?), see Post 12 below -- actually a "prequel" to this scene Smile.
For Part III, see Post 35 below.

#starwars #darthmaul #obiwankenobi #benkenobi #satire #humor #scifi #hottoys #tbleague #phicen #seamless #custom #m30
Part I Maul 1.0
Part II in Post 15 below; Part III in Post 27 below.; Part IV (Maul 2.0) in Post 39 below; Part V (Maul 3.0) in Post 54 below

For the Further Adventures of Darth Maul, please see HERE.

Let me preface this by saying that I'm no Maul fanboy. Yes, he has a striking look, but if you think about it, it is as trite and silly as "Wolf Man" or "Devil Man" from the Mos Eisley Cantina. Yes, he was a cooler and more compelling villain than his replacement (and his even sillier name). But he seems to me almost as overrated as Boba Fett, and I haven't gotten into the animated series enough to appreciate the later additions to his story, and his appearance in Solo, while less cringe-worthy than the rest of that entire film (ok, hyperbole), didn't do much for me. Perhaps I lack imagination. Perhaps I only really like the Original Trilogy...

The point is, this one was very much one of those "can it be done?" customs. I had picked up many of the parted-out Darth Maul pieces from the HT set (it was too well done to resist), and I had long experimented with painting TBLeague seamless bodies. I was also inspired by a very cool Kotobukiya statue of Maul. And some fan art, although I've got to say, I ran across some pretty curious things out there (apparently devil boy has become a bit of a sex symbol obsession for some people... to each their own...). The current "canon" is that Maul is basically red-skinned, with black Sith or Dathomirian tattoos; I prefer thinking of them as war paint, which might account why they vary from image to image (apart from parts of this never having been shown in a licensed image -- even the Kotobukiya statue that was my main inspiration is probably less than canonical), and have treated them as such. Anyway, with most of the pieces finally here, although I realized too late some things were still missing or unfinished, here is the first set of images from this custom.

Topics tagged under custom on OneSixthFigures Swdmt010

Topics tagged under custom on OneSixthFigures Swdmt011

Topics tagged under custom on OneSixthFigures Swdmt012

Topics tagged under custom on OneSixthFigures Swdmt013

Topics tagged under custom on OneSixthFigures Swdmt015

Topics tagged under custom on OneSixthFigures Swdmt014

Topics tagged under custom on OneSixthFigures Swdmt016

Topics tagged under custom on OneSixthFigures Swdmt017

Topics tagged under custom on OneSixthFigures Swdmt018

Hope you liked it or found it amusing...

Part II in Post 15 below; Part III in Post 27 below.; Part IV (Maul 2.0) in Post 39 below; Part V (Maul 3.0) in Post 54 below

For the Further Adventures of Darth Maul, please see HERE.

#starwars #darthmaul #custom #phicen #tbleague
Asmus' Lord of the Rings license has resulted in a long sequence of figures, some of which have been masterpieces (like Gimli), while others have fallen pretty flat. King Theoden is not one of the fallen (see Michael Crawford's review HERE), but it is kept from being a masterpiece by the remarkably poor choice of giving him sculpted/molded hair; even worse, they made it removable so that his head can fit into a properly-sized helmet, resulting in an obvious, unrealistic, and unsightly cut in the hairline. I suppose they were afraid of helmet hair, which is an issue, but certainly less serious than the one that resulted from their attempt to avoid it. And it is not just about realism and the unsightly cut, the sculpted hair and one-piece head and neck get in the way of articulation a bit.

I modified my Theoden (Bernard Hill) head sculpt by removing the neck (which was just a little on the short side, but not a very necessary modification in this instance) and giving him real hair from Morezmore. For the most part I will let the photos tell the story. For more detailed step-by-step walk-through of the process, see my Conan head conversion HERE (a couple of others HERE and HERE).

Topics tagged under custom on OneSixthFigures Ktah0110

The outer layers of the sculpted hair were designed to be removable, which greatly simplifies the work. I thinned down the sculpted hair on the head sculpt proper a bit, and rebuilt a low cranium over the back of the skull so that the hair would look right once in place.

Topics tagged under custom on OneSixthFigures Ktah0210

I painted the cranium a flesh color just in case something shows through and began to apply the hair in the usual manner, in tiers starting from the back of the head relatively low. I picked Morezmore's "Brown Sugar" hair, because it seemed like a close match. And it does look almost the same as the painted hair in hand (though not in the photo).

Topics tagged under custom on OneSixthFigures Ktah0310

After removing loose strands, a gentle wash, and a bit of a haircut, I snapped a few photos while the hair was drying.

Topics tagged under custom on OneSixthFigures Ktah0410

I think it looks pretty good, but I didn't feel like futzing with it to give it a more ample appearance. Besides, it had to fit in the helmet. (Yes, this particular neck is a tad too long, but my neck box is packed away at the moment.)

Topics tagged under custom on OneSixthFigures Ktah0510

And fit in the helmet it does, although it is a tight fit and results in helmet hair (of sorts). Which makes the hair appear ample again (but perhaps a bit too much).

Topics tagged under custom on OneSixthFigures Ktah0610

Overall, I think I've improved the realism, appearance, and articulation.

What do you think?

#custom #kitbash #asmus #king #theoden #lordoftherings #lotr #fantasy #male #film
Search in: GENERAL TALK  Topic: Converting Bernard Hill Asmus King Theoden Head  Replies: 11  Views: 1441
Having converted a Jason Momoa Aquaman head (HERE) and an Arnold Schwarzenegger Conan head (HERE), it seemed like a natural choice to do the same to the new Bucky Barnes head sculpt by HT. The face is excellent but the hair, while very impressively sculpted, is just soft molded plastic. I object to this on principle anyway, so here we go again. For more details on the process, please consult the other threads linked above.

More photos in Post 6 below

The original head:
Topics tagged under custom on OneSixthFigures Htbuck10

I gently pried off the two-part hair sculpt and perched it on his shoulders for this photo:
Topics tagged under custom on OneSixthFigures Htbuck11

You don't need a very ample scalp if you are going to give your head sculpt an ample hair, but I decided I should fill-in the various indents with Kneadatite Blue and Yellow. I painted it very lightly with a flesh color (not even trying to match the face, since it wouldn't be visible), then began to glue on the hair in rows, starting with a line parallel to the bottom of the head sculpt at the back.
Topics tagged under custom on OneSixthFigures Htbuck12

No matter how disheveled, I left the hair in place for a while, giving the glue a chance to cure.
Topics tagged under custom on OneSixthFigures Htbuck13

Then I gently removed any loose strands, rinsed the hair with water, and gave him a haircut.
Topics tagged under custom on OneSixthFigures Htbuck14

Finally, to make the hair less puffy, I applied a solution of water and shampoo+conditioner. I may have overdone it, giving him a more compact, wet hair look, but I will worry about styling it later (or not -- I wasn't completely crazy about the original/movie look of the hair).
Topics tagged under custom on OneSixthFigures Htbuck15

Hope this is helpful or informative. What do you think?

More photos in post 6 below

#custom #kitbash #modification #bucky #barnes #wintersoldier #hottoys #ht #infinitywar #marvel #film #fiction #male #superhero #head #headsculpt #hair
Search in: GENERAL TALK  Topic: Converting Sebastian Stan HT Bucky Barnes Head (updated)  Replies: 39  Views: 4316
Here we go again.

There was something a little off with the recent Conan head that was designed to go with Kaustic Plastik's Masterclass Warrior set (reviewed HERE). Apart from some possibly questionable choices in the paint, the most obvious problem was the sculpted hair. While it was decently (not super finely) sculpted, it looked like molded plastic (which is admittedly what it was). Mr Toys had just released their own Conan set (reviewed HERE) which, while largely based on earlier work by Kaustic Plastik, broke new ground by offering us a Conan with "real" hair. Between this and my earlier attempts to create an Arnold Schwarzenegger-as-Conan head sculpt (using one of the Hot Toys Terminator heads), and my recent modification to the Hot Toys Jason Momoa Aquaman head sculpt (replacing the sculpted hair with "real" hair -- see HERE), the next step was obvious. But this was going to be a slightly more ambitious project, because it involved not only removing the plastic hair and replacing it with "real" hair, but also filling in and repainting likely or potentially visible grooves in the head sculpt, detaching, modifying, and repainting the headgear (so it would be both screen accurate and removable, not to mention so that I could put in the hair properly), and also partly modifying, repainting, and remounting the necklace ornaments on a more sensible string that would allow the necklace to hang about right.

This time I took more photos to illustrate more of the steps, in case someone finds this helpful for modifying this or a different sculpt.

Just in case I did something horribly wrong, I managed to get myself an extra Kaustic Plastik Conan head (1). As I had noticed before, the hair was made of soft plastic, and divided into sections (two side locks and a larger back piece, separated by the headband from the crown of the head hairpiece, which last was actually part of the head sculpt), just like Hot Toys' Aquaman head. So, I heated up the head sculpt a little with a hair dryer (not much was actually needed), and gently pried off the large hair piece covering the back of the head (2).

Topics tagged under custom on OneSixthFigures Asc0110

Then I proceeded to dislodge the headband, which was (if I recall) divided at the back of the head on one end of the sculpted strings holding the two parts together. I heated and gently pried off the headband from the head, into which it was ensconced by virtue of several sections fitting into indented grooves that were parts of the head sculpt (3a-5). One of them was right in the middle of the forehead (4-5).

Topics tagged under custom on OneSixthFigures Asc0210

With the headband off, I gently pried off and removed the two side locks of hair (4-5).

Topics tagged under custom on OneSixthFigures Asc0310

With the headband and all detachable hairpieces removed, it was necessary to remove almost all of the molded hair that was an integral part of the head sculpt at the crown of the head (4a-4d). I left in place a little hair over the forehead, since that can be a challenging transition between sculpted face and "real" hair.

Topics tagged under custom on OneSixthFigures Asc0410

After a failed experiment with Vallejo acrylic putty, I filled the visible grooves in the forehead and temples with Kneadatite Blue/Yellow Epoxy Putty (the kind that comes in a tape and you mash and knead it together into a malleable green substance for sculpting and filling -- a skill I learned from members of OneSixthFigures) (5). It was my first experience with this material, but I think it worked reasonably well. Someone with greater skill and patience, would have done more in the way of sculpting bone and flesh structure and gotten the filling to sit completely flush and seamless (with filing down). Since this was going to be obscured most of the time by the headband (for the classic look), I didn't worry about it too much, though I wanted it to look ok even when exposed. Once the Kneadatite had cured overnight, I painted it with Vallejo Acrylics, trying to get as close as possible to the head's skin tone (which is perhaps not ideal itself, but I didn't want to repaint the whole thing -- which might actually have been the way to do it); I also took the opportunity to fix the hairline and darken the eyebrows. As far as painting the head, that was it (6).

Topics tagged under custom on OneSixthFigures Asc0510

Then came my "favorite" part (I'm being sarcastic), the application of the hair. I picked a warmish milk chocolate brown, because that is pretty close to Arnold's appearance on the screen during the film. Using as a basic guide the technique outlined by Morezmore (HERE), but also taking some shortcuts and utilizing superglue, I basically went in rings around the back and sides of the head, starting with a level above the edge of the head sculpt's neck and making my way upwards (7-9b).

Topics tagged under custom on OneSixthFigures Asc0610

Having gently removed as many loose strands of hair as I could, I gently rinsed it with water, gathered it backwards, and let it dry (10a-10c).

Topics tagged under custom on OneSixthFigures Asc0710

After this I cut the hair to approximate Conan's appearance in Conan the Destroyer (since that is where we see the matching outfit and accessories) -- I didn't cut as short as I should, just in case I made a mistake -- and filled up any visible "holes" (there were surprisingly few) with either more hair or acrylic marker (11). Then it was time to add the headband and the necklace and complete the modification (12).

I had shaved down the inside of the headband (especially the parts that were designed to protrude so that they could fit into the grooves in the head sculpt) to make it thinner, so that it would fit more easily around the modified head; I glued it shut at the back, and when the glue had cured, it fit the head like a charm. I had also repainted the pyramidal ornaments on the head band in brass, to match the film appearance. The ornaments on the necklace were all correct (except for the color of the "sun" or "wheel" pendant), but the necklace did not work at all. I had to remove each ornament and glue it onto a thin leather string which could hang a little more naturally (it is also malleable, if needed). I made sure to place the fangs correctly (both for appearance and so that they no longer attempted to bite into the body), and glued their now purely decorative fastenings in place. Similarly, I made sure the pendant sat ("hung") correctly, glued on a couple of pieces of string to match the screen appearance, and repainted it in brass, for the same reason (12).

Topics tagged under custom on OneSixthFigures Asc0810

Here are a couple of comparisons: with the unaltered KP head and necklace, and...

Topics tagged under custom on OneSixthFigures Asc0910

with the Mr Toys head (the necklace for that set has the wrong pendant).

Topics tagged under custom on OneSixthFigures Asc1010

I don't know if I would call it perfect, but I'm pretty happy with the way it turned out. There are some additional things that can be done, for example a shampoo+conditioner treatment to create more waviness in the hair. For this shot I put the modified head, headband, and necklace on the rest of the KP set, but that would require some additional minor modifications to be completely movie accurate. I suppose it is a work in progress.

Topics tagged under custom on OneSixthFigures Asc1110

What do you think?

#custom #kitbash #modification #arnoldschwarzenegger #conan #barbarian #destroyer #film #fiction #fantasy #kausticplastik #kp #head #headsculpt #hair #male #tbleague #phicen #body
Search in: GENERAL TALK  Topic: Converting Arnold Schwarzenegger KP Conan Head  Replies: 23  Views: 3779
Hey Friends,
someone had this HS ? Or pictures of it next to other 1:6 figures ?. I really need new Heads for my projects, but to spend much money that for and at last they are not in the scale i need is bad. I need big heads, not small ones. The Question is, will this one be a big one ?

#head #headsculpt #wonderwoman #custom #kitbash
Search in: GENERAL TALK  Topic: Hot Toys Wonder Woman training armor headsculpt  Replies: 20  Views: 1656

Converting Jason Momoa HT Aquaman Head - Sun Jul 28, 2019 1:17 pm

Like so many of us, I wasn't completely satisfied with Hot Toys' Aquaman head sculpt in terms of both likeness and molded hair sculpt (which is very nice in and of itself, but hair this long should not be sculpted for various reasons). So I decided to modify it with a re-hairing and partial repaint. Here is a little summary of the progression of the project.

Although Hot Toys made the questionable decision to go with sculpted hair, it tried to improve its appearance by installing it in layers, which helps customization by easing removal and allowing for a more or less complete fully-realized head beneath. I began by carefully tugging on the soft plastic hair of the original head sculpt (1). In this instance it is composed of four different pieces glued to the head proper and to each other. Luckily, they weren't glued very strongly, and with just a little bit of persistence and repetition, I was able to begin pulling off the largest, enveloping exterior hair piece (2).

Topics tagged under custom on OneSixthFigures Jma0110

This left the pieces hanging over the sides and back of the neck (3a-3b). They were removed the same way.

Topics tagged under custom on OneSixthFigures Jma0210

Removing the pieces hanging over the side (4) and the back leave us with a bald head (except for a bit of the hairline over the forehead, which I decided to keep) which features some useful goorves carved into it (5a-5b). The reason these are useful is that without them you would end up with an even fuller, puffier hair after you glue it onto the head, and they help diminish this problem a little bit.

Topics tagged under custom on OneSixthFigures Jma0310

Next I used three different colors of hair to glue onto the bald head in tiers -- starting with a line just above the neckline running around the back of the head and moving upwards. When this step was completed, the look was a dramatic mess (6). After the glue had cured, I weeded off loose strands and rinsed the hair to make it fall a little more naturally, and painted some highlights and color variations (to match the hair) onto the molded beard, mustache, and forelock, as well as over those parts of the hair where the glue was visible; I also tried to lighten some of the painted stubble on the head (where the mustache and beard part going upwards along the jawline) to increase the likeness to Jason Momoa (7).

Topics tagged under custom on OneSixthFigures Jma0410

Finally, I cut down the hair to the correct length (with locks reaching as far down as about the armpit) and treated it with a mixture of water and shampoo+conditioner that I did not rinse off, to give it a more natural fit (8a-8b). And with that my modifications are complete.

Topics tagged under custom on OneSixthFigures Jma0510

Here are three views of the resulting appearance.

Topics tagged under custom on OneSixthFigures Jma0610

And here are some more close-up ones.

Topics tagged under custom on OneSixthFigures Jma0710

Here is a comparison between the HT set (Aquaman from Justice League) and the same with the modified head. I should point out that I was modifying the head on principle, not specifically for this figure set or look. I am also aware that the screen look has much more emphatically bleached locks towards the lower reaches of the hair, but I wanted a slightly more organic and subdued look.

Topics tagged under custom on OneSixthFigures Jma0810

I think it turned out ok, and I hope you liked it or found it interesting. What do you think?

#jasonmomoa #hottoys #aquaman #custom #kitbash #mod #hair #head #headsculpt #superhero #scifi #fiction #film #movie #actor #male
Search in: GENERAL TALK  Topic: Converting Jason Momoa HT Aquaman Head  Replies: 47  Views: 6531
Part I
For Part II (updated and modified figure), please see Post 18 below.
For Part III ("New Friends"), please see Post 28 below.

I'm very late to the sandtrooper party. For one thing, I prefer my stormtroopers clean and ship shape for the parade ground (who was it that said wars just mess up armies?). For another, I've always had a suspicion that sandtroopers were a combination of accident and post-fact rationalization: they were the first stormtroopers used and filmed for Star Wars (Episode IV/A New Hope), and the minor differences in their armor (not just equipment) may have been the result of changing design rather than pre-thought-out purpose (to wit, spacetroopers in the same film don't differ from regular troopers except when it comes to their equipment to breathe in space).

It didn't help that Marmit, Medicom, and Sideshow messed up the helmet in different ways (Marmit and Sideshow got the facial proportions wrong, Medicom used a regular stormtrooper's helmet of the hero variety). And all this was (mostly) before I was collecting high-end sixth-scale figures anyway. When Hot Toys released their sandtrooper, I was very tempted (apart from the most convincing weathering, they had finally gotten the helmet pretty much right -- improving on their standard ANH stormtrooper design which had perpetuated the same error as Marmit and Sideshow). But I was put off by their choice to depict what was definitely a costuming error, the upward arched brow band of one sandtrooper ("these are not the droids we are looking for"). Since then, I have come across photos of the various sandtroopers in all their glory, and have also come to realize that at least the finished HT product's helmet looked acceptable for my delicate sensibilities after all. Of course, by then these collectibles, which had been pricey (for their time) to begin with, were becoming rarer and grossly overpriced. So I kept putting it off or talking myself out of it.

But one by one I picked up pieces from broken down sets (still eschewing the HT helmet until it was too late) until I was gradually able to put together a makeshift complete sandtrooper with the purchase of the last few rare and overpriced pieces. You can see it below, both by itself and also compared with the Rogue One version of essentially the same thing (though less elaborately equipped), the "heavily weathered Jeddha Patrol."  My ANH sandtrooper kitbash/custom consists mostly of different parts from Hot Toys (sandtrooper lower body armor, stormtrooper long blaster rifle, Jeddha patrol upper body armor and helmet) and Marmit (undersuit, pouches, pauldron); I did some custom fitting, greeblies, and repainting.

Topics tagged under custom on OneSixthFigures Swcsnd10

Topics tagged under custom on OneSixthFigures Swcsnd11

Topics tagged under custom on OneSixthFigures Swcsnd12

Topics tagged under custom on OneSixthFigures Swcsnd13

Topics tagged under custom on OneSixthFigures Swcsnd14

Topics tagged under custom on OneSixthFigures Swcsnd15

Hope you liked it.

For Part II (updated and modified figure), please see Post 18 below.
For Part III ("New Friends"), please see Post 28 below.

#starwars #anewhope #sandtrooper #stormtrooper #rogueone #jeddha #patrol #custom #kitbash
OSK exclusive:

https://onesixthkit.com/index.php?route=product/product&product_id=1885

As title it's made with metal. Please handle it with care, especially when you put it on head sculpt, don't scratch your head!

**This is brown lens version only limited to 100 units**

Topics tagged under custom on OneSixthFigures Img_3712
Topics tagged under custom on OneSixthFigures Img_3710
Topics tagged under custom on OneSixthFigures Img_3711
Topics tagged under custom on OneSixthFigures Img_3713
Topics tagged under custom on OneSixthFigures Img_3714

#newproduct #Custom #OSK #sunglasses #metal #accessory
Part I: A New Superhero Revealed? Leaked memo from IAFOOSHA.
Fort Part II see post 47 below.

Stryker started it. Blackpool encouraged it. This is dedicated to them. Smile I can resist the potential for things that strike me as silly/funny only so much. It was actually a surprisingly difficult custom, and then there was research and too many potential things to recreate. Photo heavy, but I kept the images light.

NSFW (?) This contains somewhat adult humor so it may or may not fit your definition of "not safe for work"; there is certainly nothing truly explicit and the intent is humor, but you've been cautioned. For other disclaimers, please see at end.

SUPERHERO FIRE-MAN

Topics tagged under custom on OneSixthFigures Fmc0110

Topics tagged under custom on OneSixthFigures Fmc0210

Topics tagged under custom on OneSixthFigures Fmc0310

Topics tagged under custom on OneSixthFigures Fmc0410

Topics tagged under custom on OneSixthFigures Fmc0510

Topics tagged under custom on OneSixthFigures Fmc0610

Topics tagged under custom on OneSixthFigures Fmc0710

Topics tagged under custom on OneSixthFigures Fmc0810

Topics tagged under custom on OneSixthFigures Fmc0910

Topics tagged under custom on OneSixthFigures Fmc1010

Topics tagged under custom on OneSixthFigures Fmc1110

Topics tagged under custom on OneSixthFigures Fmc1210

Topics tagged under custom on OneSixthFigures Fmc1310

Topics tagged under custom on OneSixthFigures Fmc1410

Topics tagged under custom on OneSixthFigures Fmc1510

Topics tagged under custom on OneSixthFigures Fmc1610

Topics tagged under custom on OneSixthFigures Fmc1711

Topics tagged under custom on OneSixthFigures Fmc1810

Topics tagged under custom on OneSixthFigures Fmc1910

Topics tagged under custom on OneSixthFigures Fmc2010

Topics tagged under custom on OneSixthFigures Fmc2110

Topics tagged under custom on OneSixthFigures Fmc2210

Topics tagged under custom on OneSixthFigures Fmc2310

Topics tagged under custom on OneSixthFigures Fmc2410

Topics tagged under custom on OneSixthFigures Fmc2510

Topics tagged under custom on OneSixthFigures Fmc2610

Topics tagged under custom on OneSixthFigures Fmc2710

Topics tagged under custom on OneSixthFigures Fmc2810

Topics tagged under custom on OneSixthFigures Fmc2910

Topics tagged under custom on OneSixthFigures Fmc3010

Topics tagged under custom on OneSixthFigures Fmc3110

Topics tagged under custom on OneSixthFigures Fmc3210

Topics tagged under custom on OneSixthFigures Fmc3310

Topics tagged under custom on OneSixthFigures Fmc3410

Topics tagged under custom on OneSixthFigures Fmc3510

Topics tagged under custom on OneSixthFigures Fmc3610

Hope you found it at least moderately amusing -- I realize that different things resonate with different people and there are plenty of different angles to things and issues, some of them serious, some not.
Any favorite book covers so far? Just don't expect me to write the books...

#superhero #fiction #humor #humour #parody #dating #romance #firefighter #fireman #modern #comedy #vampire #roman #hero #fire #explosion #erotica #books #covers #tbleague #phicen #m34 #kitbash #custom

Star Wars Sideshow Dengar weapon upgrade - Sun May 12, 2019 4:09 pm

Sideshow has produced a full pack of Empire Strikes Back bounty hunters, including Dengar. These are all generally excellent figures, but in Dengar's case they overlooked one fairly signature detail when it came to his long blaster rifle. In the film (though not in some of the released pre-production photos), Dengar sported a modified MG 42 with the bipod and buttstock removed. Sideshow's weapon is beautifully sculpted and painted (even if a bit too evenly for my taste), and has the bipod removed; but the buttstock is still there. While I would agree that the weapon looks silly without the buttstock, we are supposed to strive for movie accuracy, are we not?

So instead of modifying the Sideshow piece, I purchased an inexpensive 1/6 MG 42 kit on eBay, put it together without the bipod and buttstock, and finally got around to painting/weathering it. I wanted to give it a used, worn appearance, and to reduce the plastic-looking effect of, well, black plastic. I think it turned out reasonably well, even if the less accurate Sideshow weapon has finer detail.

Topics tagged under custom on OneSixthFigures Dengar10

Topics tagged under custom on OneSixthFigures Dengar11

Topics tagged under custom on OneSixthFigures Dengar12

What do you think?

#starwars #empirestrikesback #esb #dengar #bountyhunter #weapon #mg42 #machinegun #scifi #custom #repaint
Search in: GENERAL TALK  Topic: Star Wars Sideshow Dengar weapon upgrade  Replies: 24  Views: 3643
Here is my custom/kitbash attempt at Aurra Sing, a bounty hunter who had a cameo in The Phantom Menace during the pod-race scene. I wasn't able to do everything I would have liked with her (like the elongated fingers), but I still think she turned out sort of cool. I had originally wanted to use a much skinnier body (The TBLeague S18A - Pale), but all my attempts to white the body were a massive failure. Ended up scavenging a body from one of my two Lady Death figures (I was a bit bummed about that, but it is what it is). The Lady Death body is, as many know, a much bustier and muscular body than is appropriate for this character -- particularly considering that the lovely lady who played the role in the film was a tall, lanky runway model. I used a combination of parts to make this figure, and ended up making several. I had originally purchased a blank, bald female head sculpt off eBay to use for the head, but honestly, it just didn't seem right for this character. Aurra has a rather elongated skull, and I just couldn't make it look right -- even after adding modeling clay to her noggin. (I might revisit that at some point). I ended up sticking with the Hasbro head sculpt, even though the head sculpt is slightly more grey than the body used, I think it actually works fairly well. Ultimately, this figure is going in my Jabba the Hutt display.

Anyway...

Parts breakdown:

Head - Hasbro Aurra Sing (had to modify it to get it to fit on the TBLeague)
Body - Lady Death Version 1
Vest - Hasbro Aurra Sing
Hands - Lady Death Version 2
Laser Pistols - Hasbro Aurra Sing (not removable at this point thanks to the restraining straps on the holsters)
Rifle - modified Luke Skywalker Episode IV (Hot Toys)
rifle scope -- HT Last Jedi Luke Skywalker "lightning rod"
rifle scope mount -- piece of the Hasbro Aurra Sing rifle
rifle sling -- Hasbro Aurra Sing rifle sling
holsters and belts -- custom made using ultra-thin, double layered Kangaroo skin
Boots - brown "Black Widow" knock-offs from eBay
Orange body Suit -- modified from a full body suit. Big shout out to Blackpool for helping me acquire this. Went a little crazy with the scissors trying to cut off the sleeves, and caught a bit around the torso -- I call it "battle damage"
Belt pouches on the rifle sling and on the belts -- HT Deadpool 2 belt pouches
Lightsaber -- I honestly can't remember who's it's supposed to be, but it is an HT item gotten off eBay.
wrist wraps and bicep wrap -- cut from the Hasbro Aurra Sing bodysuit

As always, comments and criticism welcome.

Topics tagged under custom on OneSixthFigures _dsc3125
Topics tagged under custom on OneSixthFigures _dsc3126
Topics tagged under custom on OneSixthFigures _dsc3127
Topics tagged under custom on OneSixthFigures _dsc3128
Topics tagged under custom on OneSixthFigures _dsc3129
Topics tagged under custom on OneSixthFigures _dsc3130
Topics tagged under custom on OneSixthFigures _dsc3131
Topics tagged under custom on OneSixthFigures _dsc3132

#Custom #Kitbash #AurraSing #StarWars #EpisodeI #female #alien #bountyhunter
Search in: GENERAL TALK  Topic: Custom/Kitbash: Aurra Sing - Star Wars Bounty Hunter (Episode I)  Replies: 38  Views: 2657

Early Imperial Roman Infantry Kitbash - Thu Mar 28, 2019 2:21 pm

The newly released Roman military figures from Kaustic Plastik and Haoyu Toys (all of which I intend to review) inspired and made possible a little kitbash attempting to recreate some of the most typical appearance of the early imperial legionary and auxiliary infantry -- about the time of Claudius I (41-54).

The most obvious differences in the look of these early imperial forces from the "classic" look of late-1st-/early 2nd-century Roman troops are: the use of simpler bronze or bronze-colored helmets; the use of chain mail for both legionaries and auxiliaries; the absence of long (braccae) or knee-length (feminalia) pants; rectangular shield (scutum) with curved side edges for legionaries and oval shield for auxiliaries. Obviously, there was plenty of variation (for example, as to which side to place the sword and the dagger, tunic color and shield devices); moreover, this is still a work in progress, and I am planning some upgrades and changes (e.g., repainting the auxiliary shield with a different decoration).

Most of the pieces were from the new KP sets, with some others from Ignite and other sources. I used KP bodies because you could easily remove and replace the upper arms, something very useful when dealing with these tight rubber chain mail tunics, but these KP bodies have some weak joints and stiff hands, and this was a pain to pose and photograph. I hope it is still presentable.

Topics tagged under custom on OneSixthFigures Kpr0110

Topics tagged under custom on OneSixthFigures Kpr0210

Topics tagged under custom on OneSixthFigures Kpr0310

Topics tagged under custom on OneSixthFigures Kpr0410

Topics tagged under custom on OneSixthFigures Kpr0510

This last photo (below) shows a couple of Roman infantrymen about to attend to camp tasks, having taken off their armor. The pants indicate they belong in a slightly later period.

Topics tagged under custom on OneSixthFigures Kpr0610

Hope you liked them.

#roman #kitbash #custom #kp #kausticplasik #ignite #romanempire #legionary #auxilia #ancient #historical #military #infantry
Search in: GENERAL TALK  Topic: Early Imperial Roman Infantry Kitbash  Replies: 25  Views: 2638

Search found 115 matches for custom

Go to page : 1, 2, 3, 4, 5  Next

Back to top